
Explore - Transactions and workbook agent
Use the Transactions Explore to build custom reports on gateway activity, payment failures, fraud signals, and geographic trends — with an AI-powered Workbook Agent for plain-language querying.
Definition
Key benefits
Key details
The Transactions Explore includes all transactions processed through a gateway, along with corresponding invoices and line items. It does not include all invoices or charge items. Multiple transactions may be associated with a single invoice, and multiple lines may be included for a given transaction when multiple fraud line items are returned from a Kount fraud integration.
Explore interface
The Explore is divided into three panels:
| Panel | Description |
| Left panel — Workbook Agent | Ask natural-language questions about your transaction data. The agent suggests fields and runs queries on your behalf. |
| Center panel — Field picker | Browse and search the full field catalog. Fields are grouped by topic. Click any field to add it to your active query. Use the In-use filter to see only selected fields. |
| Right panel — Results area | Toggle between Results (table view), Chart (visualization), or Both. Use the Options tab to configure axes, grouping, and chart type. Click Preview to run a sample query and verify your field selection before committing. |
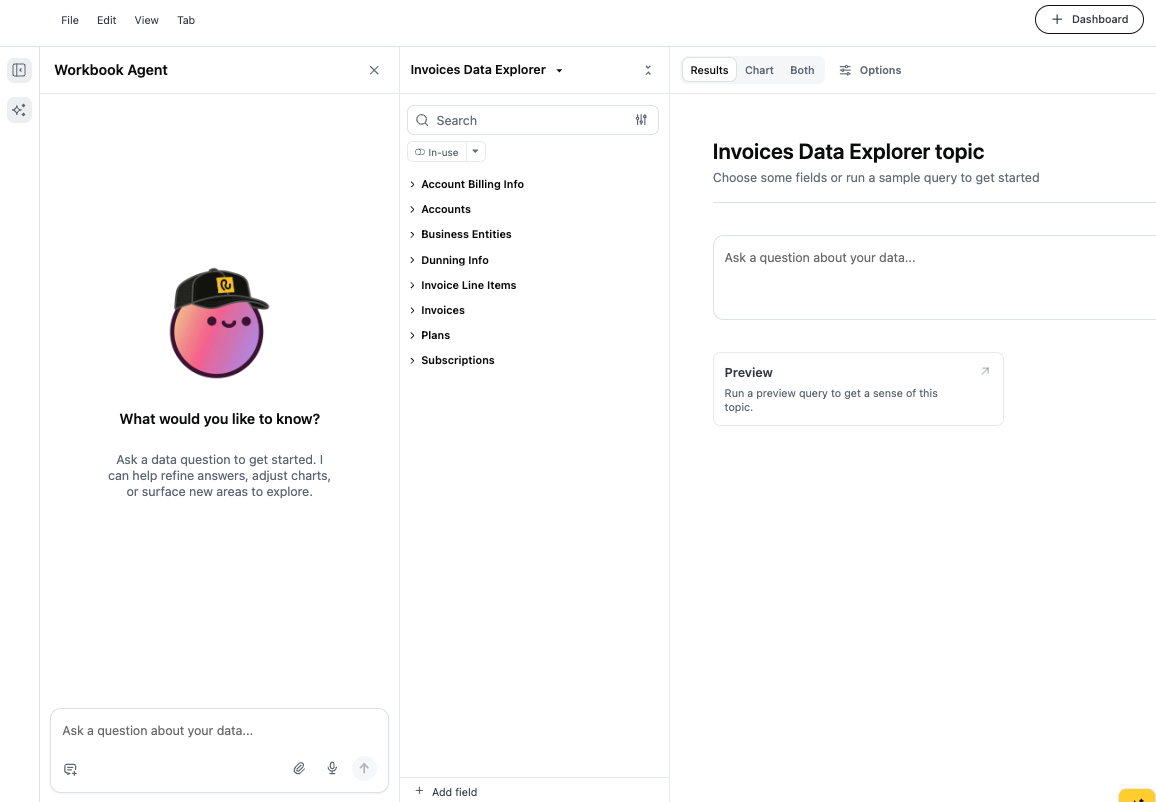
Using the Workbook Agent
The Workbook Agent is the fastest way to start an analysis. Type a question in the text box at the bottom of the left panel and press Enter (or click the send icon).

Example prompts:
- "Show me all failed transactions in the last 7 days grouped by failure reason"
- "What is the total transaction volume by country this month?"
- "Which credit card types have the highest decline rates?"
- "List transactions flagged for fraud in the past 30 days"
- "Break down successful transactions by plan and subscription state"
You can use the Agent and the field picker together. After the agent populates a query, you can add or remove fields manually using the center panel — changes are reflected immediately in the results view.
Opening an existing report

Running or refreshing a report
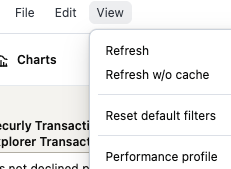
Creating a new report
Saving a new report
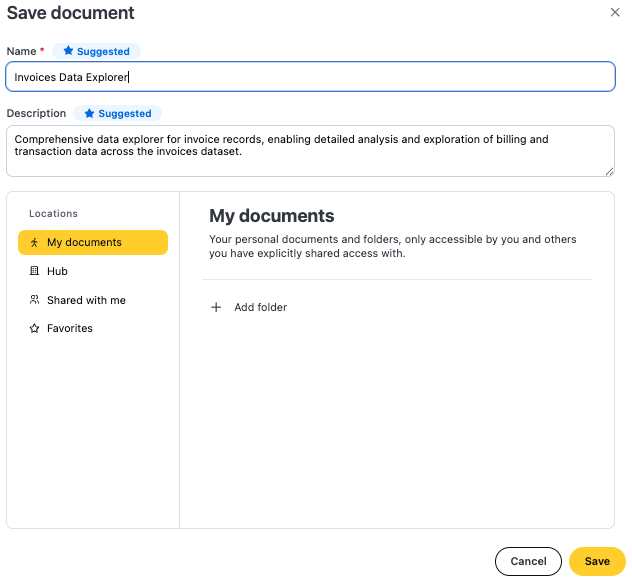
Available data
The field picker organizes all available dimensions and metrics by topic. Each topic maps to a set of underlying data entities:
| Data topic | Description |
| Billing info | Payment method details, billing address, and card metadata associated with accounts. |
| Accounts | Account-level attributes including account code, email, address, and name. |
| Business entities | Legal entity data for multi-entity merchants, including entity name and tax region. |
| Country | Country-level geographic dimensions for filtering and grouping transaction data by region. |
| Credit card | Card brand, card type (debit/credit), issuing bank, last four digits, and expiration data. |
| Dunning info | Retry attempts, dunning state, and communication timing for failed payment recovery. |
| Fraud infos | Fraud risk scores, decision outcomes, and signals returned by Recurly's fraud detection layer. |
| Invoice line items | Individual charges and credits at the line level, including unit amounts, quantities, and product codes. |
| Invoices | Invoice totals, state (open, collected, failed, voided), currency, and dates. |
| Operations | Internal processing metadata including gateway response codes and operation type. |
| Plans | Plan codes, names, intervals, and pricing tiers. |
| Subscriptions | Subscription state, start/end dates, trial info, and associated plan and add-on metadata. |
| Transaction statuses | Standardized transaction outcome states: success, declined, error, voided, and more. |
| Transaction_Geo (maps) | Geographic coordinates and region data for map-based transaction visualizations. |
| Transactions | Core transaction fields: amount, currency, type (purchase, refund, void), gateway, and timestamp. |
Tips and best practices
- Use Preview before adding many fields to confirm the data shape and avoid slow load times on large result sets.
- The In-use toggle in the field picker narrows the view to your current selection, making it easier to audit what's included before running a query.
- Combine the Transaction statuses topic with Credit card or Country to identify regional or card-type-specific decline patterns.
- Use the Fraud infos topic alongside Transactions to correlate fraud signals with transaction outcomes — useful for investigating dispute spikes.
- For high-volume date ranges, start with aggregated metrics (totals, counts, rates) before drilling into row-level detail to keep performance fast.
- Save frequently used queries as a dashboard using the + Dashboard button in the top-right corner so teammates can access them without rebuilding.
- The Workbook Agent works best with scoped, specific questions. Include a timeframe, a transaction outcome (e.g., failed, declined), and at least one grouping dimension for the most precise results.
Updated 3 months ago