Checkout.com
Configure Checkout.com as a payment gateway in Recurly to accept credit cards, Apple Pay, and Google Pay across global markets.
Definition
Checkout.com is a global payment gateway that integrates with Recurly to manage financial transactions for recurring subscriptions and one-time payments. It supports a wide range of card brands, payment methods, and currencies worldwide, and includes built-in fraud detection that works together with Recurly.js to capture device and browser signals at the time of payment.
- Checkout.com's fraud detection requires Recurly.js to collect browser and device data. If you're using 3D Secure (3DS) Recurly.js is also required. Passing raw card numbers directly via the API is not supported. See Recurly.js with stored billing information for guidance on tokenizing stored cards.
- Ensure your Business Entity's Merchant Category Code (MCC) is filled in correctly before enabling 3DS.
- The CVV is required for all CIT card payments, including MOTO. Ensure you are capturing the CVV for return customer transactions including signups, and one-time transactions. Recurly will never store the CVV code on your behalf.
Key details
| Feature | Details |
| Services that work with Recurly | Recurring subscriptions, payments (ecommerce and MOTO), 3D Secure |
| Supported operations | Authorize and Capture, Purchase, Refund, Verify, Void, Recurring, Unscheduled MIT |
| Supported payment types | Credit card, Apple Pay, Google Pay |
| Supported card brands | Visa, Mastercard, Amex, Discover, JCB, Diners Club, Union Pay |
| Unified 3DS2 supported | Yes |
| Card on file supported | Yes |
| Regions | Worldwide |
| Currencies | All supported currencies |
| Additional feature support | Billing and shipping information, Level 2 data, Dynamic Descriptors, AVS/CVV checks, and line item passthrough |
Set up Checkout.com with Recurly
Step 1 — Obtain your Checkout.com credentials
For additional guidance, see Checkout.com's documentation: Access and/or create API credentials and the Dashboard documentation.
If you plan to enable 3DS, you'll also need the following from Checkout.com before proceeding:
- Your Acquirer BIN (6 digits)
- Your Acquirer Merchant ID
- Your Acquirer Country
These are used in Step 4. Gather them now so you have them ready.
Step 2 — Configure webhooks in Checkout.com
Recurly uses webhooks from Checkout.com to receive payment and dispute event notifications. You'll also generate a Signature key here, which you'll enter in Recurly in Step 3.
https://callbacks.recurly.com/checkout/<MERCHANT_SUBDOMAIN>For example, if your Recurly subdomain is mywebsite, enter:
https://callbacks.recurly.com/checkout/mywebsitemywebsite.recurly.com. It's also shown under Configuration → Site Settings.Step 3 — Enter your credentials in Recurly
| Field | Where to find it |
|---|---|
| API Public Key | Checkout.com dashboard → Developers → Keys |
| Channel ID | Checkout.com dashboard → Developers → Keys |
| API Secret Key | Checkout.com dashboard → Developers → Keys |
| Source Verification Key | Generated in Step 2 (Signature key) |
Step 4 — Enable 3D Secure
Skip this step if you're not using 3DS.
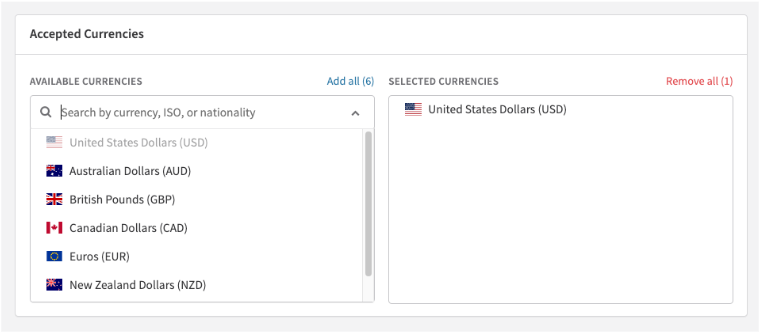
Step 5 — Enable currencies
Select the currencies your Checkout.com gateway should accept. You can add or change currencies at any time — choose only from those you're approved to process.
Step 6 — Save your gateway configuration
Once you've configured everything, select Add Payment Gateway. If you're updating an existing configuration, the button reads Update Payment Gateway instead.
Additional configuration
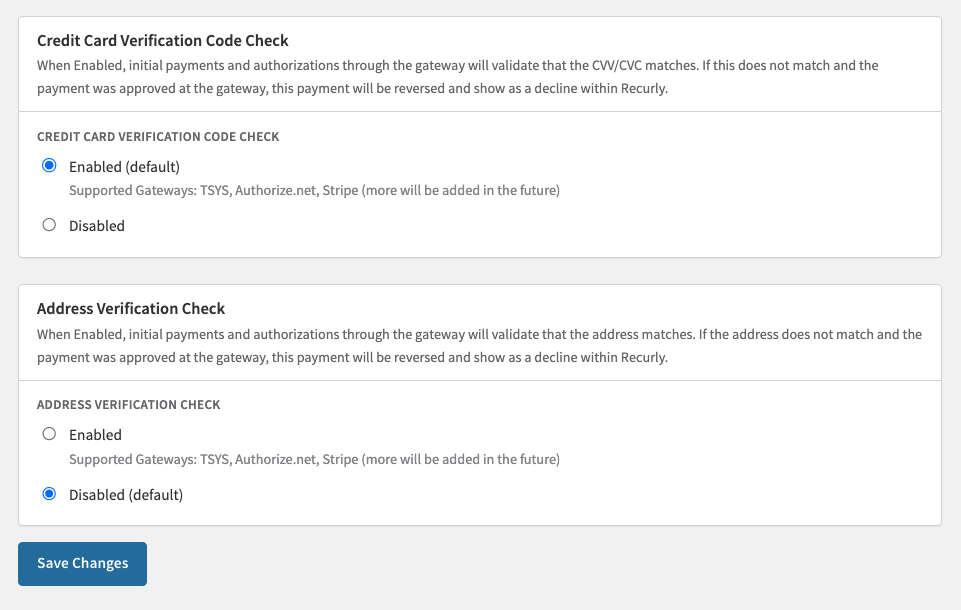
Address and card code verification
You can configure Recurly to automatically reject transactions where the billing address or CVV doesn't match what the card issuer has on file. These settings apply across all gateways — they're not Checkout.com-specific.
Enable Address Verification (AVS)
- Go to Configuration → Payment Settings.
- Scroll to the Address Verification Check section.
- Select your preferred AVS rule.
- Select Save Changes.
Enable Card Code Verification (CVV)
- Go to Configuration → Payment Settings.
- Scroll to the Credit Card Verification Code Check section.
- Set the option to Enabled. When enabled, transactions with an invalid or mismatched CVV are rejected based on issuer feedback.
- Select Save Changes.
Test your integration
- Go to Configuration → Payment Gateways.
- Find your Checkout.com configuration and select Options → Test Configuration.
If your credentials are correct, Recurly will confirm a successful connection.
Go live
Once testing passes, your gateway is ready for real transactions. Monitor activity in both Recurly and your Checkout.com dashboard to confirm everything is processing as expected.
Production and sandbox behavior
Production and sandbox environments in Checkout.com are entirely separate systems with distinct endpoints. Keep the following in mind when managing your environments:
- If you create a Checkout.com gateway configuration while your Recurly site is in either Production or Sandbox mode, you can control which Checkout.com endpoint — production or sandbox — your transactions hit.
- If you ever change your Recurly site's mode (for example, from Sandbox to Production), your existing gateway tiles will stop working. You must create new gateway configurations for the new mode and disable the old ones.
- Best practice: Keep your site in a consistent mode and use a dedicated development site for integration testing. Set that site to Development mode before adding gateway accounts, and keep it there for the duration of your testing.
Updated about 1 month ago