Revenue Recognition Advanced Reports
Recurly Revenue Recognition Advanced reports: Comprehensive insights for informed financial decisions.
Overview
This feature is part of our product, Recurly Revenue Recognition Advanced. [Learn more here].
Prerequisites:
- Familiarity with the organization's revenue recognition standards.
- Understanding of product bundling and data rule configurations.
- Knowledge of the desired attributes for dataset creation.
Limitations:
- Any changes that are made will be applied for future transactions only.
- If changes are made to the revenue data, it can take up to an hour for those changes to be reflected in the reporting.
- Once a dataset is created, it cannot be deleted, only inactivated.
- Data Rules in Recurly Revenue Recognition Advanced cannot be deleted but can be set to an inactive status.
Key benefits
- In-depth analysis: Dive deep into financial data with detailed reports on revenue, costs, variable considerations, and more.
- Customizable views: Configure reports based on specific attributes and save layouts for future use.
- Audit and compliance: Access audit reports to ensure adherence to financial standards and regulations.
- Exception handling: Identify and address exceptions with dedicated reports for SSP and holds.
- Strategic decision making: Leverage comprehensive insights to make informed financial and operational decisions.
Definition
Recurly's reporting module offers a plethora of detailed reports that cater to various financial and contractual needs. From revenue insights to transaction details, these reports provide a comprehensive view of an organization's financial landscape. They are designed to offer insights into revenue recognition, contractual balances, costs, variable considerations, and more. With an intuitive interface, users can configure, save layouts, and generate reports tailored to their specific requirements.
Configuring reports
- Navigate to the Reports section and select the desired report from the available options.
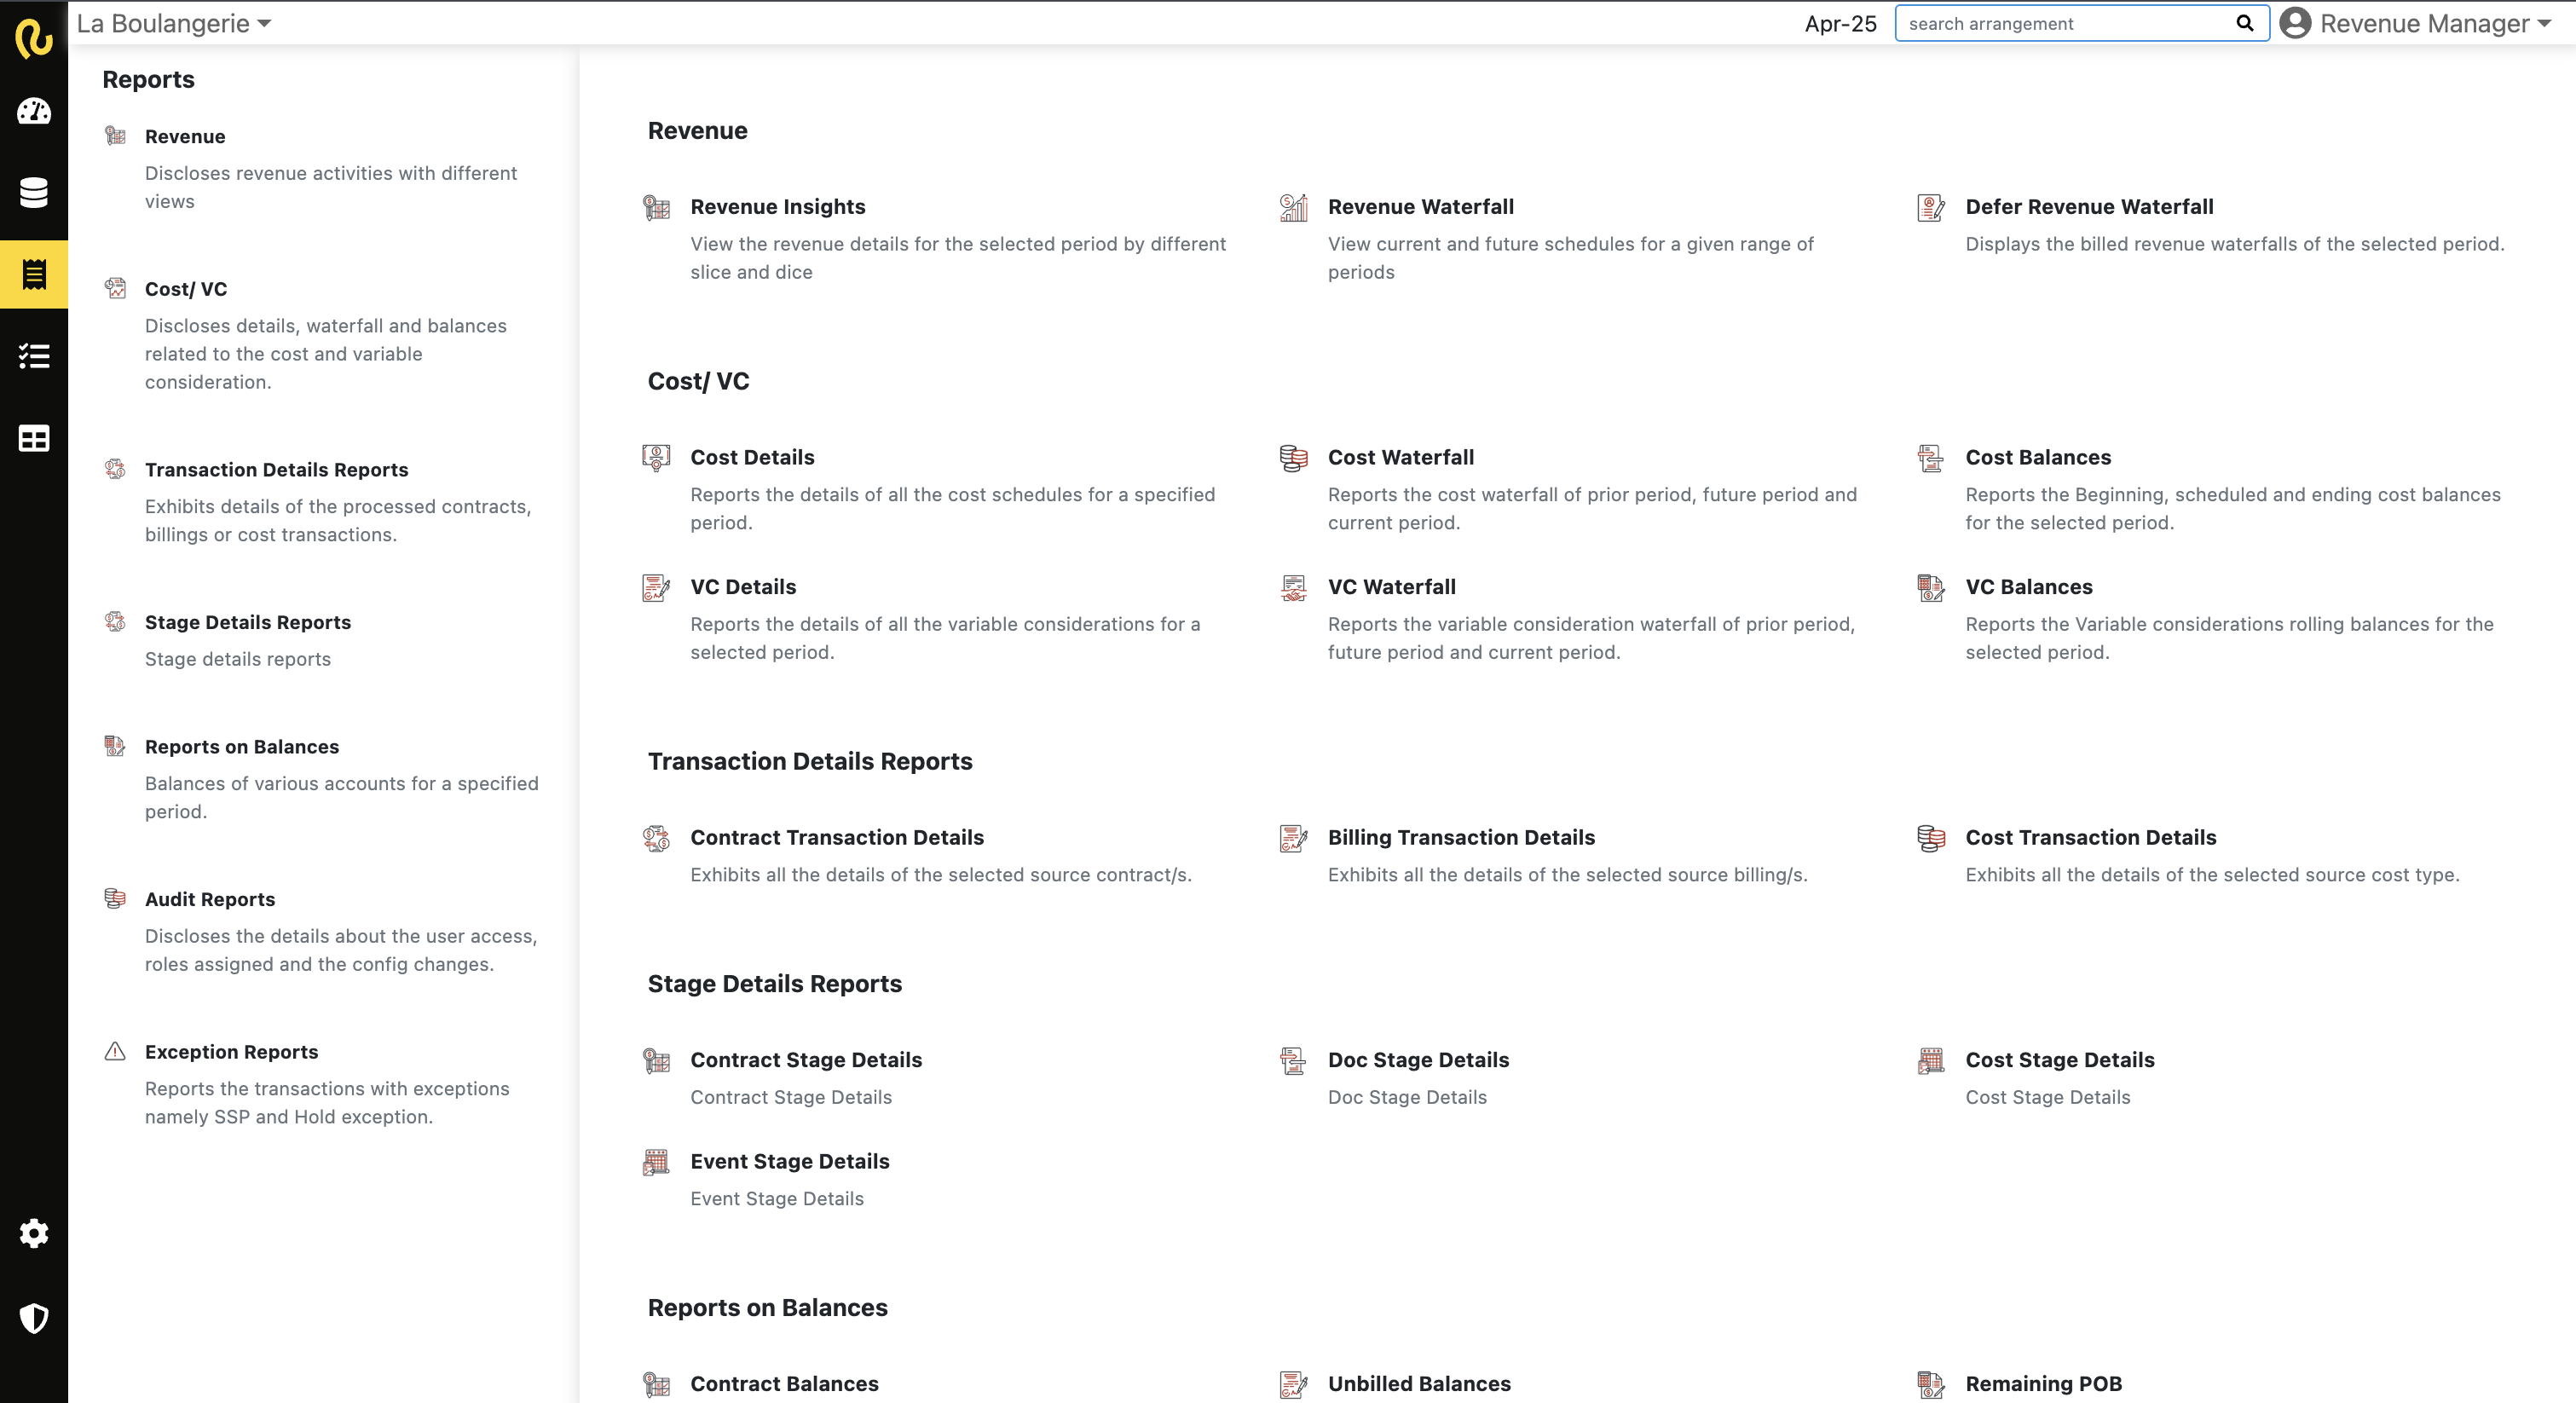
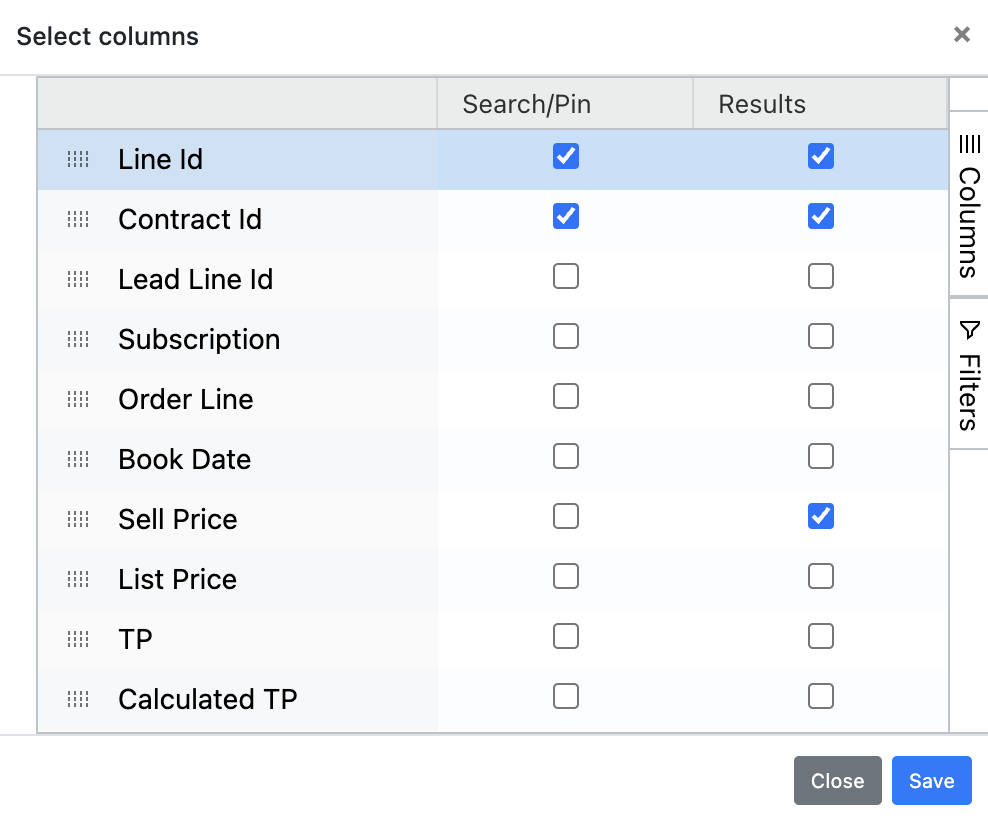
- Click on the Mapper icon, available on the black right column, and a dialogue box will appear displaying the available attributes.

Report view

Mapper icon
- Select the attributes you want to view under the Search/Pin & Results column, and click on Save to save your selections.
- Enter any search criteria you want to apply to the report, or leave it blank for a complete report.
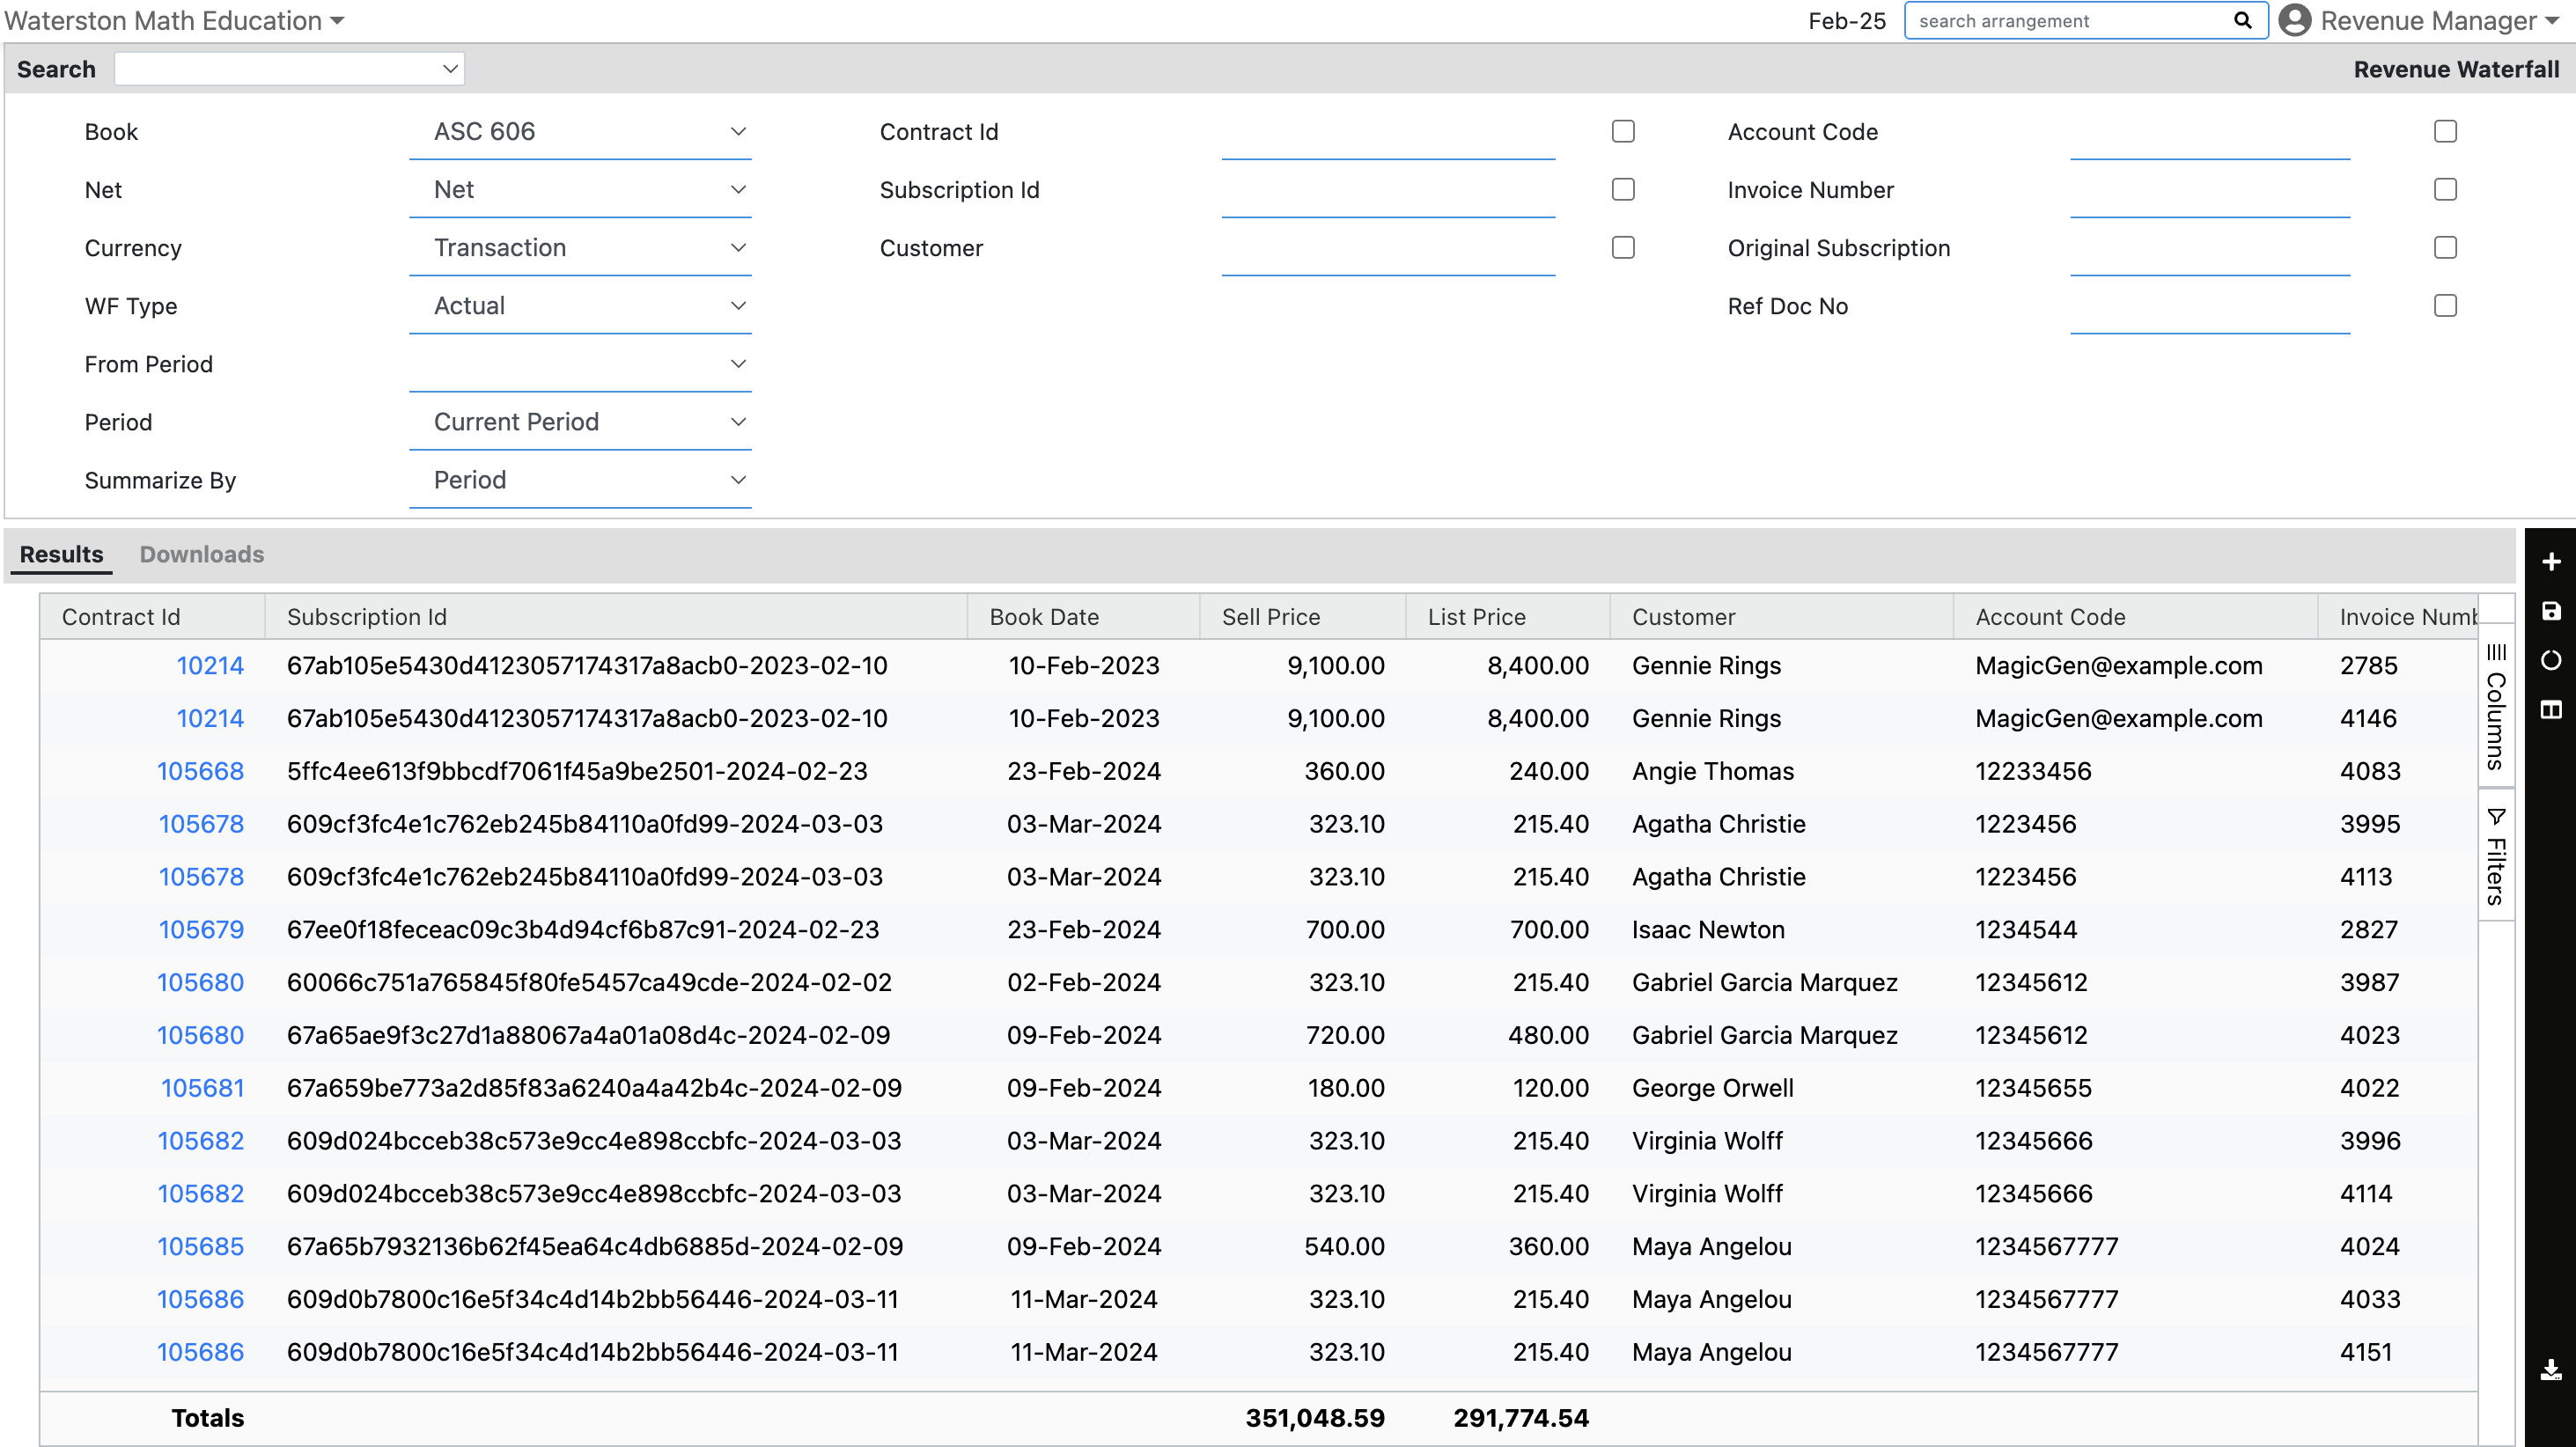
- Once the report is generated, click on the Download Icon to download the report in your preferred format.
How to save layouts in reports
Once you open a report, you can apply filters and adjust columns to create a custom format, referred to as a “Layout,” which can be saved for future use:
-
Set Up Your Report:
- Open the desired report and fill in any search criteria.
-
Customize the Layout:
- Click on the Mapper, check the attributes you wish to display, and drag them into the desired order.
-
Generate the Report:
- Click the Run button to view the customized report.
-
Save the Layout:
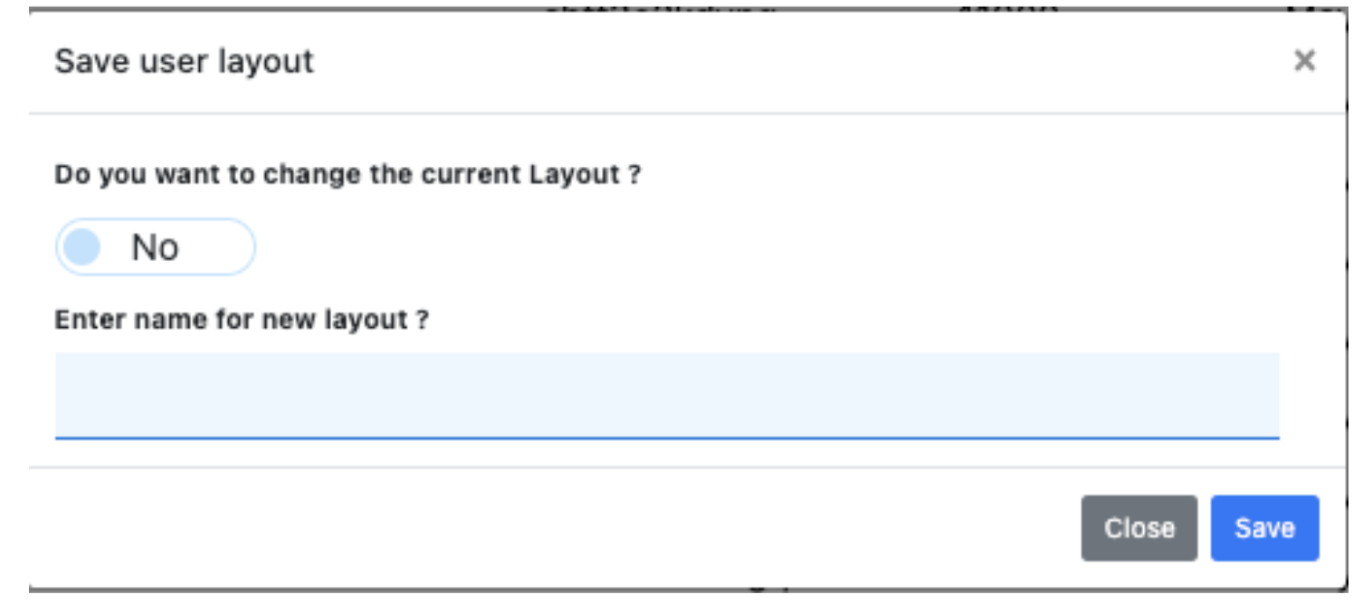
- Click on the Save Layout option on the right-side bar.
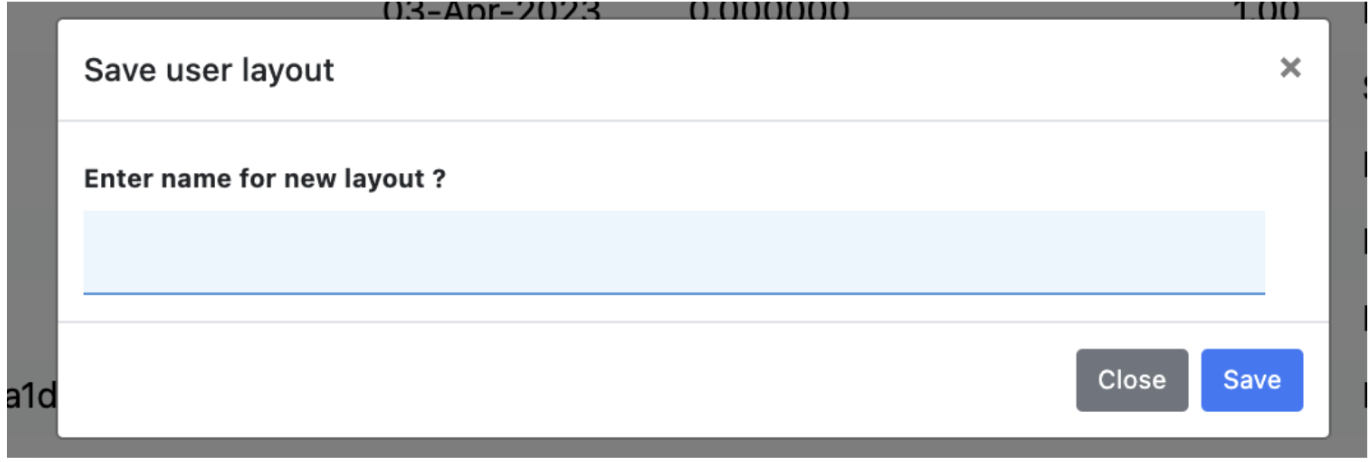
- Enter a unique name for the layout and click Save.
-
Accessing Saved Layouts:
- To view a saved layout, click on the drop-down menu in the upper right corner next to Search; your saved layouts will be listed there.
-
Saving Additional Layouts:
- To create another layout, modify the filters or columns and click Save again. Toggle the save option to "No" when prompted to save it as a new layout.
By following these steps, you can easily access, customize, and manage your Event Stage Report layouts, ensuring the data is presented in the most useful format for your analysis.
Reports list
Find a comprehensive list of reports below, with a detailed guide for each category.
-
Revenue Reports
-
Cost / VC Report
-
Transaction Details Reports
-
Stage Details Reports
- Doc Stage Details
- Contract Stage Details
- Cost Stage Details
- Event Stage Details
-
Balances Reports
-
Audit Reports
-
Exception Reports
Updated 2 months ago