Recurly Revenue Recognition Standard Wizard
An interactive, step-by-step onboarding flow that guides you through configuring and activating Revenue Recognition Standard in Recurly with best-practice defaults and clear explanations at every stage.
Overview
Prerequisites & limitations
- Revenue Recognition Standard must already be enabled for your site.
- You must have the necessary admin permissions to configure settings and accounts.
- After activation, only the Auto Period Close Delay setting remains editable; all other fields are locked.
Definition
The Revenue Recognition Standard Wizard is a self-service onboarding tool inside Recurly that walks merchants through each configuration step—explaining controls, recommending best practices, and validating completion—so you can activate Revenue Recognition in one streamlined flow.
Key benefits
- Guided setup: Step-by-step prompts and contextual guidance remove guesswork from configuring revenue settings.
- Compliance-driven: Built-in best practices ensure your setup aligns with ASC 606 and IFRS 15 standards.
- Rapid launch: Complete every required task in one flow—no back-and-forth—so you go live faster.
Key details
After the Revenue Recognition feature is enabled for your site, you’ll notice several updates to your navigation panel prior to activating the feature.
- A notification will appear, informing you that Revenue Recognition can now be enabled. This link will remain visible until you complete the enablement process.

- A new "Revenue Recognition" section has been added to your main navigation menu. Advanced merchants will have access to advanced console options within this section, while standard merchants will be able to view Revenue Settings and General Ledger Accounts.
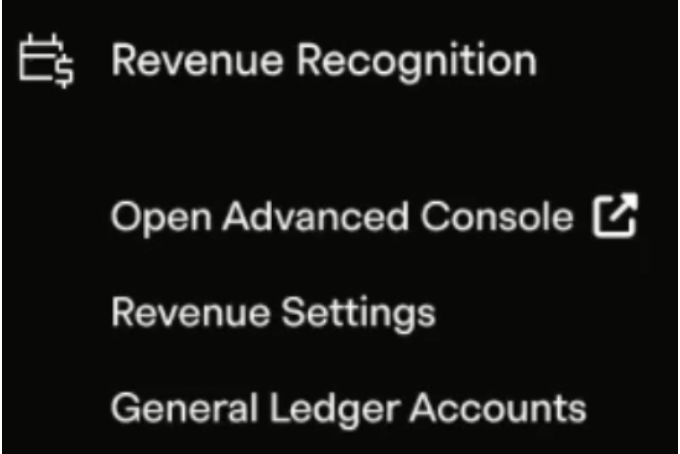
Revenue settings page:
- Navigate to Revenue Recognition→Revenue Settings.
- Adjust the following required settings:
- Auto Period Close Delay: Specifies the number of days the system should wait after the end of a period before automatically closing it for standard merchants. The recommended minimum is 2 days, meaning the system will begin closing the completed period at the end of the second day. Merchants can choose to auto-close the period at any time after 2 days, depending on their business process.
- Default Revenue Recognition Rules: Set default rules for each type of plan, item, add-on, charge, credit, shipping method, and any other variant displayed on the screen for charges created prior to enabling the revenue recognition feature. The default value will be applied only if the system cannot find a rule at the charge line or plan/item level.
- Global Reporting Currency: Select a global currency for reporting purposes. Please note, this is separate from your site's global currency in Recurly. The global currency setup here is only for the purpose of revenue recognition.
- Credit Transaction Handling: For merchants using Advanced Revenue Recognition, you can specify how credit transactions—including Goodwill, On Account, and Prepaid Credits—are handled. If you choose the ‘ignore credit transactions’ option, revenue recognition will exclude these credit transactions from processing. To learn more about the various types of credits supported in Revenue Recognition, please refer to the Recurly Revenue Recognition Credits Documentation. You can modify all these settings any time before activation. After activation, only the Auto Period Close Delay will remain editable.
General ledger accounts
Recurly's Revenue Recognition feature provides flexible configuration for liability and revenue accounts at the charge, plan, or item level. This means you can designate specific liability accounts (such as Deferred Revenue) and revenue accounts for each product, plan, or charge, aligning them with the accounts you use in your General Ledger (GL) system:
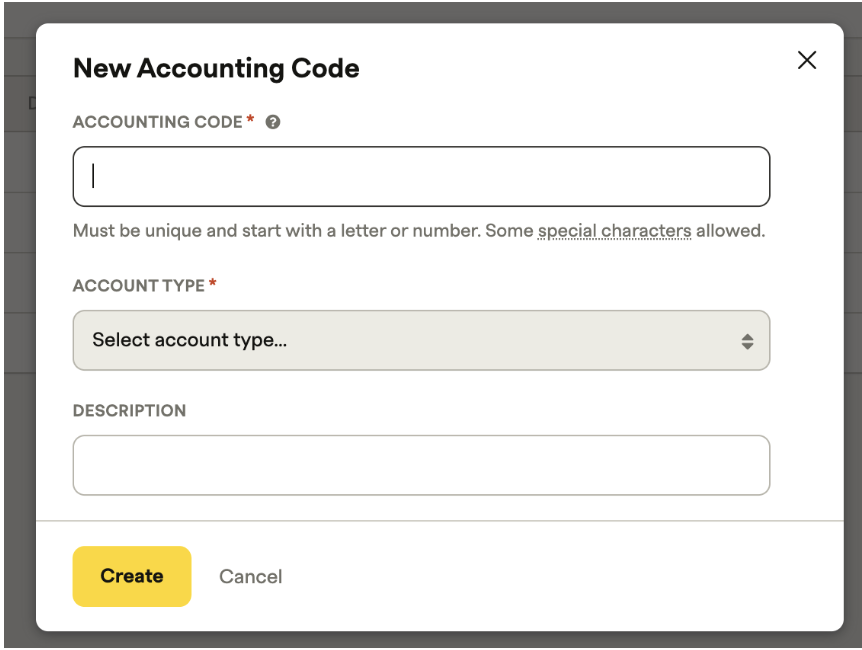
- Click on “New Accounting Code”.

- Fill in the accounting code and select the account type as Revenue or Liability. Give the description if required. Click on Create.
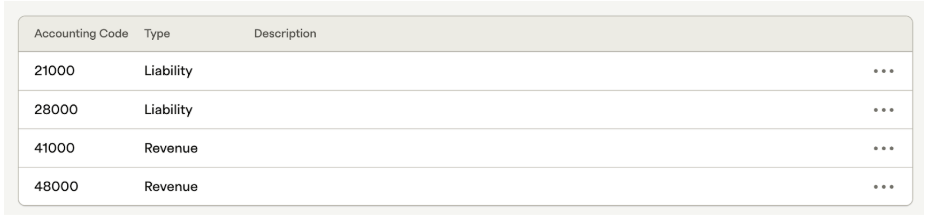
- Once all the required accounts are created, the screen looks like this:
Onboarding wizard
This onboarding wizard is designed to guide you through the process of self-enabling and activating the Revenue Recognition feature for both the Standard and RA Manage Advanced systems. The wizard will walk you through each step, explaining the purpose of each control and providing guidance on which values to select for your specific use case.
What to expect in this wizard:
- Each step provides a clear explanation of the control or setting involved.
- You will receive recommendations and best practices for selecting the appropriate values.
- The flow is structured to ensure compliance with revenue recognition standards and to help you avoid common pitfalls.
Preparation
To ensure a smooth onboarding experience, please complete the following preparations before starting the wizard:
- Gather your technical memos: Have your internal documentation and technical memos on hand. These should outline your organization’s revenue recognition policies, processes, and any unique requirements.
- Chart of accounts: Understand which General Ledger (GL) accounts will be used for revenue and liabilities. You will need to associate the correct GL accounts to revenue and deferred revenue postings.
- Performance obligations: Identify the different revenue recognition performance obligation types that will be associated with each charge, plan, or item. Performance obligations are promises to deliver distinct goods or services to your customers and are central to accurate revenue recognition.
- Contract review: Review your customer contracts to ensure you have clearly identified all performance obligations and understand how each should be recognized.
- Product catalog mapping: Be prepared to map each product, plan, or item in your catalog to the appropriate revenue recognition rule and performance obligation type.
Key concepts
- **Revenue recognition: **The process of recognizing revenue as it is earned, in compliance with accounting standards such as ASC 606 and IFRS 15.
- Performance obligations: Each distinct good or service (or bundle) you promise to deliver is a performance obligation. Proper identification is critical for compliance and accurate financial reporting.
- GL accounts: Revenue and liability accounts must be set up and mapped correctly to ensure transactions are posted accurately for accounting and reporting purposes.
Next steps
Once you have gathered the necessary information and documentation, proceed with the wizard. Each step will guide you through configuration, offering explanations and context to help you make informed decisions.
Click the "Get Started" button to open the onboarding wizard. This will appear as a side dialog, guiding you through the remaining setup tasks. You must complete every item in the task list to activate Revenue Recognition, but you can finish them in any order.

Note: You can safely exit the wizard at any time. Your progress will be saved, allowing you to return and continue later. Anyone on your team with the necessary permissions can view and contribute to the process.
There will be several steps to be completed before we activate the Revenue Recognition. These steps can be completed in any order. The steps to be completed are as under:
- Assigning business entity defaults
- Review settings of All Products
- Configure Default Rules
- Set Global Currency
- Set Auto Period Close Delay
- Configure Credit Handling (Available only to Advanced Revenue Recognition merchants)
- Configure Revenue Recognition Start
Step 1: Assigning GL accounts to business entities
Assigning General Ledger (GL) Accounts to business entities enables users to set default values for GL accounts at the plan, item, and charge levels during product and charge creation.
- Default value assignment: When merchants use one or two GL accounts across multiple charges, attaching GL accounts to business entities allows these accounts to be automatically used as default values when defining products and charges.
- Streamlined setup: This approach simplifies the configuration process, especially for merchants with straightforward accounting structures, by reducing repetitive data entry and ensuring consistency.
- Automatic application for historical Data: The system will use these default GL account values for inactive plans that still have active subscriptions requiring revenue recognition processing.
Guidance
- For simple account structures: If your business uses the same GL accounts for most or all charges, assign these accounts at the business entity level to streamline product and charge setup.
- For complex account structures: If different products or charges require different GL accounts, you can override the default values at the plan, item, or charge level as needed.
This feature ensures that both new and historical transactions are processed with the correct accounting mappings, supporting accurate revenue recognition and financial reporting.
Assigning business entity defaults
One of the required tasks is to assign default accounting codes for your business entities.
- Within the wizard's task list, locate the step for business entities.
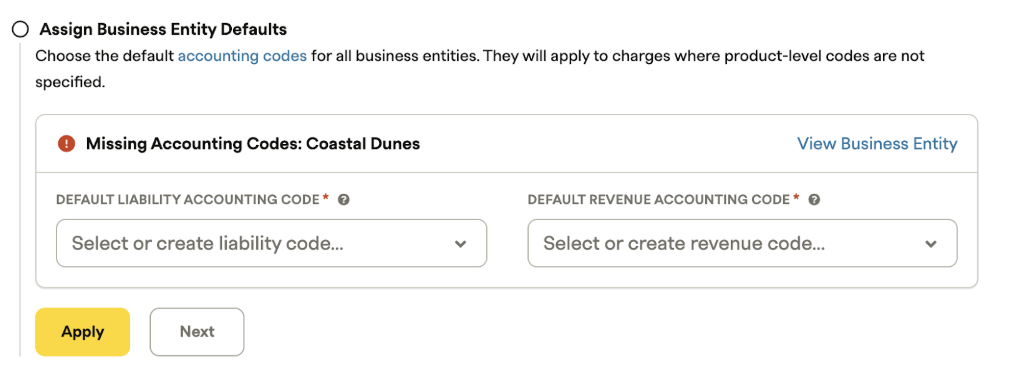
- Instead of editing each business entity directly through configuration, you can enter your preferred accounting codes into the fields presented in the card and click on create.
- Click "Apply" to save your changes. The system will validate this step.
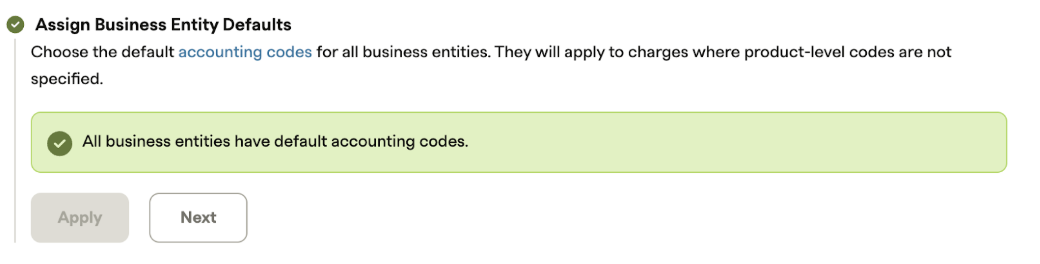
- Once completed, click "Next" to move to the following step.
Step 2: Reviewing settings of all products
To ensure compliance with best accounting practices, you must review each plan individually to apply the correct revenue recognition rules and accounting codes.
Out of the box, the system provides several Revenue Performance Obligations (POBs) that can be attached at the Setup, Plan, and Add-On levels. You must select the correct values for each section to ensure the system generates accurate accounting entries.
PointInTime recognition
PointInTime recognition- Definition: Revenue is recognized at a specific point in time, typically the month the billing is issued.
- Setup: Attach the "PointInTime" POB to the relevant plan or item.
- Example table:
| Invoice Created Month | Invoice Amount | Start Date | End Date | Recognized Period | Recognized Amount |
|---|---|---|---|---|---|
| JAN 2025 | $129.00 | 01/21/2025 | 07/20/2025 | JAN 2025 | $129.00 |
| FEB 2025 | $120.00 | 02/02/2025 | FEB 2025 | $120.00 |
OverTime (daily) recognition
OverTime (daily) recognition- Definition: Revenue is recognized evenly over the contract period, calculated daily.
- Setup: Select "OverTime (Daily)" POB for the plan or item.
- Amortization example:
| Period | Number of Days | Amortized Amount |
|---|---|---|
| Jan | 11 | $7.84 |
| Feb | 28 | $19.96 |
| Mar | 31 | $22.09 |
| Apr | 30 | $21.38 |
| May | 31 | $22.09 |
| Jun | 30 | $21.38 |
| July | 20 | $14.25 |
- Calculation:
- Number of days: 181
- Per day rate: $129.00 / 181 = $0.713
OverTime (partial monthly) recognition
OverTime (partial monthly) recognition- Definition: Revenue is recognized over the contract period, with partial recognition in the first and last months, and equal amounts in the remaining months.
- Setup: Assign "OverTime (Partial Monthly)" POB as required.
- Amortization example:
| Period | Number of Days | Amortized Amount |
|---|---|---|
| Jan | 11 | $7.84 |
| Feb | 28 | $21.38 |
| Mar | 31 | $21.38 |
| Apr | 30 | $21.38 |
| May | 31 | $21.38 |
| Jun | 30 | $21.38 |
| July | 20 | $14.26 |
- Calculation:
- Number of days: 181
- Per day rate: $129.00 / 181 = $0.713
Manual recognition (only for Revenue Recognition Advanced)
- Definition: No revenue is released automatically; amounts remain in the deferred bucket. The Advanced Revenue recognition merchants will be able to release revenue manually using the Revenue Workbench.
- Setup: Select "Manual Recognition" in the Advanced Revenue Recognition rules.
Configuration steps
- Review each plan and item: Evaluate every plan and item individually to determine the correct revenue recognition rule and GL account.
- Select performance obligation: From the configuration page, choose the appropriate POB (PointInTime, OverTime (Daily), OverTime (Partial Monthly), or Manual) for each plan, item, or add-on.
- Assign GL accounts: Specify the relevant GL accounts for revenue and deferred revenue at each configuration section.
- Save and validate: Ensure all selections are saved. The system will use these settings to create journal entries and amortization schedules.
- Default handling:
- If no values are selected, the system assigns default POBs from the missing Rules page and GL accounts from the business entities.
- For inactive plans, rules are drawn from the default section.
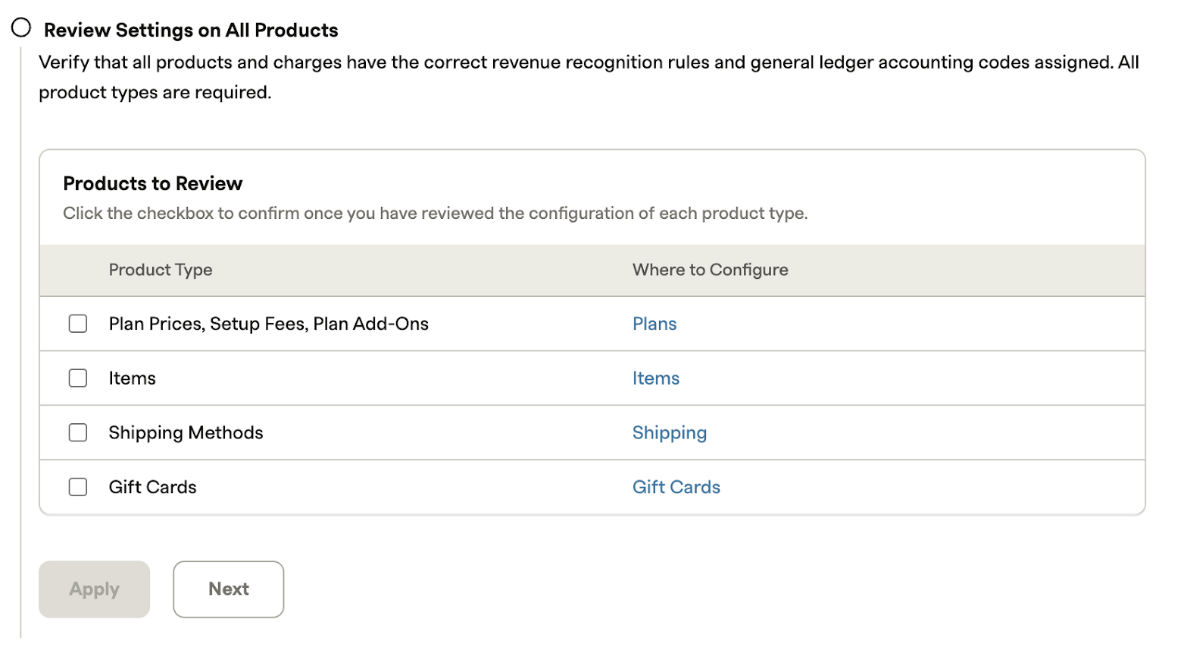
The steps to review plans are as under:
- Review each product type listed.
- Assign the appropriate revenue recognition rules and accounting codes for each one.
- As you complete the review for each item, check it off to confirm.
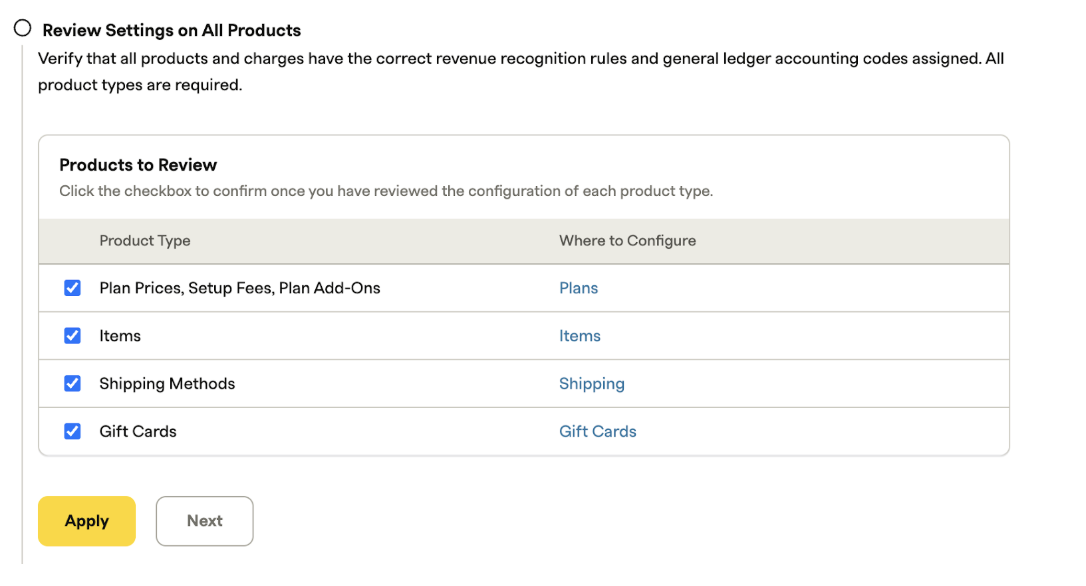
- Once all types have been reviewed and configured, click "Apply" to save the changes.
Please note, if the products are not configured with rules or accounting codes, they will pick the default ones.
You can modify and revalidate these settings as needed until you activate Revenue Recognition.
Step 3: Setting up default rules and global settings
Under this step we assign default revenue rules to each product defined in Recurly. Revenue recognition has the below rules that can be selected for the products.
- Point in time: Recognizes all revenue on a single, specific date when an invoice is created.
- OverTime (Daily): Spreads revenue recognition evenly across each day of the contract period.
- OverTime (Partial Monthly): Recognizes revenue on a monthly basis. It automatically calculates partial amounts for the first and last months if the contract begins or ends mid-month.
- Manually recognize: This rule helps in recognizing the revenue manually.
Define the default rules:
Set up default revenue rules for any products that do not have specific settings assigned. Any changes made here will also be reflected on the main Revenue Settings page. Currently default rules assigned cannot be changed.
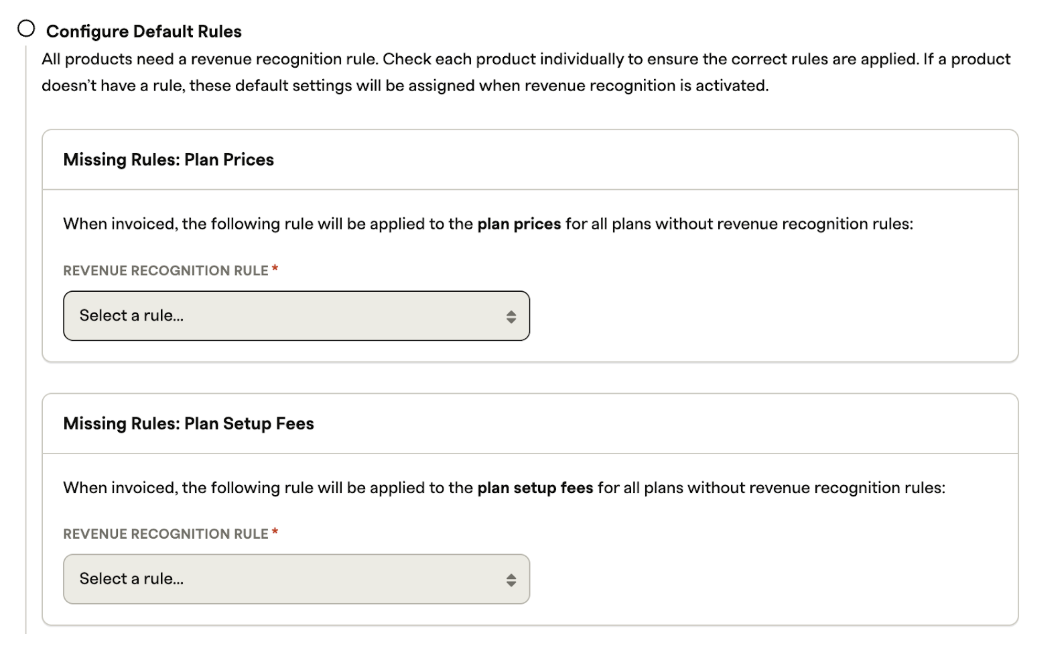
Under this step we will assign default rules to the following product types:
- Plan Prices
- Plan Setup Fees
- Plan Add Ons
- Items
- Shipping Method
- Custom Charges
- Custom Credits
- Gift Cards
When no specific rules are defined, these defaults will be applied during revenue recognition. Users can also choose different recognition rules for each item as needed.
Step 4: Setting up global reporting currency
It is required to select a reporting currency from the available dropdown menu. This currency will be used for generating journals and revenue reports, ensuring consistency in financial reporting.
- Mandatory selection: Choosing a reporting currency is mandatory before proceeding with revenue recognition setup.
- Multi-currency support: Merchants who process subscriptions and contracts in multiple currencies can consolidate and generate reports in their chosen reporting currency. This enables unified financial reporting regardless of the transaction currencies involved.
- Flexible reporting options: Users can view journals and revenue in both the original transaction currency and the selected reporting currency, providing flexibility for operational and statutory reporting needs.
This feature ensures that all revenue and journal entries are accurately reflected in the currency required for your company’s financial statements, while still allowing access to transaction-level currency details.
Step 5: Setting up auto period close delay
- Set the number of days the system should wait after a period ends before automatically closing the revenue period for standard merchants.
- The minimum recommended delay is 2 days, allowing the system to start closing the period at the end of the second day.
- You have the flexibility to configure auto-closure for any time after the 2-day minimum, based on your operational needs.
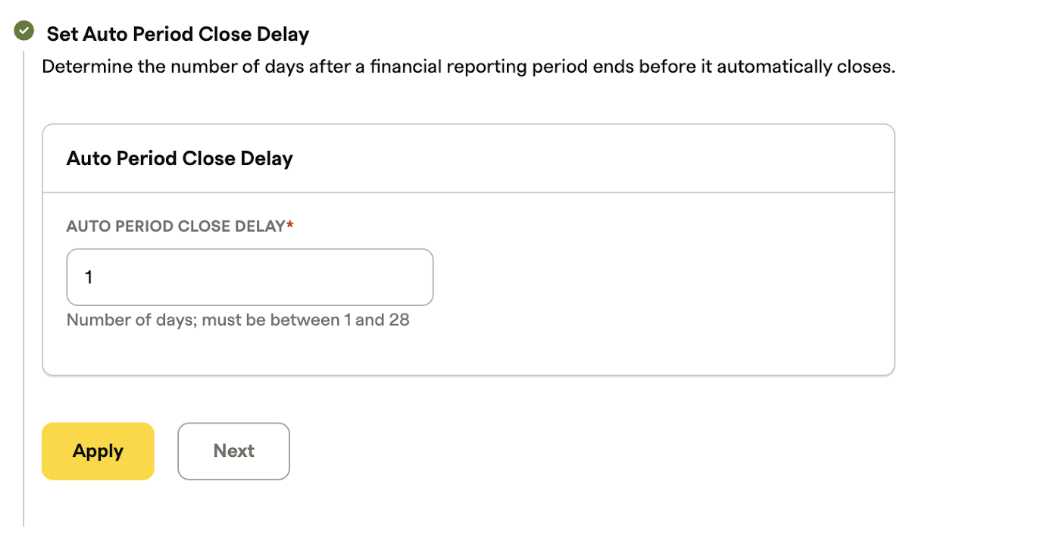
This setting will delay the period close for the number of days mentioned in the setting.
Please note: Only the auto-period close lag days can be changed after activation. No other settings can be changed.
Step 6: Handling credit transactions
- This feature is available exclusively to merchants using Revenue Recognition Advanced.
- Merchants can configure how credit transactions—such as Goodwill, On Account, and Prepaid Credits—are processed.
- By selecting the ‘ignore credit transactions’ option, these types of credits will be excluded from revenue recognition calculations.
- This setting allows merchants to tailor revenue recognition to their specific business requirements and credit policies.
- For detailed information on the types of credits supported, consult the Recurly Revenue Recognition Credits Documentation.
Decide how credit transactions should be managed.
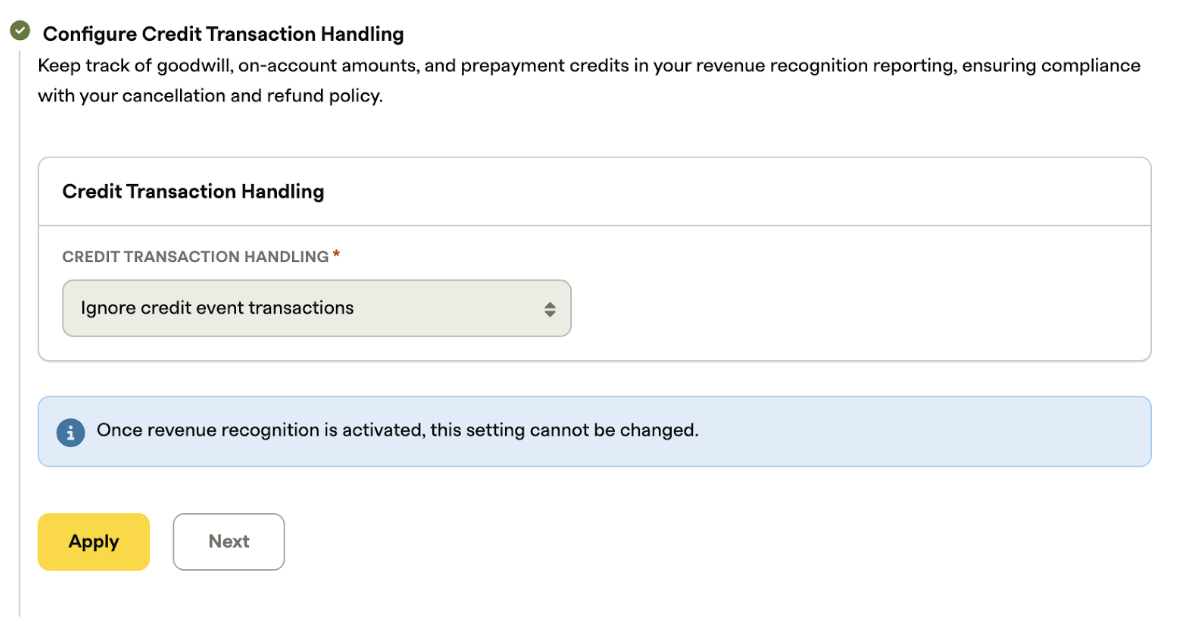
Please note, only the auto-period close lag days can be changed after activation. No other settings can be changed.
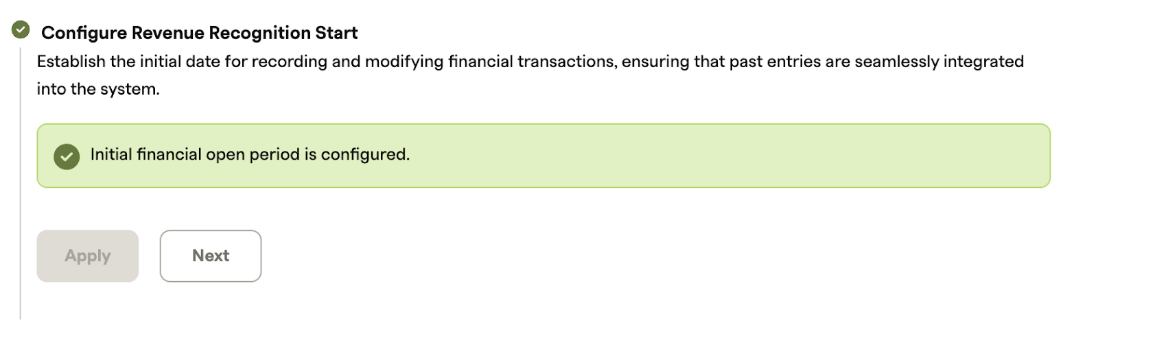
Step 7: Configuring Revenue Recognition start
This crucial step determines the starting point for your revenue recognition.
Set the initial open period
Definition: The Initial Open Period is the first accounting period that opens after system activation. This is the period in which the system will begin generating revenue accounting entries and journals.
Best practice: It is recommended to set the Initial Open Period to cover at least the duration of your longest contract or subscription. This ensures that all relevant revenue is accurately recognized.
Common options: Many organizations choose the end of the previous financial year (e.g., December 2024 or December 2023) as the starting point for the Initial Open Period.
Select the earliest transaction date
-
Purpose: The Earliest Transaction Date determines the starting point for including invoices in revenue recognition calculations. Only invoices dated on or after this date will be considered.
-
Guidance: After selecting the Initial Open Period, set the Earliest Transaction Date to match the start date of your longest contract or subscription that may still have unrecognized revenue within the open period.
-
Example:
- If the Initial Open Period is set to December 2024 and you require data from January 2024, configure the Initial Open Period as December 2024 and set the Earliest Transaction Date to January 1, 2024.
- This configuration ensures that all invoices from January 1, 2024, onward are included in the revenue recognition process for the open period beginning December 2024. This ensures the revenue for the financial year 2025 will be reported including all the unrecognized revenue from the longest contract.
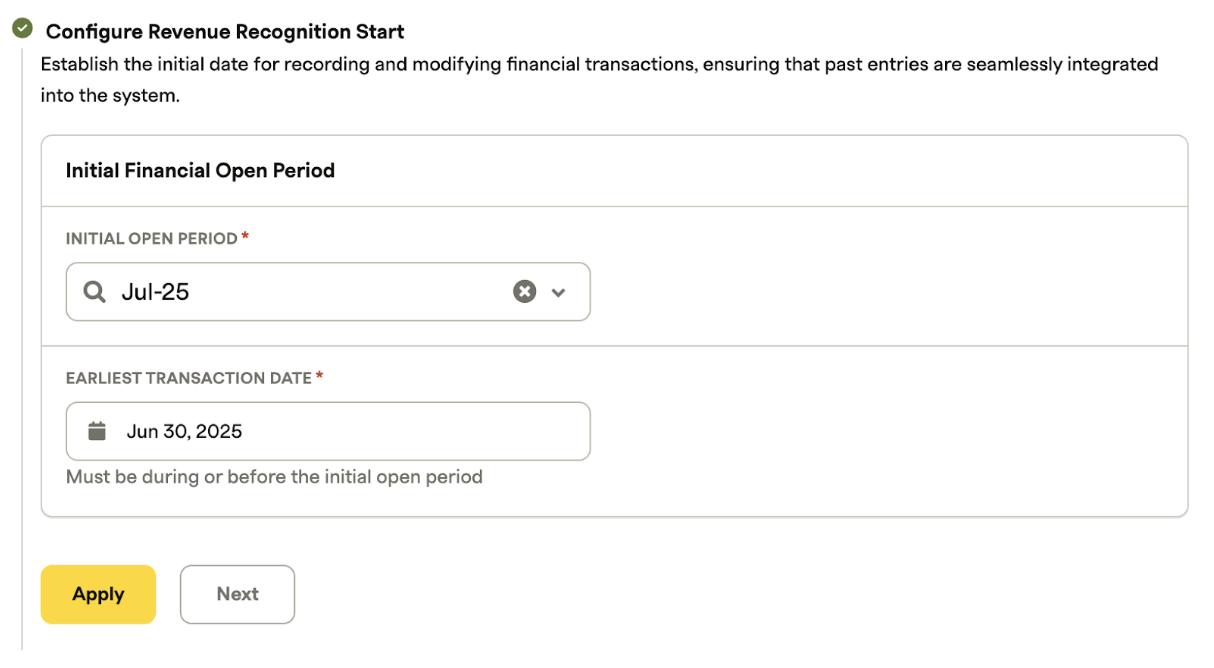
Once you select Initial Financial open period and earliest transaction date, the system will show that the task is complete. You will not be able to make any changes to these fields.
Step 8: Activating Revenue Recognition
Once all the tasks in the onboarding wizard are completed and validated, you are ready to activate.
- A confirmation prompt will appear, asking you to confirm enabling Revenue Recognition.
- Click "Activate".

- The activation process will begin.
If any of the above steps are incomplete, the following error will appear:

Post-activation
During and after activation, you will notice the following changes:
- Activation in progress: A notification will appear in the sidebar, indicating that activation is underway and that report data may be temporarily incomplete.
-
Activation complete: The in-progress notification will disappear. You will receive an email confirming that Revenue Recognition is now active.
-
New interface elements:
- Open revenue period indicator: An indicator will now be visible in the top bar, showing the current open revenue period.
- Period details: Hovering over this indicator will reveal the start and end dates of the period and show the most recently synced transaction. This helps you monitor the synchronization status between Recurly and the Revenue Recognition client.
- Hovering over the period will display the period dates and the most recent synced transaction date.
-
Data integration and period close: For standard merchant accounts, the system performs an automatic data integration and period close, processing all periods from the initial opening to the current one. The revenue recognition feature is activated only after the data integration for the current period has been successfully completed. As an advanced merchant, you must manually sync data and close periods sequentially to bring your account to the current date.
Run Billing Integration:
- Navigate to Revenue Recognition → Admin Console.
- Open the Import/Export tab and choose Billing Integration.
- Switch the integration job to Active and click Save.
- Click the Run icon—this imports all transactions for the selected period.
Transfer Journal Entries:
- Go to Import/Export → Transfer JE.
- Select the journal-entry card for your primary book.
- Review the entries, then click Approve for Transfer.
- Click Mark as Transferred to summarize the journal card.
Close the Period
- Once your journal entries are summarized, formally close the period.
- For full details, see the Period Close Documentation.
After completing these steps, Revenue Recognition will be activated on your site.
Updated 10 days ago