
App Management setup
Connect your Apple App Store and Google Play apps to Recurly App Management to track subscription lifecycles, then configure external products, entitlements, and webhooks.
Connect your mobile apps
Choose your platform below. If you offer subscriptions on both, complete each tab.
Prerequisites
Before configuring Recurly App Management, create a new Apple App Store Connect API key with the right permissions. You'll need to be an Account Holder or Admin in Apple App Store Connect to complete these steps — if you hit permission issues, reach out to one of your Apple App Store Connect Admins.
Log into App Store Connect
Log into Apple App Store Connect. You'll be creating an App Store Connect API key — not an In-App Purchase key — for the Recurly connection.
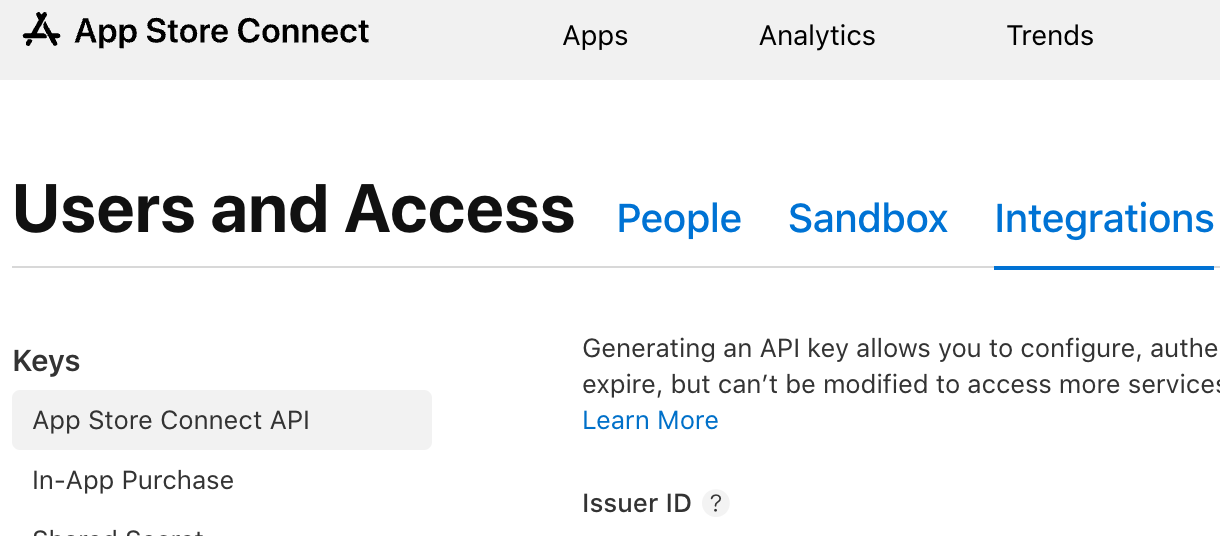
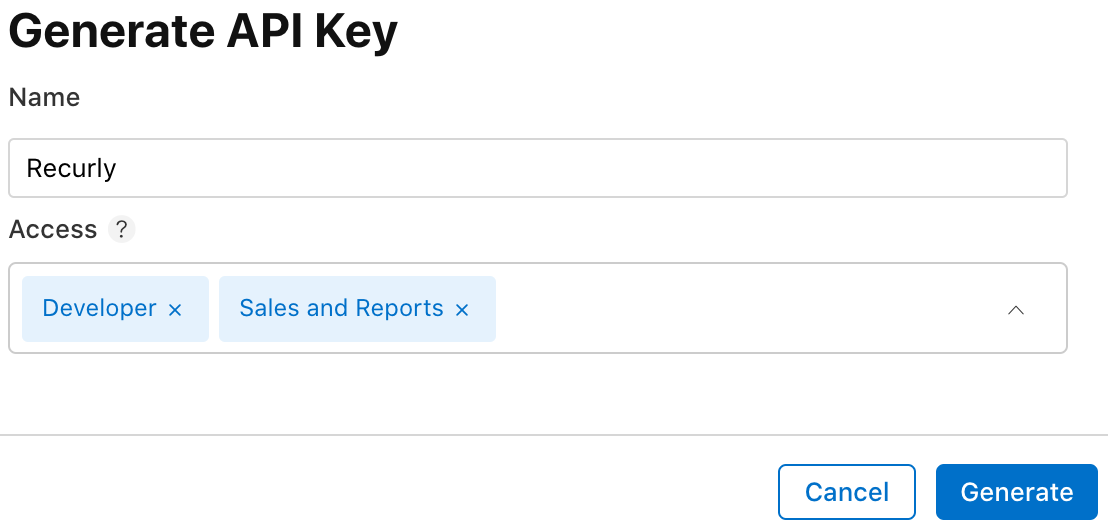
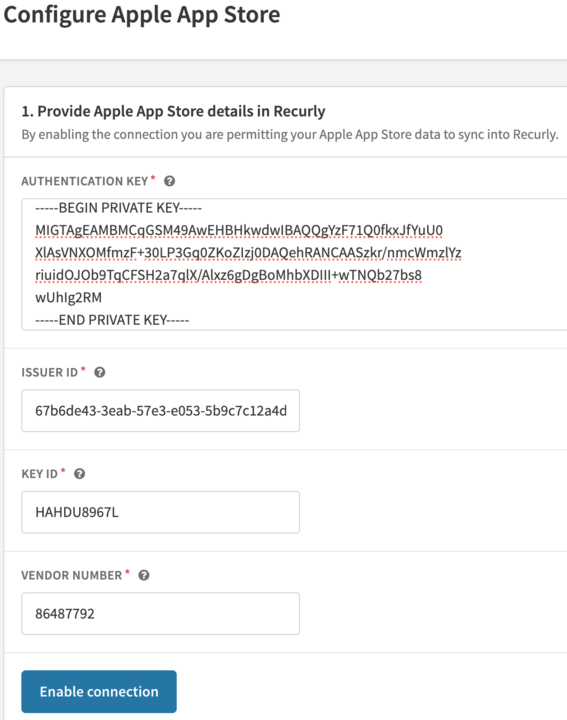
Configuration
Prerequisites
Before configuring Recurly App Management, create a new Google Cloud service account and API key with the right permissions.
Set up your developer and payments accounts
Ensure you have a Google Play Developer account and a profile in the Google Payments Center that's linked to your developer account. If your app isn't live yet, you can skip the payments profile and return to it before going live.
Configure Google Play Developer API access
Follow Google's instructions to link your developer account to a Google Cloud project, enable the Google Play Developer API, and set up a service account. See the details below.
- Link your developer account to a new or existing Google Cloud project.
- Enable the Google Play Developer API for that project.
- Set up a service account with Google Play Console permissions to access the Google Play Developer API. When creating it, add the Pub/Sub Admin and Monitoring Viewer roles, and save the service account's email address.
- Give the service account access to your app in Google Play Console: from Users and Permissions, select Invite new users, then Add app and choose your app. Under Account permissions, select View app information and download bulk reports (read-only), View financial data, orders, and cancellation survey responses, and Manage orders and subscriptions. Select Invite User to finish.
Create a JSON key
Follow Google's instructions to create a new JSON key for your service account. You can never recover this key from Google, so store it securely — you'll need it in Recurly.
Save the Earnings report URI
Using the "Find your Google Cloud Storage URI" section of these Google instructions, save the Google Storage URI that points to the Earnings report. Stay logged into Google Play and Google Cloud for the steps below.
Configuration
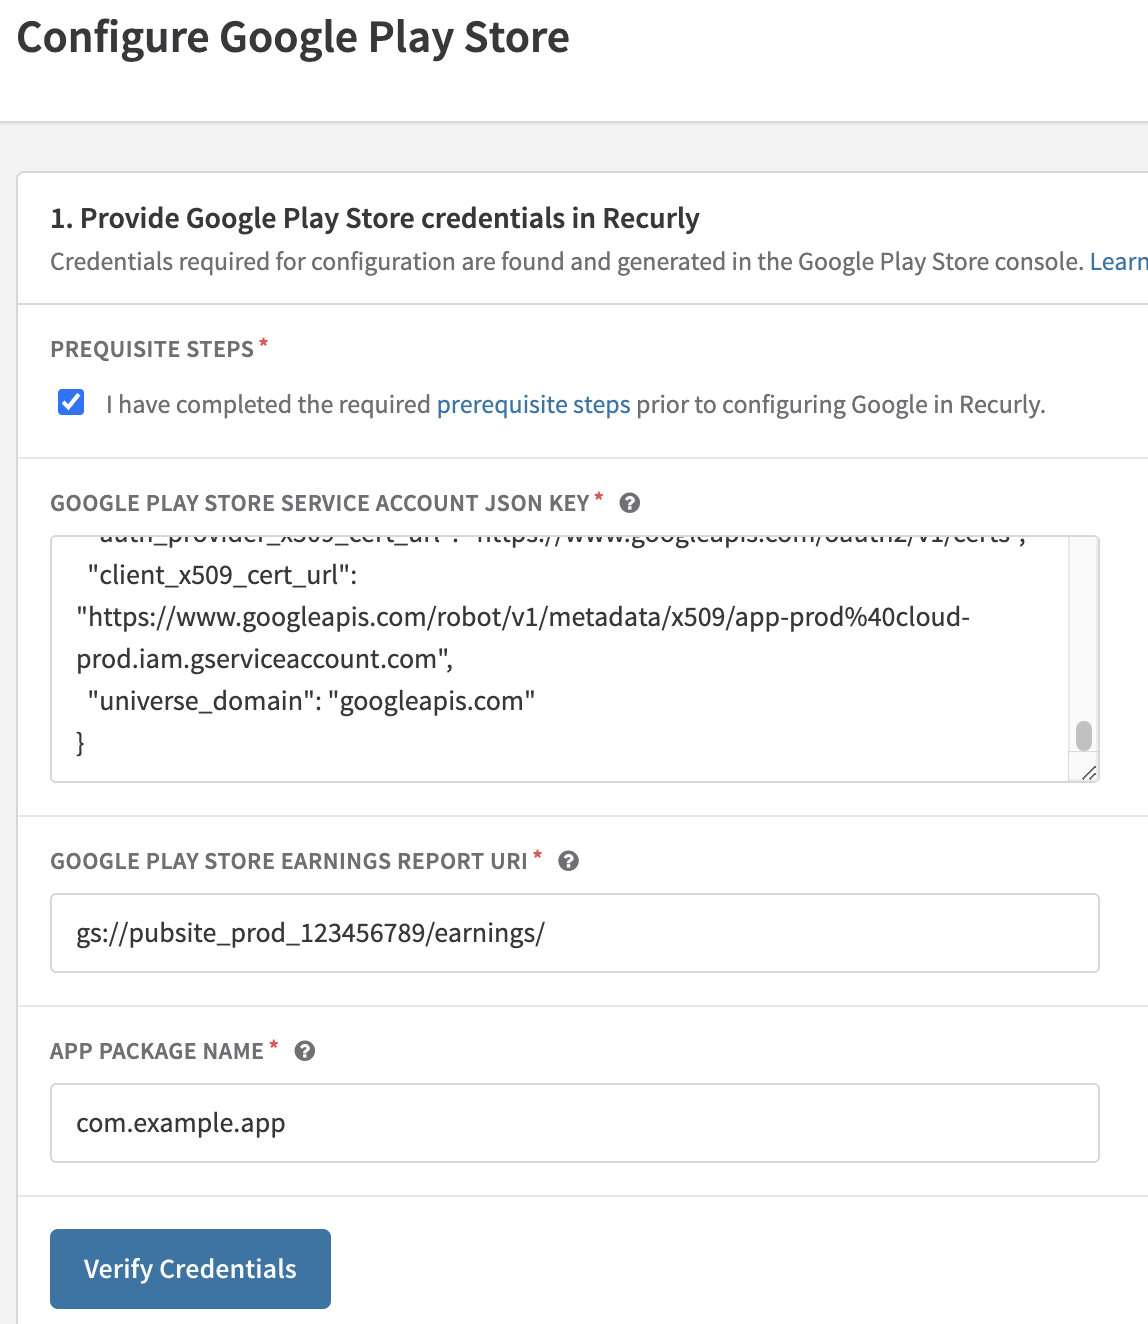
- JSON key: copy the entire contents of the JSON key file and paste them into the field.
- Google Earnings Report URI: paste the full URI you saved earlier. It typically begins with
gs://and ends withearnings/. - App package name: in Google Play Console, open your app from Home to reach its Dashboard. Copy the unique package name shown directly under your app's name.
- Following Google's instructions, create a topic. Uncheck "Add a default subscription" — you'll create one next.
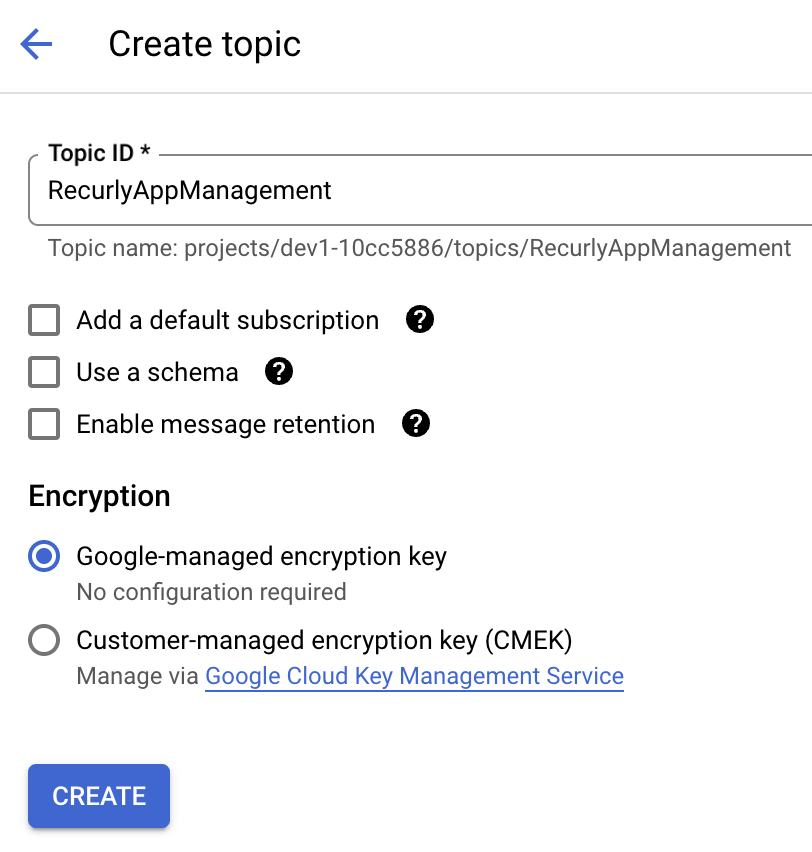
- While viewing the topic, save the Topic ID for later. Use the longer URI version — for example,
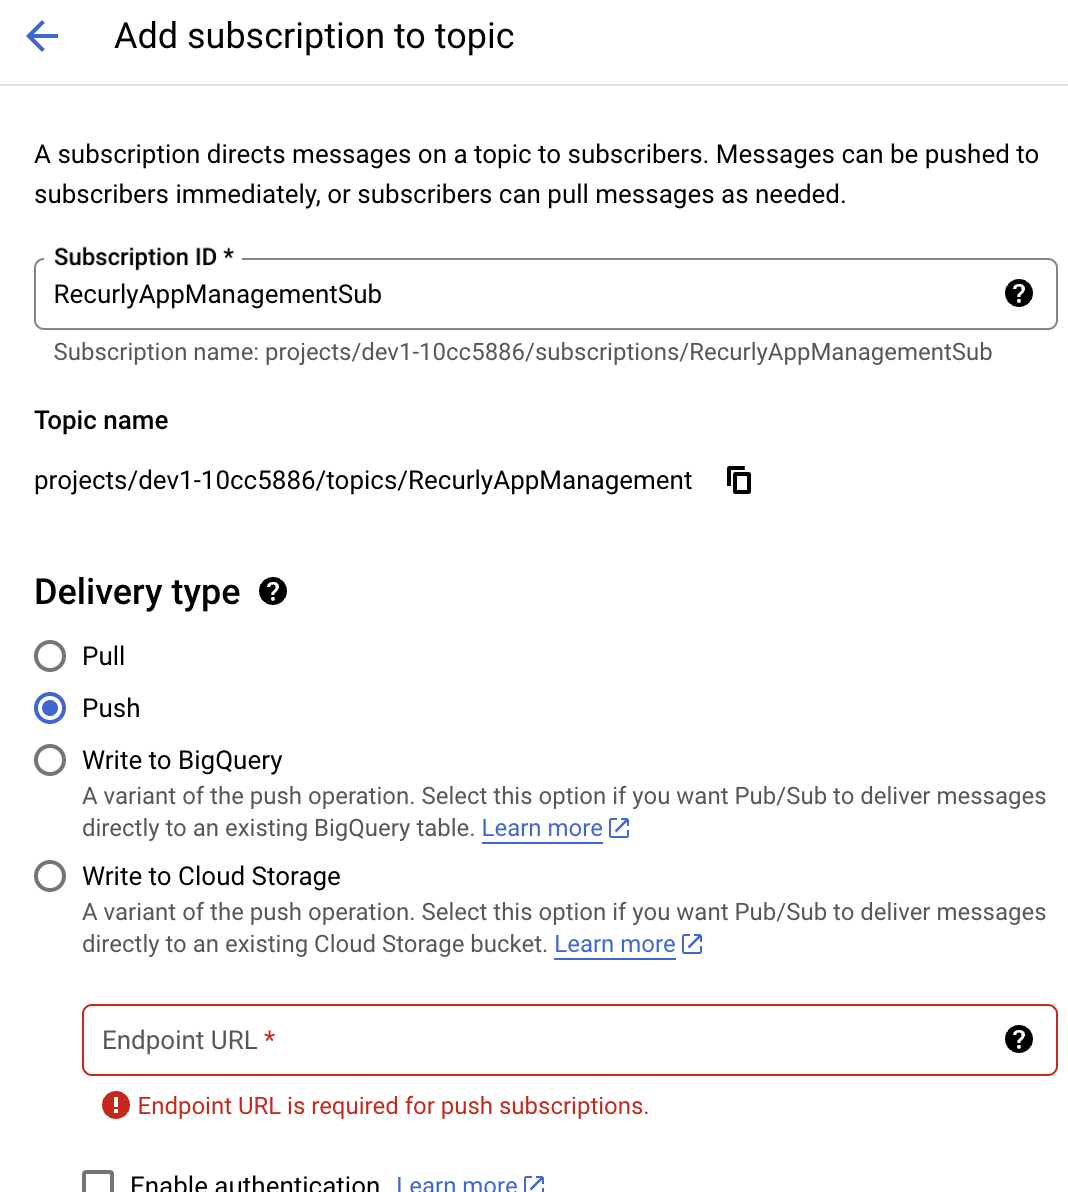
projects/PROJECT_ID/topics/TOPIC_NAME— not just the name you provided. - Add a subscription to the topic by selecting Create Subscription within it, using the settings below.
Set the delivery type to Push and paste the URL from Recurly App Management into Endpoint URL.
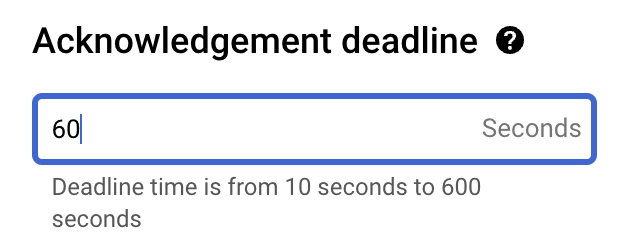
Change the acknowledgement deadline from the default to 60 seconds.
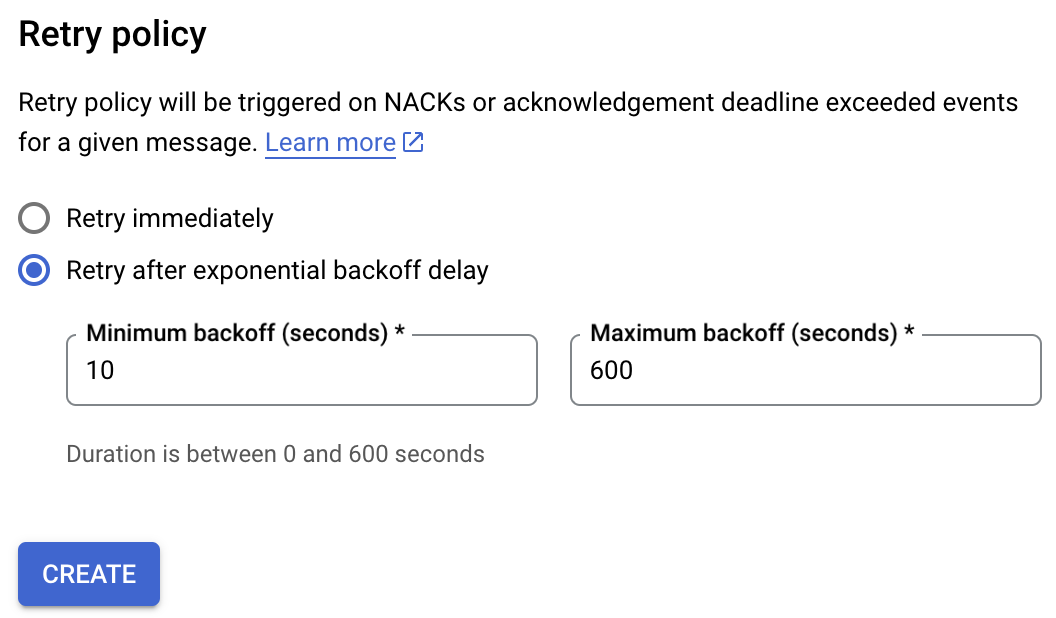
Change the retry policy to "Retry after exponential backoff delay," keeping the defaults of 10 seconds minimum backoff and 600 seconds maximum backoff. Then select Create.
Following Google's instructions, grant Google Play privileges to publish notifications to your topic.
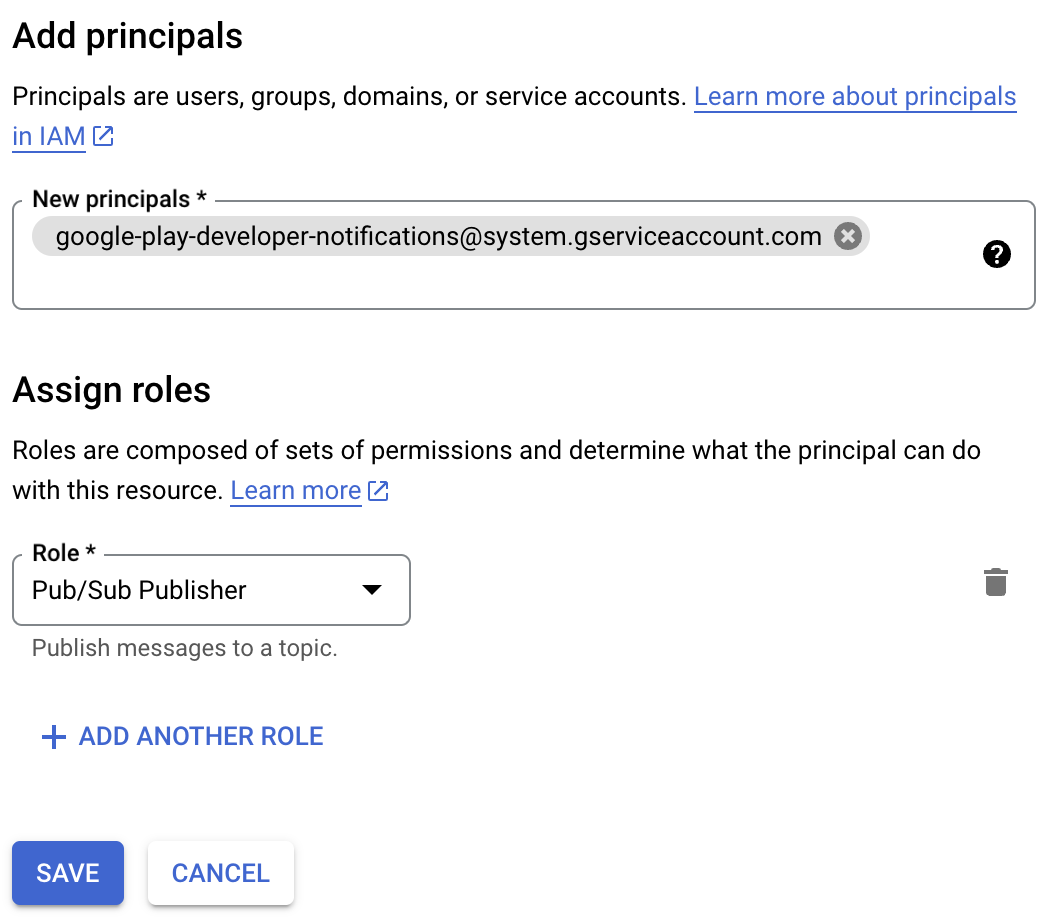
Enable real-time notifications
Following Google's instructions, enable real-time notifications for your app by inputting the topic name and sending a test message. Use the longer URI version of your topic that you saved earlier.
Configure App Management
Once your mobile apps are connected, complete the configuration below.
Creating external products
External products let Recurly associate your unique Apple and Google subscriptions with a single product in Recurly — so you can track one subscription type whether it's sold on the web or your mobile apps. You only need to do this once per subscription you've created in Apple or Google.
- Apple: provide the Apple Product ID of the product you want to map. You'll find it when viewing the details of a specific subscription in Apple App Store Connect.
- Google Play: a subscription can have one or more plans, so you need both the Product ID and Base Plan ID. For example, with a Product ID of "ACME" and a Base Plan ID of "Monthly_Pass," you'd enter
ACME+Monthly_Passas the External Reference Code. In Google Play Console, go to Monetize → Products → Subscriptions; the Product ID is on the subscription's details view, and the Base Plan ID is in the first column of the "Base plans and offers" table.
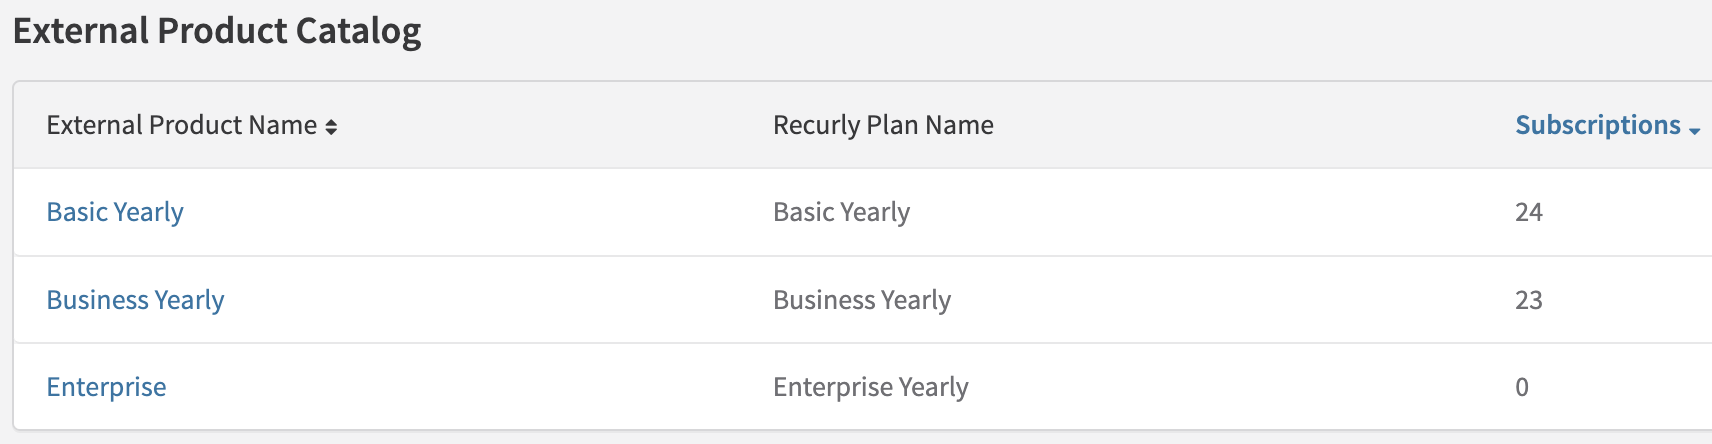
For each subscription offered via Apple or Google, you should end up with one external product in Recurly. For example, if you offer a monthly and a yearly subscription, you'll have two external products when done. The example below shows three subscription offerings identified as external products.
Entitlements
Entitlements give you an easy way to control and grant access to features within your mobile app. When you create an entitlement, you'll see an option to assign an external product — that's how you connect one of the external products you just created. For full details, see the entitlements feature docs.
If you plan to use entitlements, navigate to Configuration → Entitlements and follow the linked instructions. The example below shows three entitlements configured.

Webhooks
Once Recurly processes a real-time notification from Apple or Google and updates the subscription data, it can send a webhook notification specific to the subscription event — for example, subscriber canceled. To receive those webhooks, see configuring Recurly to send webhooks.
Migration
Due to limitations with the Apple and Google App Stores, Recurly can't automatically ingest historical data from the app stores on your behalf. This includes any app store subscriptions created before you started using Recurly App Management. To reflect that data in Recurly, you'll need to backfill our records with the subscription and customer information stored on your side.
This backfill process can be performed using Recurly's API. If you'd like help, the Professional Services team can either guide you through using the API or perform the import on your behalf. Contact the support team to request a paid engagement with the Professional Services team.
Updated 4 months ago