Access management
Recurly access management: Tailored user privileges for secure financial operations.
Overview
This feature is part of our product, Recurly revenue recognition advanced. [Learn more here].
Prerequisites
- Familiarity with Recurly's user interface.
- Understanding of the organization's hierarchy and user roles.
- Knowledge of the desired access levels and functionalities for each user.
Limitations
- Any changes that are made will be applied for future transactions only.
- User roles and access levels are predefined and cannot be customized beyond the available options.
- Changes to user privileges may require re-login or session refresh to take effect.
- Only users with administrative privileges can modify or create new roles.
Definition
Recurly's Access Management is a robust feature designed to streamline user access and privileges within the platform. It ensures that users have the appropriate level of access to perform their tasks while maintaining data integrity and security. From creating specific roles with tailored permissions to managing individual user access, Recurly's Access Management offers a comprehensive solution to control and monitor platform usage.
Key benefits:
- Enhanced security: Define user roles and access levels to ensure data protection and prevent unauthorized modifications.
- Customizable roles: Create roles tailored to specific job functions, ensuring users have the right tools for their tasks.
- Streamlined operations: Easily manage and modify user access, ensuring efficient operations without compromising security.
- Clear oversight: Monitor user activities and access levels, ensuring compliance and accountability.
- Flexibility: Provide either read-only or administrative access, catering to various operational needs within the organization.
Revenue Recognition user management
Creating roles and their specifications
Before creating any user, it is necessary to establish roles that define their access and editing privileges within the platform. Roles determine the level of access and functionality a user will have. There are two primary types of roles that can be created: read-only (or access-only) and Administrator roles. The Site Admin role is the only role available by default, providing full access to the user with this specification.
To create roles and manage their specific settings, follow these steps:
- From the Recurly main menu, navigate to Admin → Roles → Create a Role.
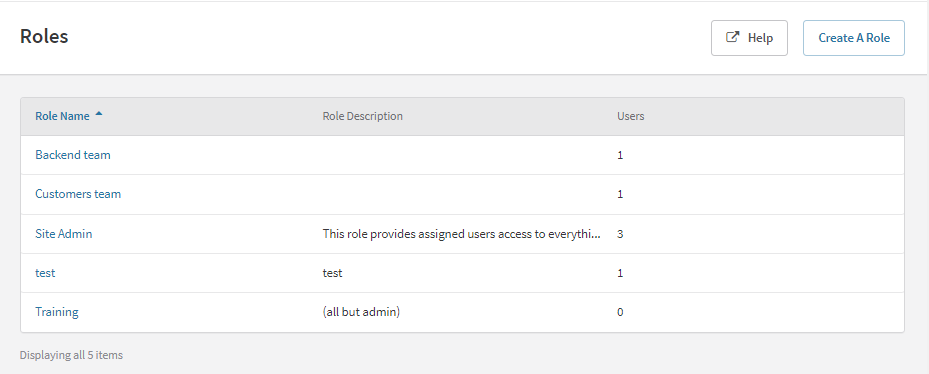
- Fill in the Role Name and Roles Description fields.
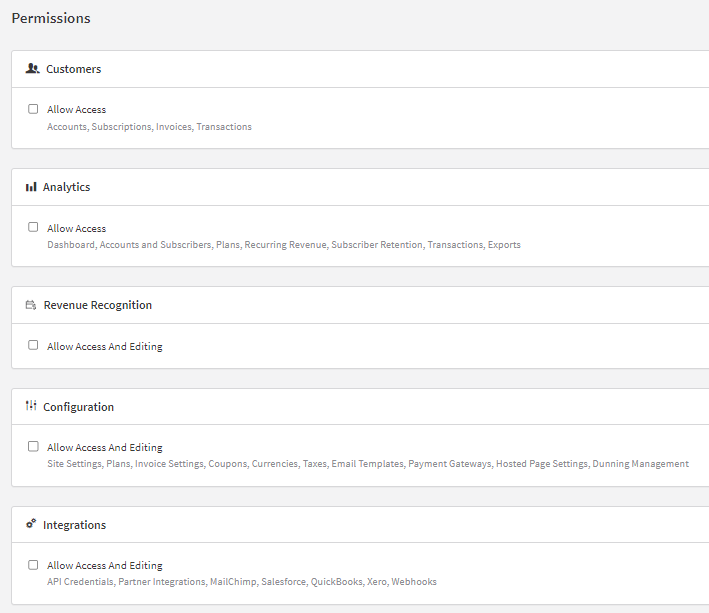
- Select the desired configuration in the Permissions section.
- Note that in the revenue recognition settings, you can select whether that role provides read-only or admin access. This is something that can only be managed in this initial configuration. We advise you to create two different roles differentiating both read-only and admin access.
- However, you can always manage user’s privileges within the revenue recognition platform.
- Press Create Role.
Within the access configuration screen, specifically in the revenue recognition option, you can specify whether a user with a particular role can access and edit information within the revenue recognition tool. Please note that the configuration of editing privileges or read-only access within the revenue recognition platform must be done within the platform itself.
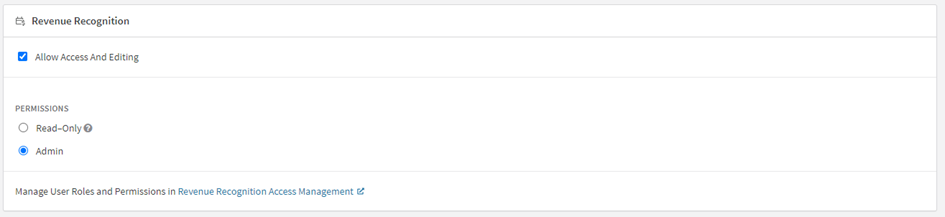
A read-only user has limited access and can only view data and reports within the revenue recognition platform, without the ability to make modifications. On the other hand, an Administrator user has full access and can perform various administrative tasks, including managing users, configuring settings, and overseeing the overall workflow.
Creating users and providing Recurly access
In the Recurly User Management section, you have the ability to create new users and grant them access to Recurly's revenue recognition platform. This functionality is available during the initial configuration phase, assuming you have purchased Recurly's revenue recognition service.
To create a new user and provide them with access to Recurly, follow these steps:
-
From the Recurly main menu, navigate to Admin → Users → User Actions → Invite Users.
-
Fill in the user's email address and select their access level/role. Then, click "Send Invite."
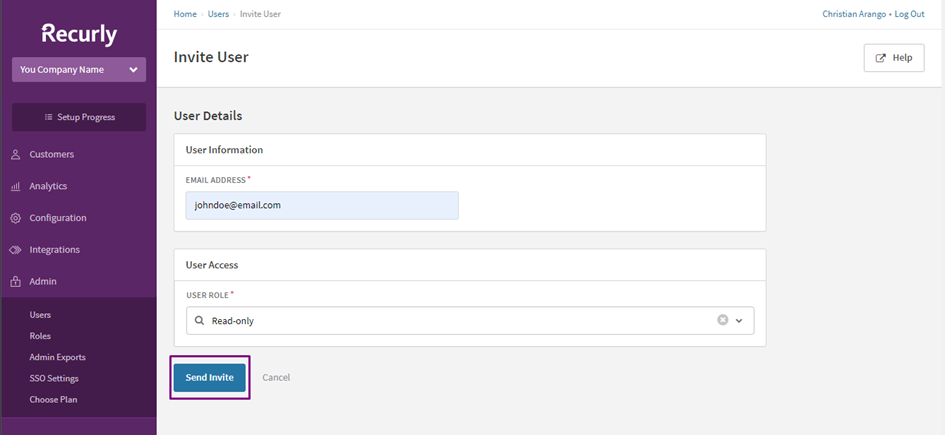
-
The user will receive an invitation to join the platform and must accept it to participate as part of your team.
-
Once the user has accepted the invitation, you will be able to see and manage their privileges in the Users section under the Admin menu.
Providing administrator or read-only privileges in the revenue recognition site
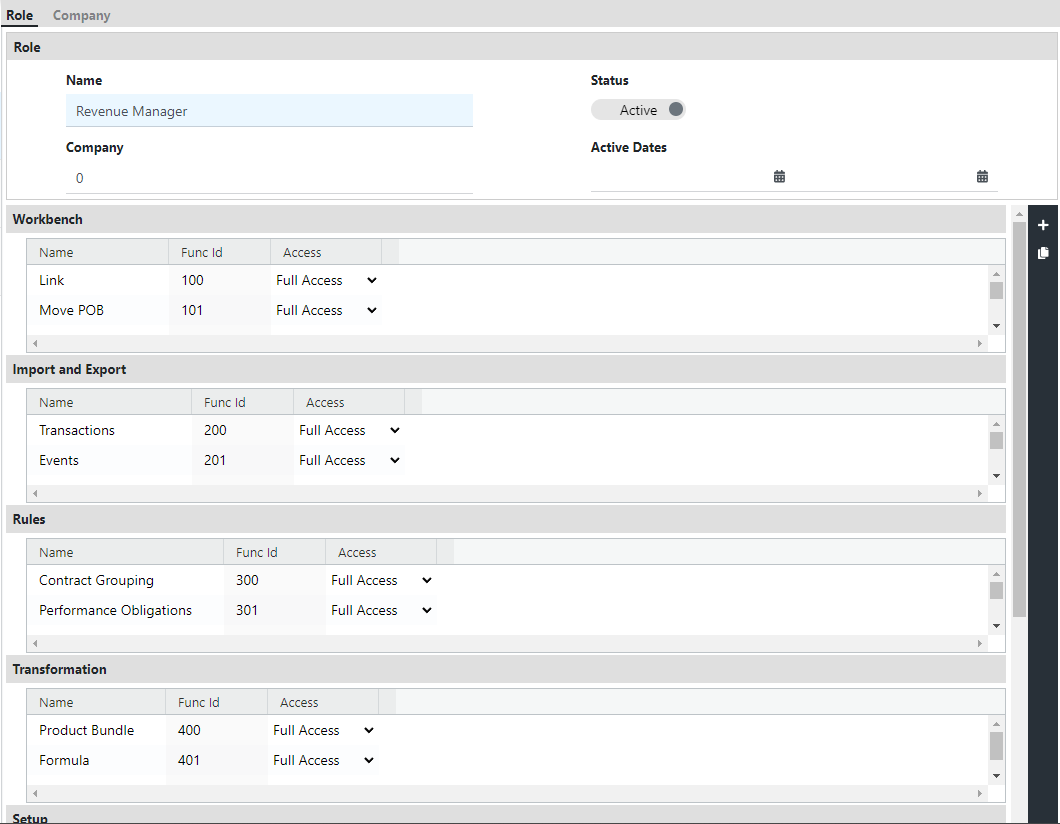
Creating a role within the platform
-
Navigate to Recurly Revenue Recognition in the platform.
-
Go to Access Management and select Roles.
-
Click on the "+" button to create a new role.
-
Provide a name for the new role.
-
Configure the role settings by clicking on each dropdown button and selecting the desired options.
-
Once you have configured the role settings, click Save to create the new role with the specified configurations.
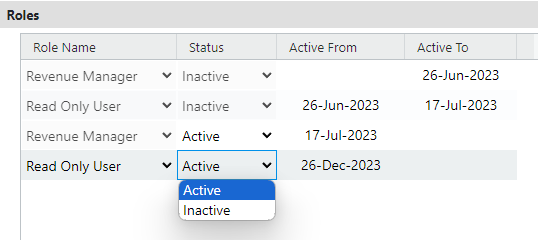
Modifying user’s privileges within the platform
-
Navigate to Recurly revenue recognition in the platform.
-
Go to Access Management and select Users.
-
Select the user from the list on the left.
-
In the Roles section, press “+” to add a role configuration and set to active. The roles available depend on those created previously.
-
Press Save to update the user privileges.
Please note that the availability of the revenue recognition section and corresponding permission set depends on the revenue Recognition feature flag being enabled for your Recurly site. Enabling this feature flag activates the specific functionality related to revenue recognition within the Recurly platform.
User profile
Users can also view and modify their profile.
- From within Recurly Revenue Recognition, click the dropdown menu in the upper right and select "View profile". This will take you to the Recurly UI and the profile page.
- Here they can modify their name, timezone, and job function.
Updated 7 days ago