Setting up Revenue Recognition Standard
Simplify and automate revenue recognition with Recurly. Align with ASC 606 and IFRS 15 standards, effortlessly set up rules, and enhance reporting accuracy through a seamless, integrated solution.
Applying the rules - Overview
To ensure accurate revenue recognition, it is important to apply the appropriate rules to each of the products you already offer, such as plans, items, add-ons, and set-up fees. In the Recurly App, you can easily configure the way you want to recognize revenue and specify the liability and revenue accounts to be used. These fields are available for all transactions, providing flexibility and customization.

By selecting the right rules for each product, you can align revenue recognition with your business requirements. If certain products deviate from the default settings, you can easily modify the Performance Obligation (POB) or account codes to reflect the desired configurations.
How to set up initial configurations
Setting up the initial configuration for Recurly's revenue recognition is essential to ensure accurate revenue recognition data. Follow these steps to successfully set up your configuration:
Step 1: Create accounting codes & determine the defaults.
Step 2: Determine performance obligations & accounting codes for products.
Step 3: Test and Validate.
Step 1: Create accounting codes & determining the defaults
To accurately track revenue and deferred revenue in your accounting system, it's essential to create accounting codes and map them to the correct revenue and deferred revenue accounts. Follow these steps to set up accounting codes:
1. Accessing the accounting codes
In the Recurly application, navigate to Configuration → General Ledger Accounts.
2. Creating accounting codes
On the General Ledger Accounts page, click the "New Accounting Code" button to create a new accounting code. Enter a code and description for the accounting code you wish to create.
3. Setting up the accounting code type
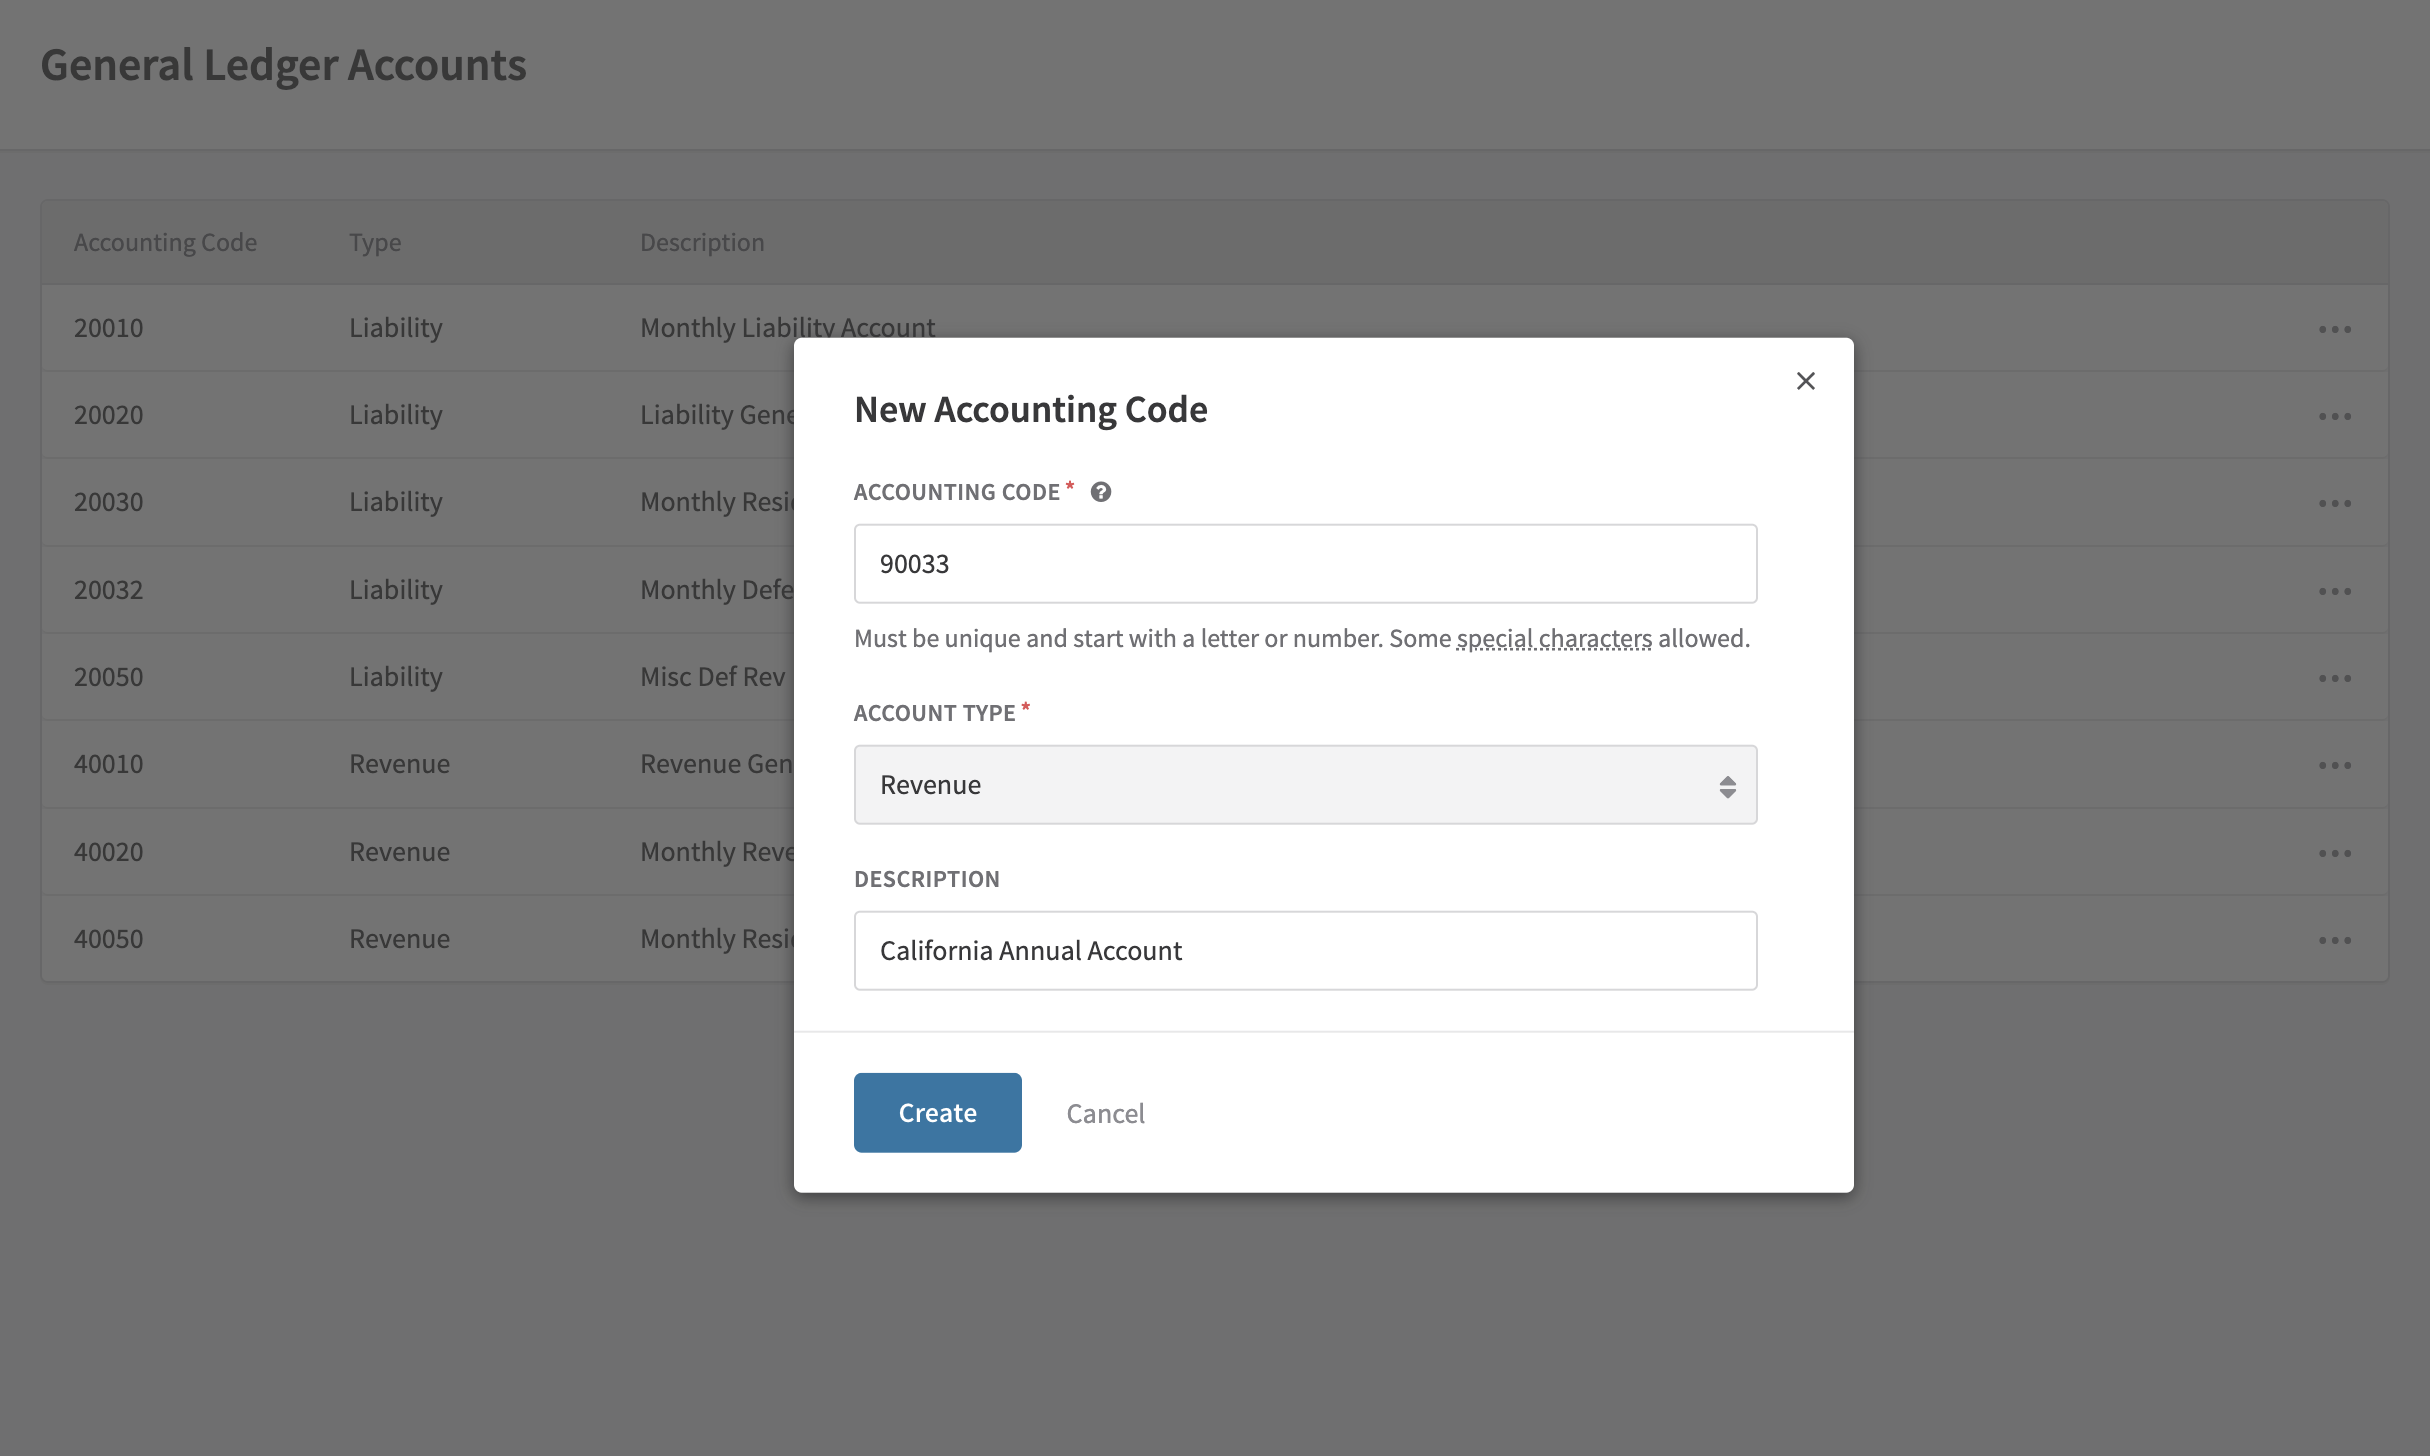
Select whether the accounting code is for Revenue or Deferred Revenue. This selection determines the type of revenue that will be tracked in your accounting system.
4. Saving the accounting code
Once you've entered the code, description, and selected the accounting code type, save the new accounting code. It will now be available to assign to performance obligations.
5. Editing accounting codes
From the Accounting Codes page, you can also edit existing accounting codes. To edit an accounting code, select the code you wish to modify, make the desired changes, and save the updated code.
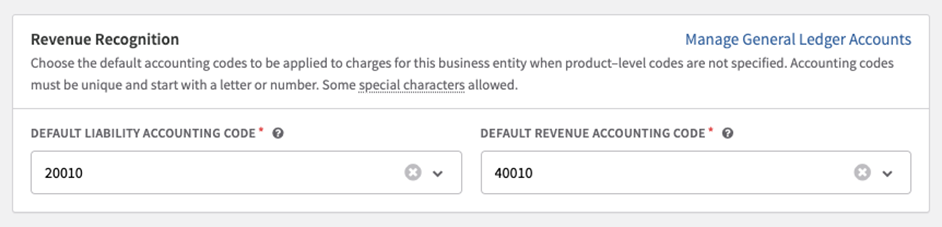
6. Determining the default account codes
On the Business entities page, select from your list of accounting codes to set the default revenue and liability account codes.
Step 2: Applying performance obligations and accounting codes to products
After setting up the accounting codes, the next step is to apply the appropriate POB and account codes to existing products - setup fees, plans, add-ons, items, gift cards, shipping, and charges, as well as any new products.
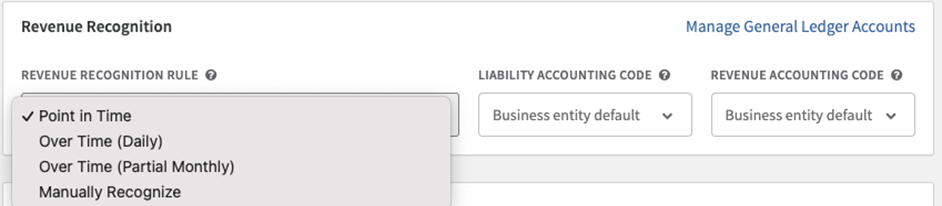
Performance obligations
To apply performance obligations to a product, go to the main page for that product and click edit. Below the field where you determine the cost, you can select the appropriate performance obligation - Point in Time, Over Time (Daily), Over Time (Partial Monthly) or Manually Recognize.
Account codes
In addition for each product, you can select the liability and revenue account codes for each field with the cost determination. Account codes are automatically set to the default accounts as defined in the business entities page. However, you have the flexibility to change these account codes on all individual product pages as needed to align with your specific requirements and apply the desired codes to any new products.
Step 3: Testing and validating
After setting up the initial configuration and applying performance obligations and accounting codes to your products, it is crucial to test and validate the revenue recognition process. See here for our validation process.
Updated 16 days ago