
User traits
This article explains how to import, configure, and manage custom user traits in Recurly Engage to extend targeting beyond default behavior metrics.
Prerequisites
This feature or setting is available to all customers on any Recurly Engage subscription plan.
Definition
Key benefits
- Richer personalization: Leverage lifetime value, plan type, NPS, or any business metric in your prompts.
- Seamless sync: Encrypted CSV ingestion with AWS S3 credentials for secure, automated uploads.
- Flexible integrations: Activate push notifications and connector‑based traits for services like Stripe, Salesforce, SendGrid, and Zendesk.
Key details
-
CSV format: First column must be
user_id, additional columns become traits. -
Trait types: Number, string, boolean, date with corresponding display options (slider, multi‑select, date range).
-
Push endpoints: Import device tokens via CSV or Device Registration API.
-
3rd‑party requirements: Specific ID or email columns needed for connectors (e.g.,
stripe_id,email_address).
You can import additional user traits into Recurly Engage to give you greater ability to target users based on characteristics beyond site/app usage. Typical examples are lifetime value, customer satisfaction score, subscription start date, renewal date etc. User traits can be added via a CSV file. This file will be stored, encrypted, on a secured S3 bucket and will be ingested within a few hours of uploading. Each column will be mapped into a Recurly Engage user trait.
You can also export your CSV data from Looker.
Formatting the CSV file
Here is an example of what your CSV file should look like. The first column must beuser_id, all other columns can be utilized to specify user traits. There are no limits on columns but please keep in mind this can significantly impact load and sync times.
user_id,ltv,channel,signup_date,nps,plan_type,payment_failed
789129,150,adwords,2011-08-12,8,monthly,false
322321,0,blog,2014-09-18,7,trial,false
900194,100,homepage,2018-04-01,9,annual,true
3rd Party Integrations
Note: To activate third‑party connectors like Stripe, Salesforce, and others the following columns are required:
- Salesforce:
salesforce_id(the id of the Salesforce contact) ORemail_address - SendGrid:
email_address - Stripe:
stripe_id(the id of the Stripe customer) ORemail_address - Zendesk:
zendesk_id(the id of the Zendesk user) ORemail_address
Push Notifications
To activate push notifications, the following columns are required:
Id: the id of the device (aka endpoint)ChannelType: the push channel of this endpoint. Allowed values:FCM,ADM,APNSAddress: The device tokenUser.UserId: the id of the user. This should be the same id that Recurly Engage uses
This CSV can be used as a one‑time initial load of endpoint information. To keep this information updated, you may:
- Upload an updated CSV periodically into your S3 bucket from Recurly Engage OR
- Call the Device Registration API with the device token from your client application
Upload the file to AWS
After creating your CSV file you will need to upload it to your secure area on Amazon S3. In this step we will retrieve the credentials to allow you to upload the file.
-
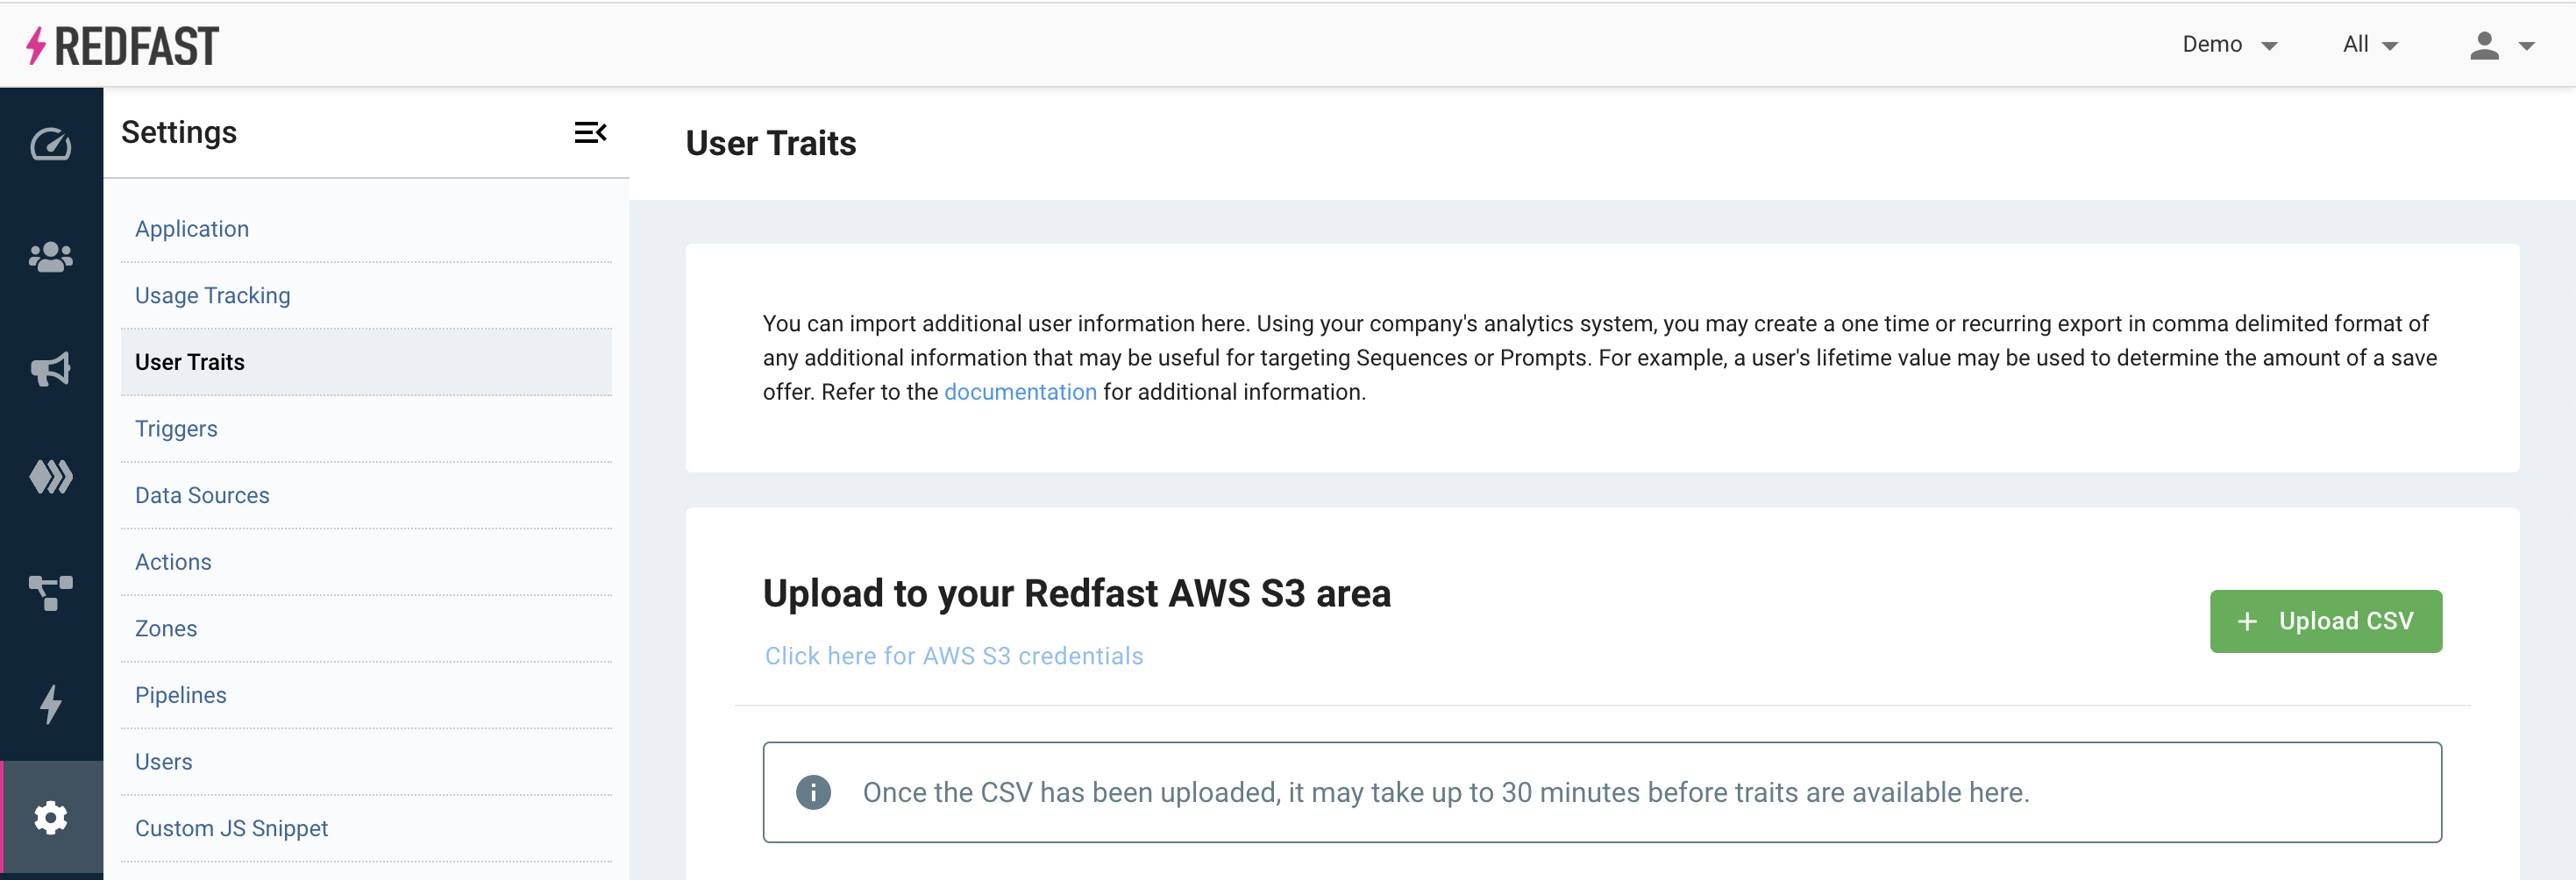
Go to Settings > User Traits
-
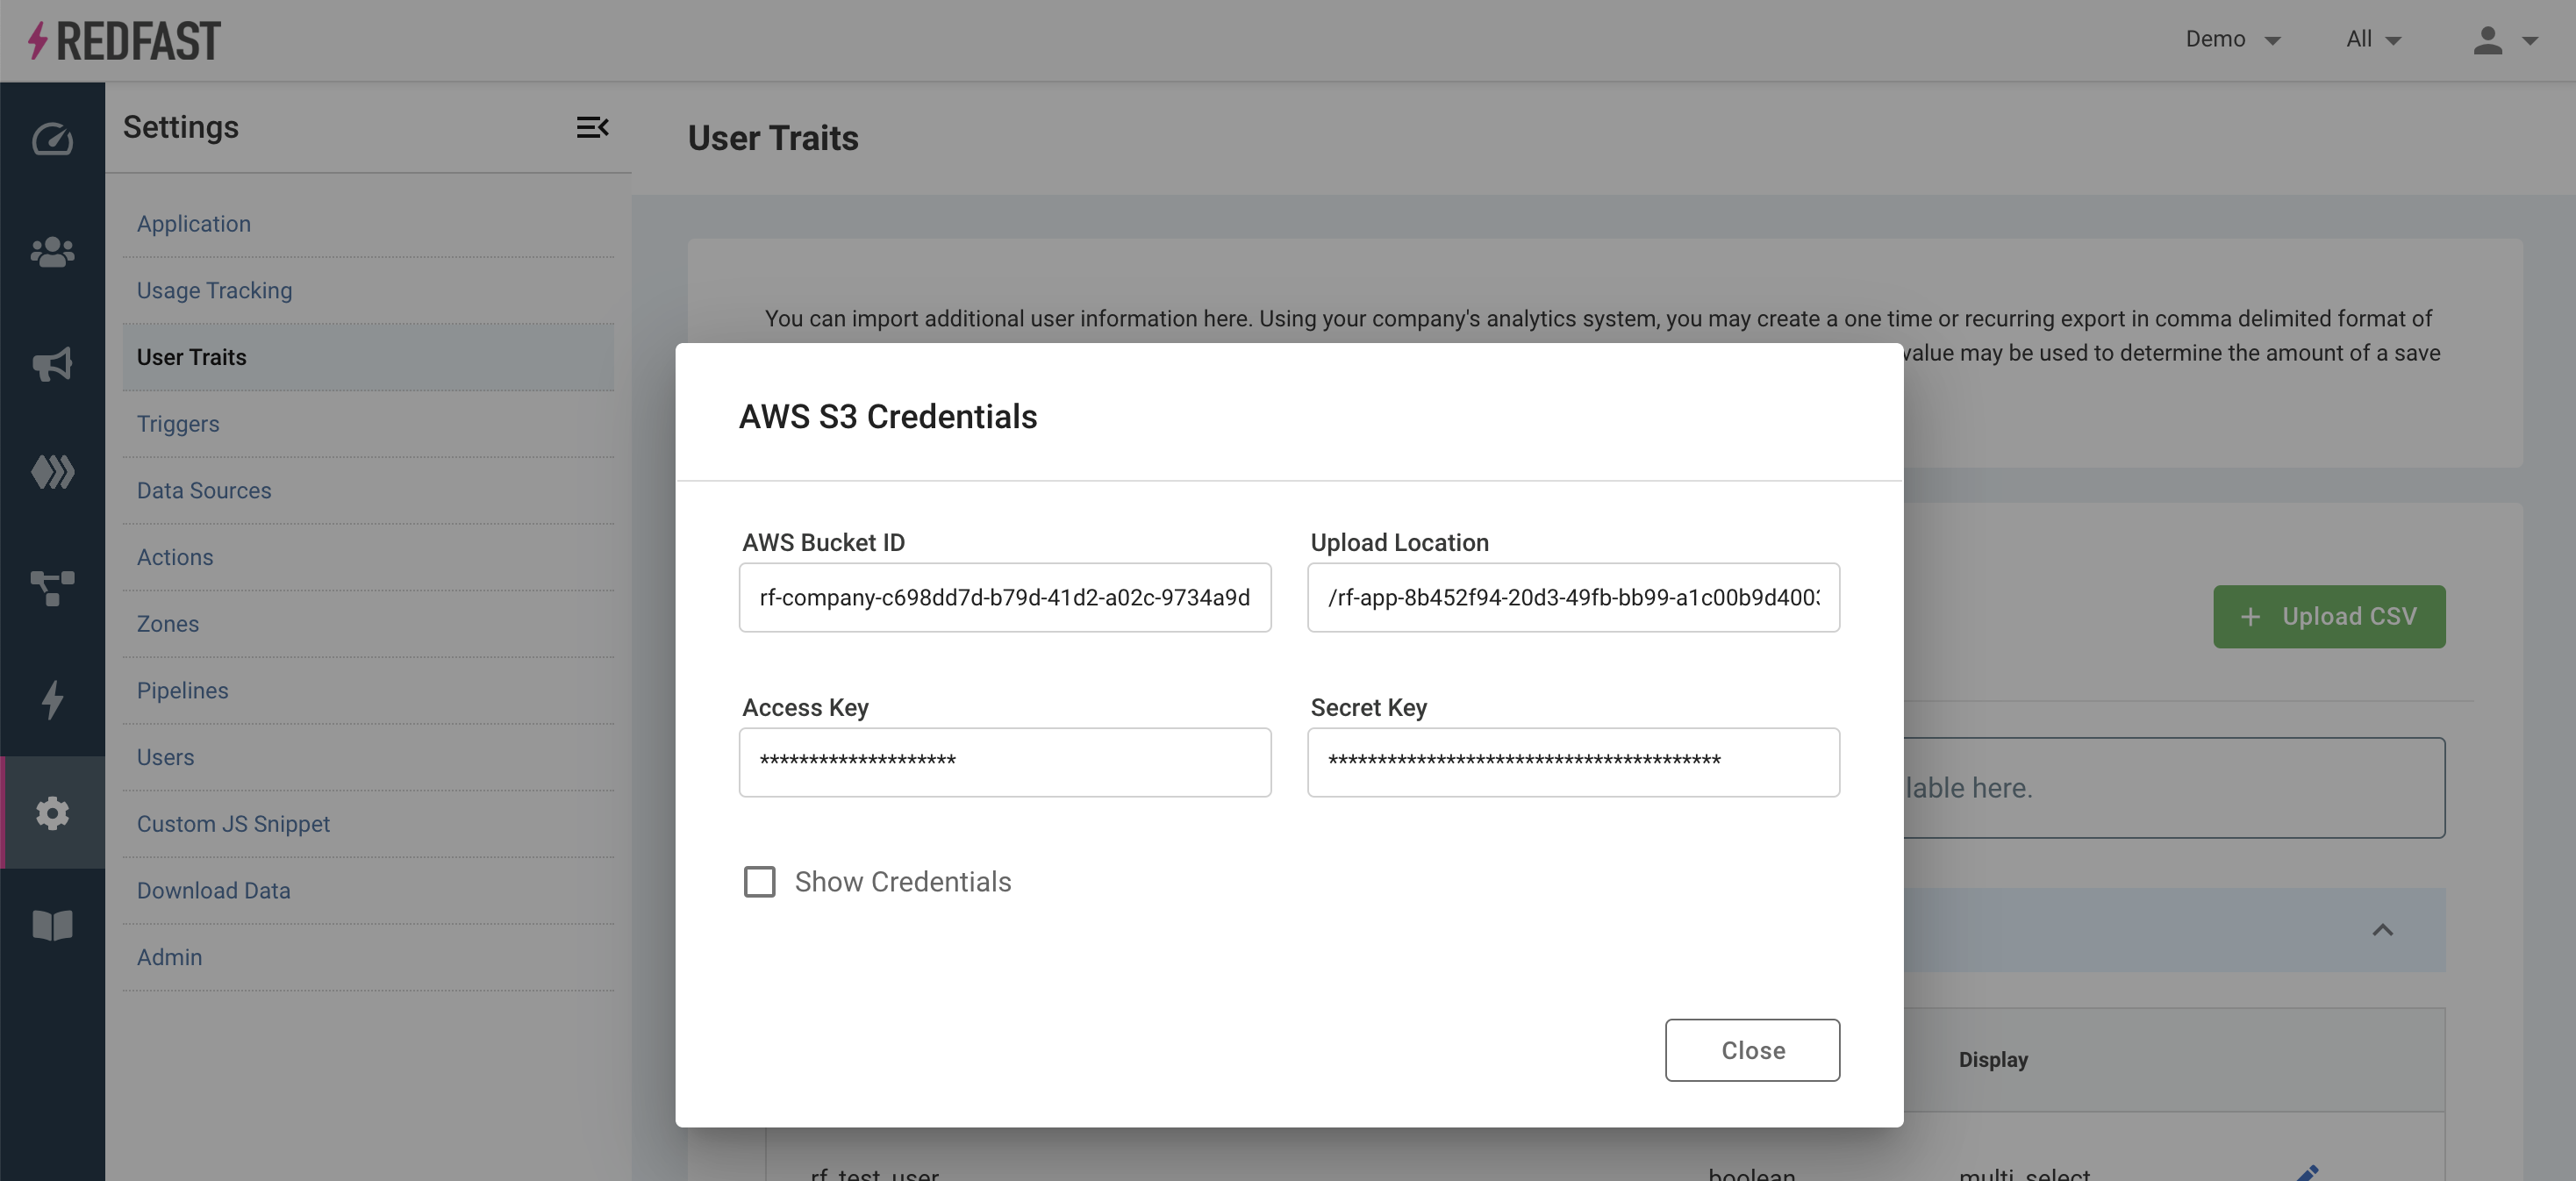
Select "Click here for AWS S3 credentials"
-
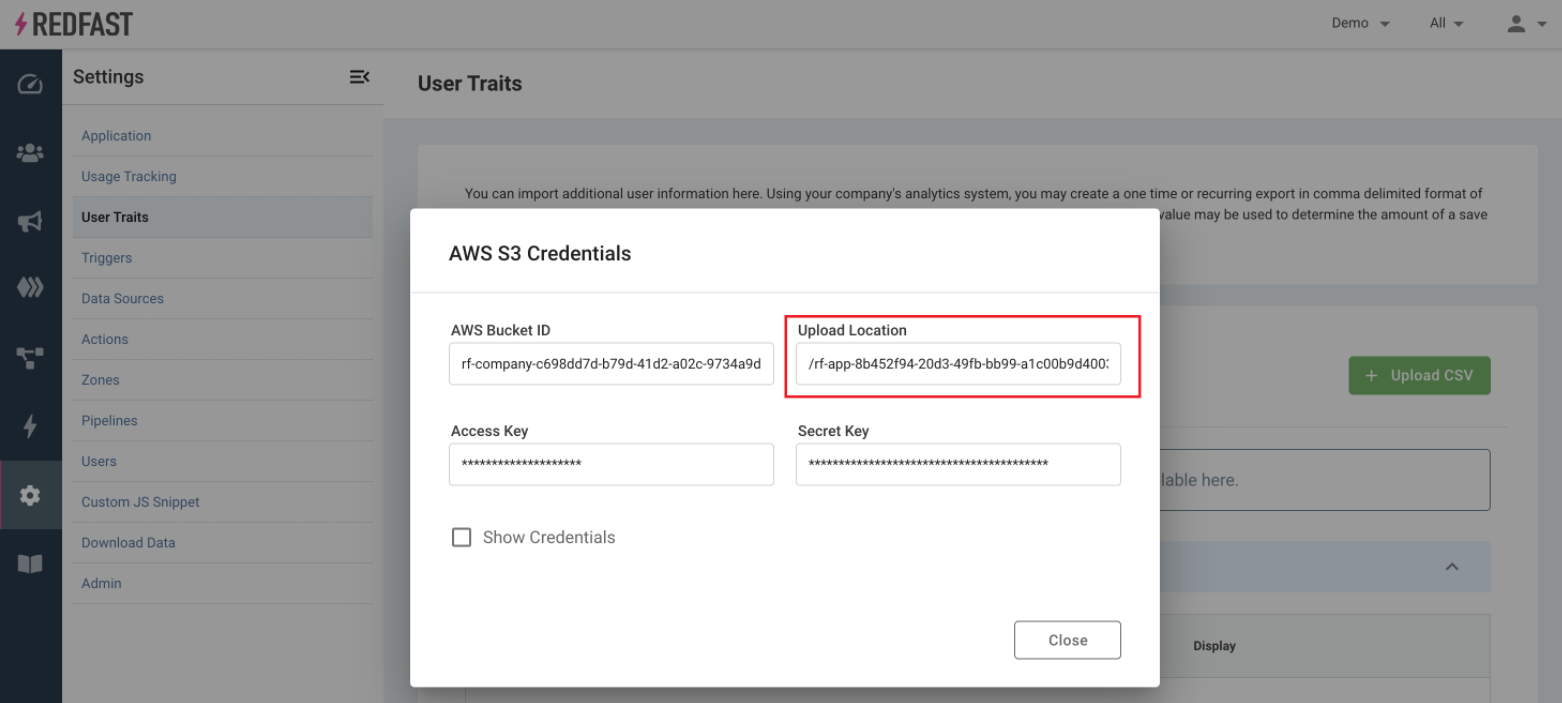
Check the Show Credentials box to view your credentials. You will need to use the AWS Bucket, Access Key and Secret Key to login and securely upload via AWS. Keep this information handy, you will need it to upload the CSV.
-
If you are automating a file transmission to the S3 bucket, use the above credentials with the AWS SDK or CLI (link). Otherwise, the following steps describe how to manually upload a CSV file.
-
Download Cyberduck. Cyberduck is a client that you can connect to AWS with. Otherwise the next steps describe how to use a free S3 client to upload the CSV file.
-
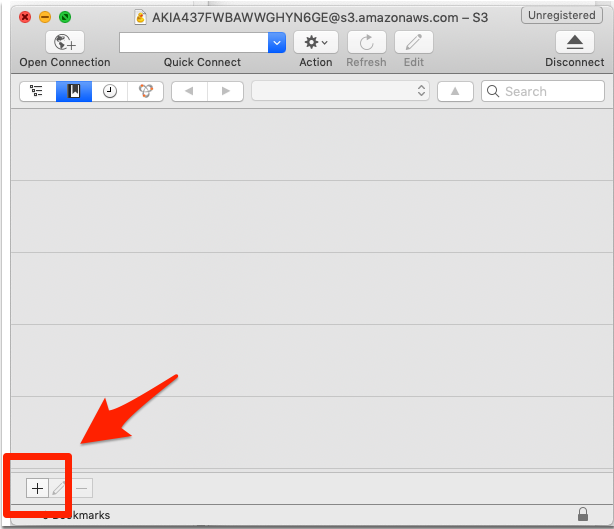
Click the plus sign to add a new connection
-
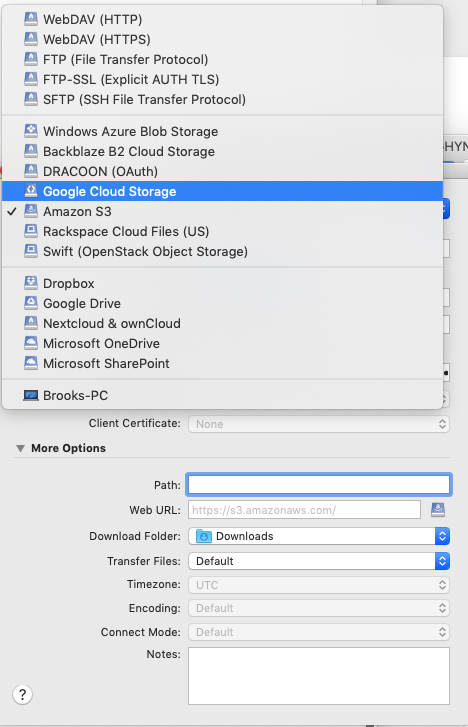
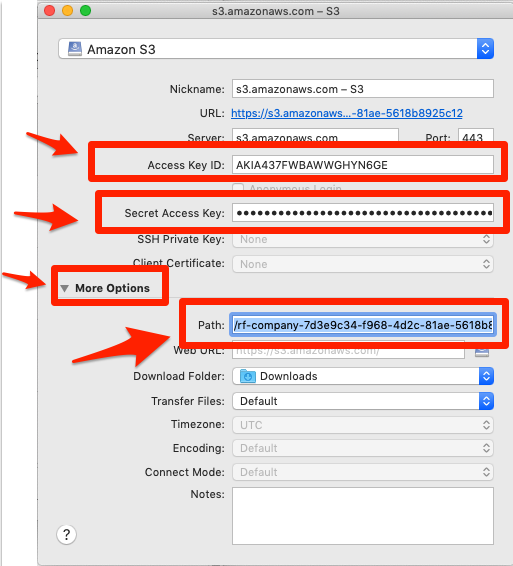
Select Amazon S3 from the dropdown list
-
Type in your credentials. Then click More Options and type in your AWS Bucket in the Path field with the "/" in front of it (see the screenshot for reference)
-
Locate Upload Location which gives you the location where you should put your CSV.
-
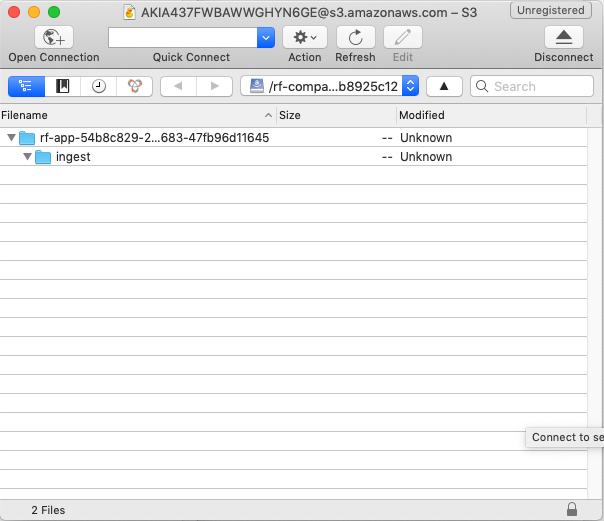
Drag and drop your CSV file to the ingest folder, using the information from above. Within 3 hours your data will be fully ingested. You should receive an email once you’re done.
Customizing User Traits
After importing the CSV successfully you will need to configure the new user traits before you can use them in your Segments.
-
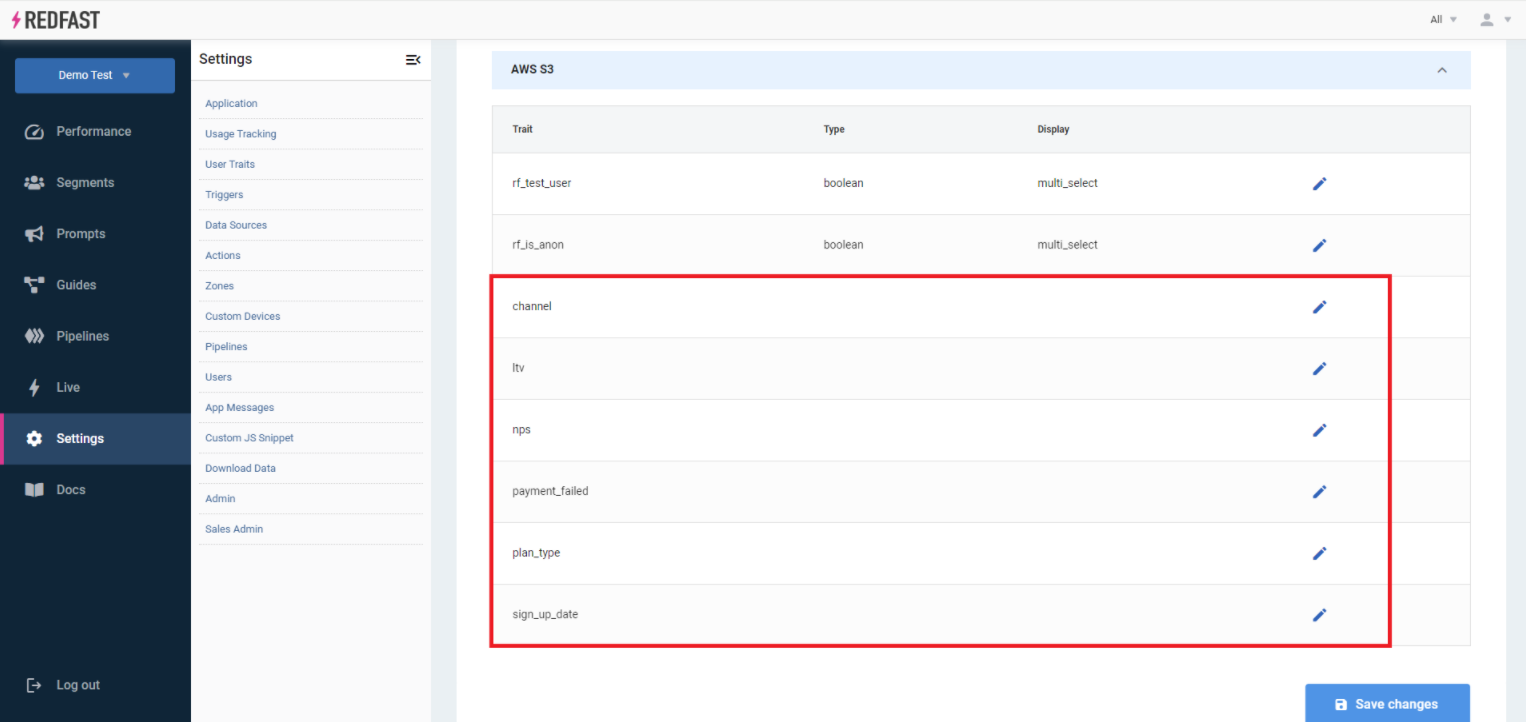
Go to Settings > User Traits, you should now see all imported columns
-
Now go through each trait to update the type, display and description (optional) by clicking on the Edit (pencil) icon
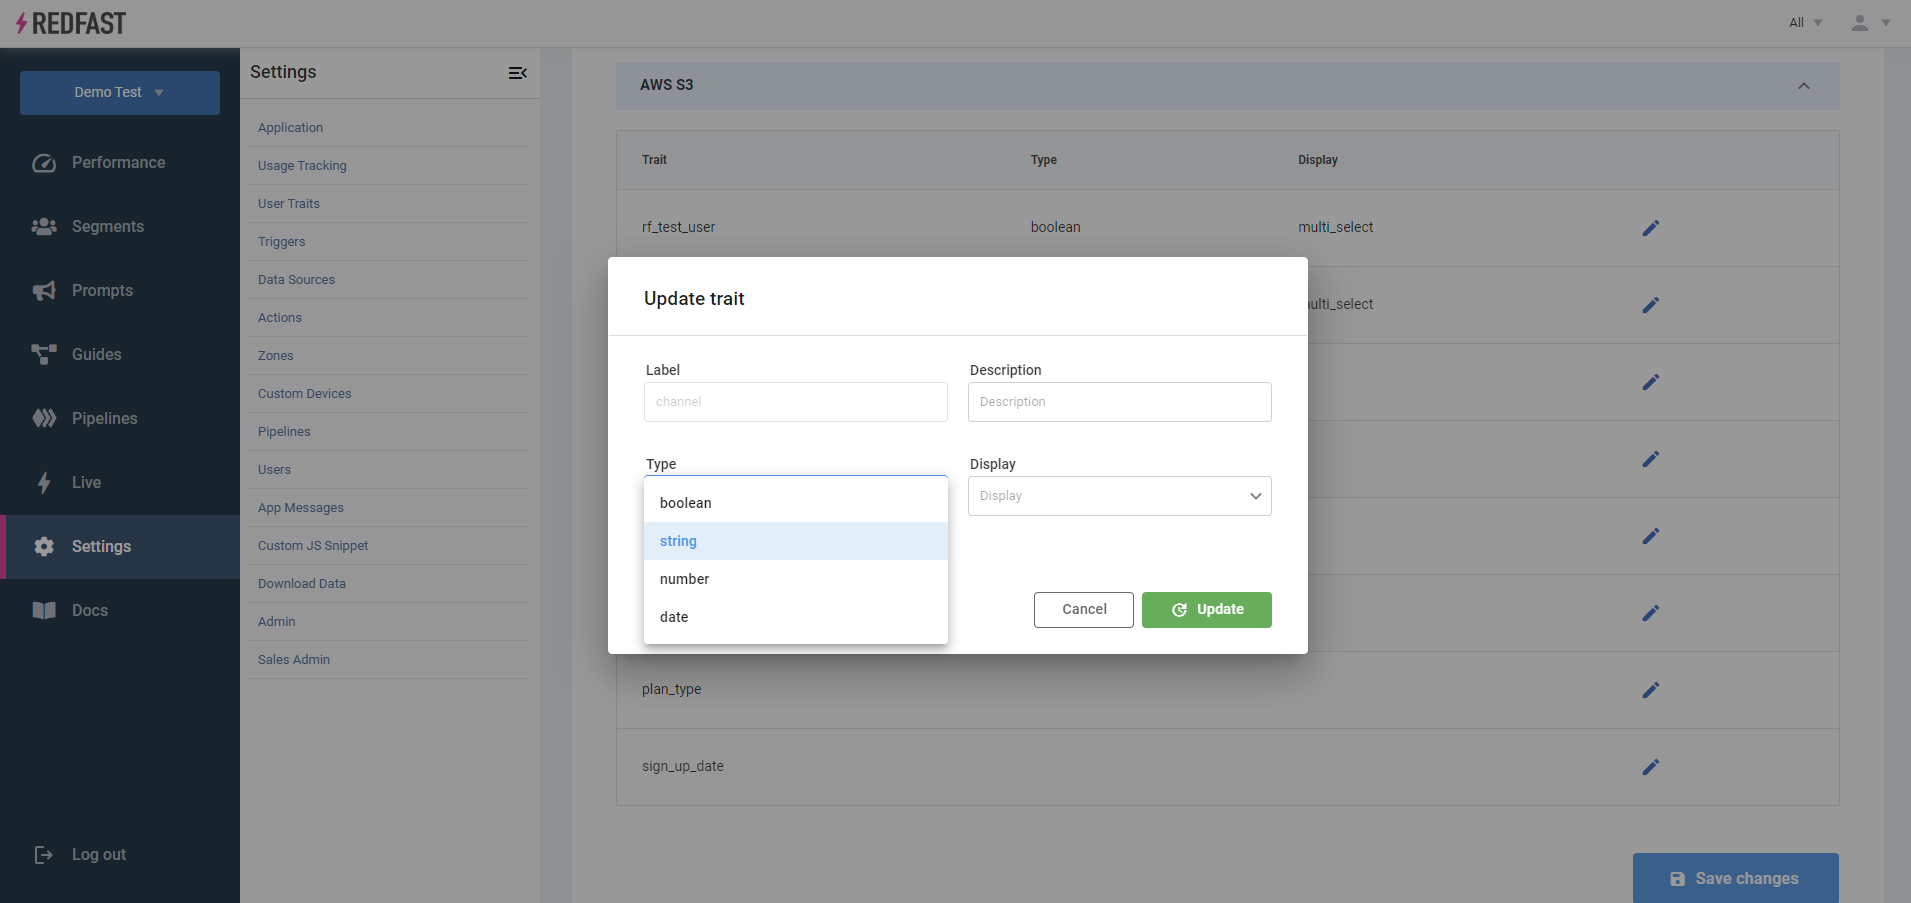
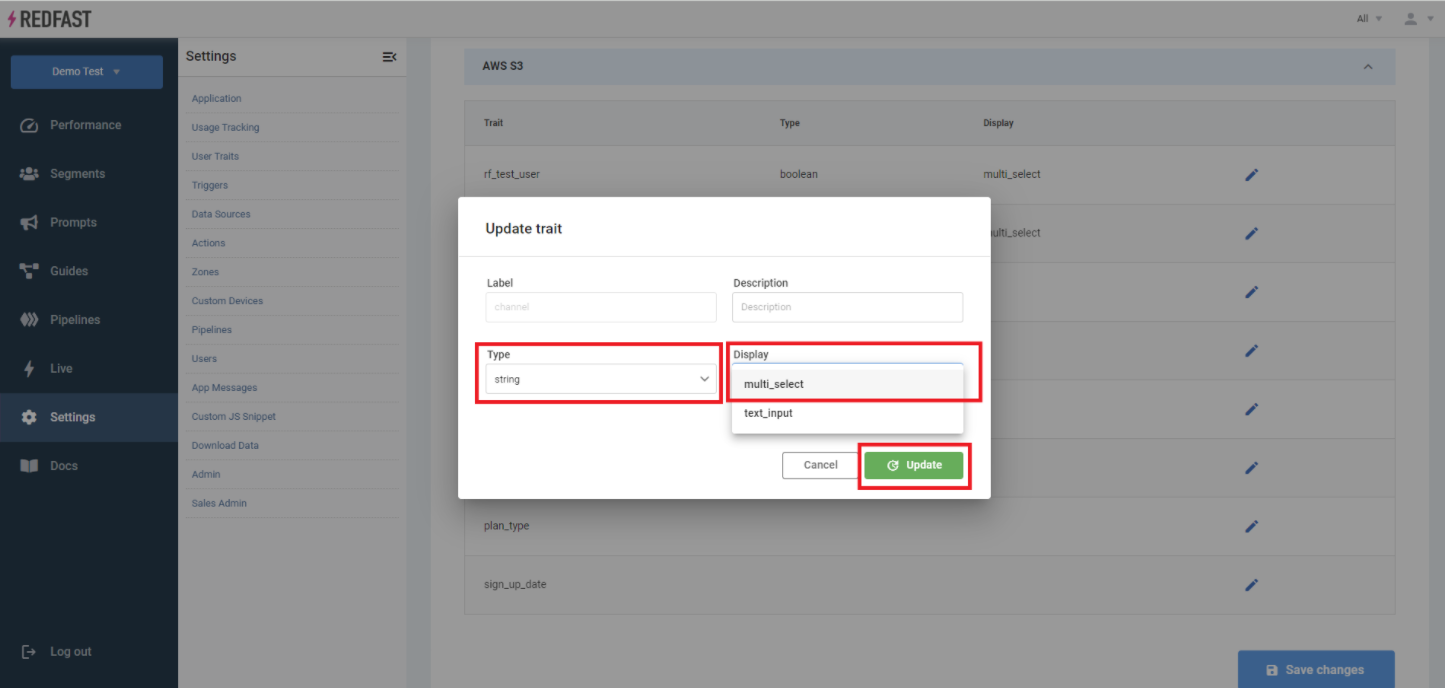
This may seem intimidating at first but let’s take a look at the original CSV to see what the values should be:
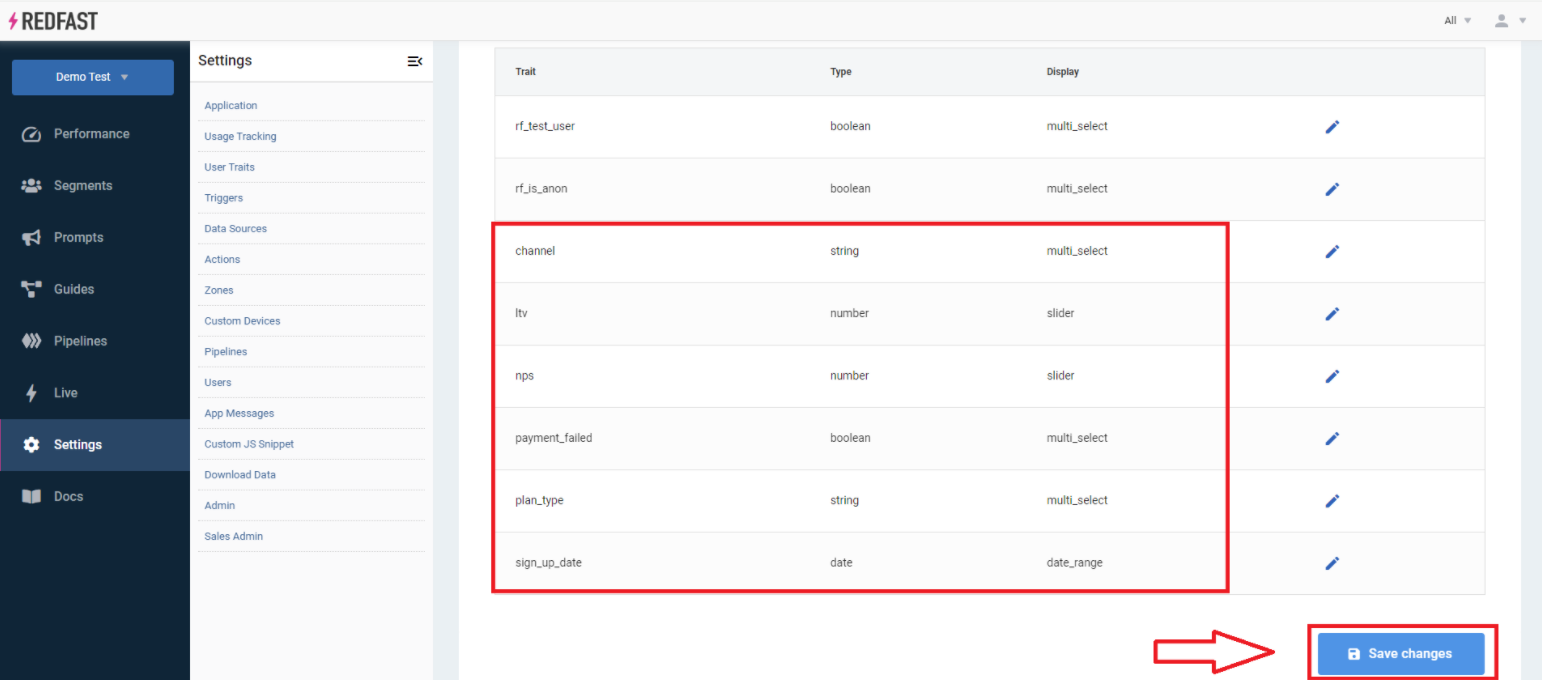
user_id,ltv,channel,signup_date,nps,plan_type,payment_failed 789129,150,adwords,2011-08-12,8,monthly,false 322321,0,blog,2014-09-18,7,trial,false 900194,100,homepage,2018-04-01,9,annual,true- ltv – number
- channel – string
- signup_date – date
- nps – number
- plan_type – string
- payment_failed – boolean
Now that we know the types, selecting the display is easy. Here are some guidelines for display options:
- numbers – slider (unless it refers to an ID such as
zendesk_id, then multi‑select) - string – multi‑select
- boolean – multi‑select
- date – date_range
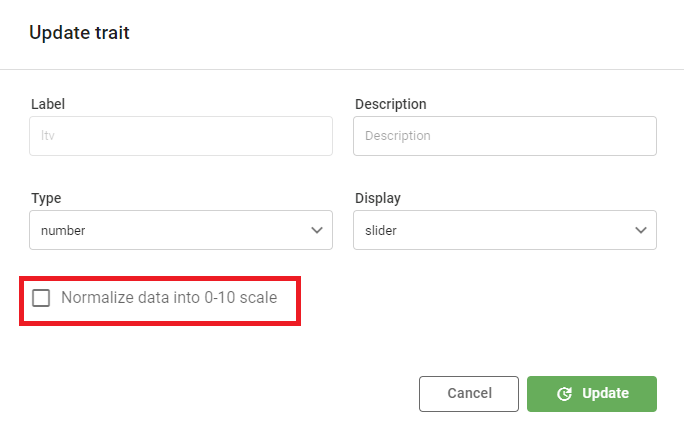
Note: For the slider display type there is a Normalize to 0–10 checkbox. You can check this box and it will allow you to target percentiles rather than the exact number (e.g. top 20% LTV users).
-
Now when you create or edit a segment you can filter based on these user traits.

Updated 3 days ago