
Google tag manager
Step-by-step instructions for deploying the Recurly Engage client SDK via Google Tag Manager.
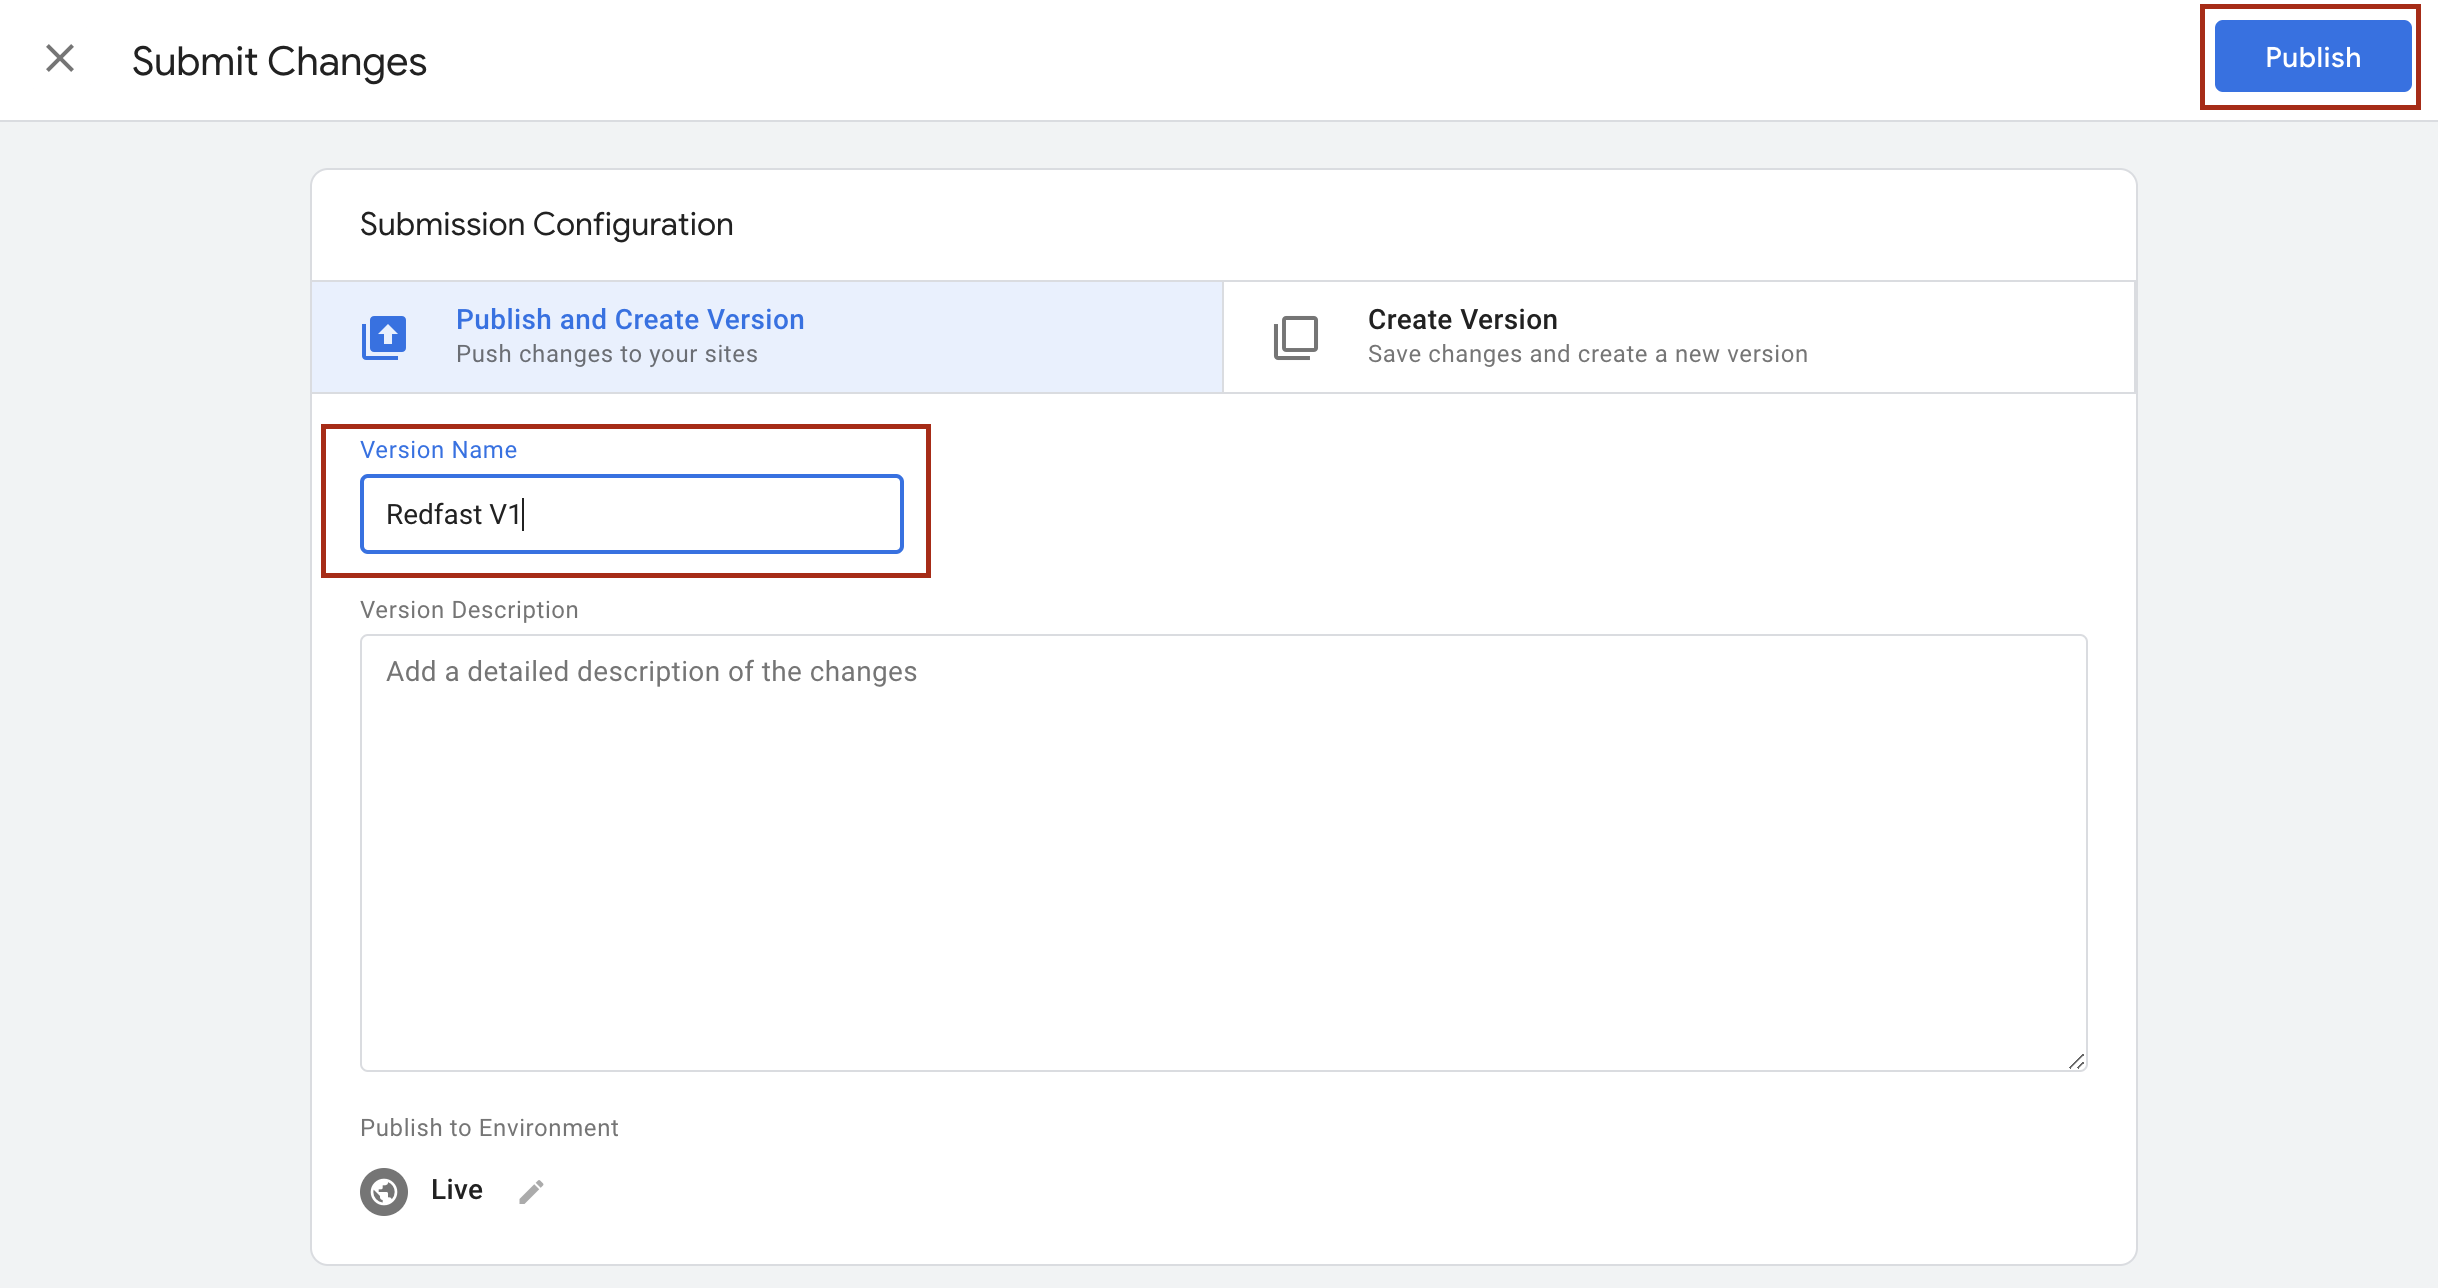
Install the Recurly Engage SDK across your site using a custom Google Tag Manager template — no manual code edits required. This guide walks you through adding the tag, connecting your Application ID, and publishing your container.
Available to all customers on any Recurly Engage subscription plan
Prerequisites
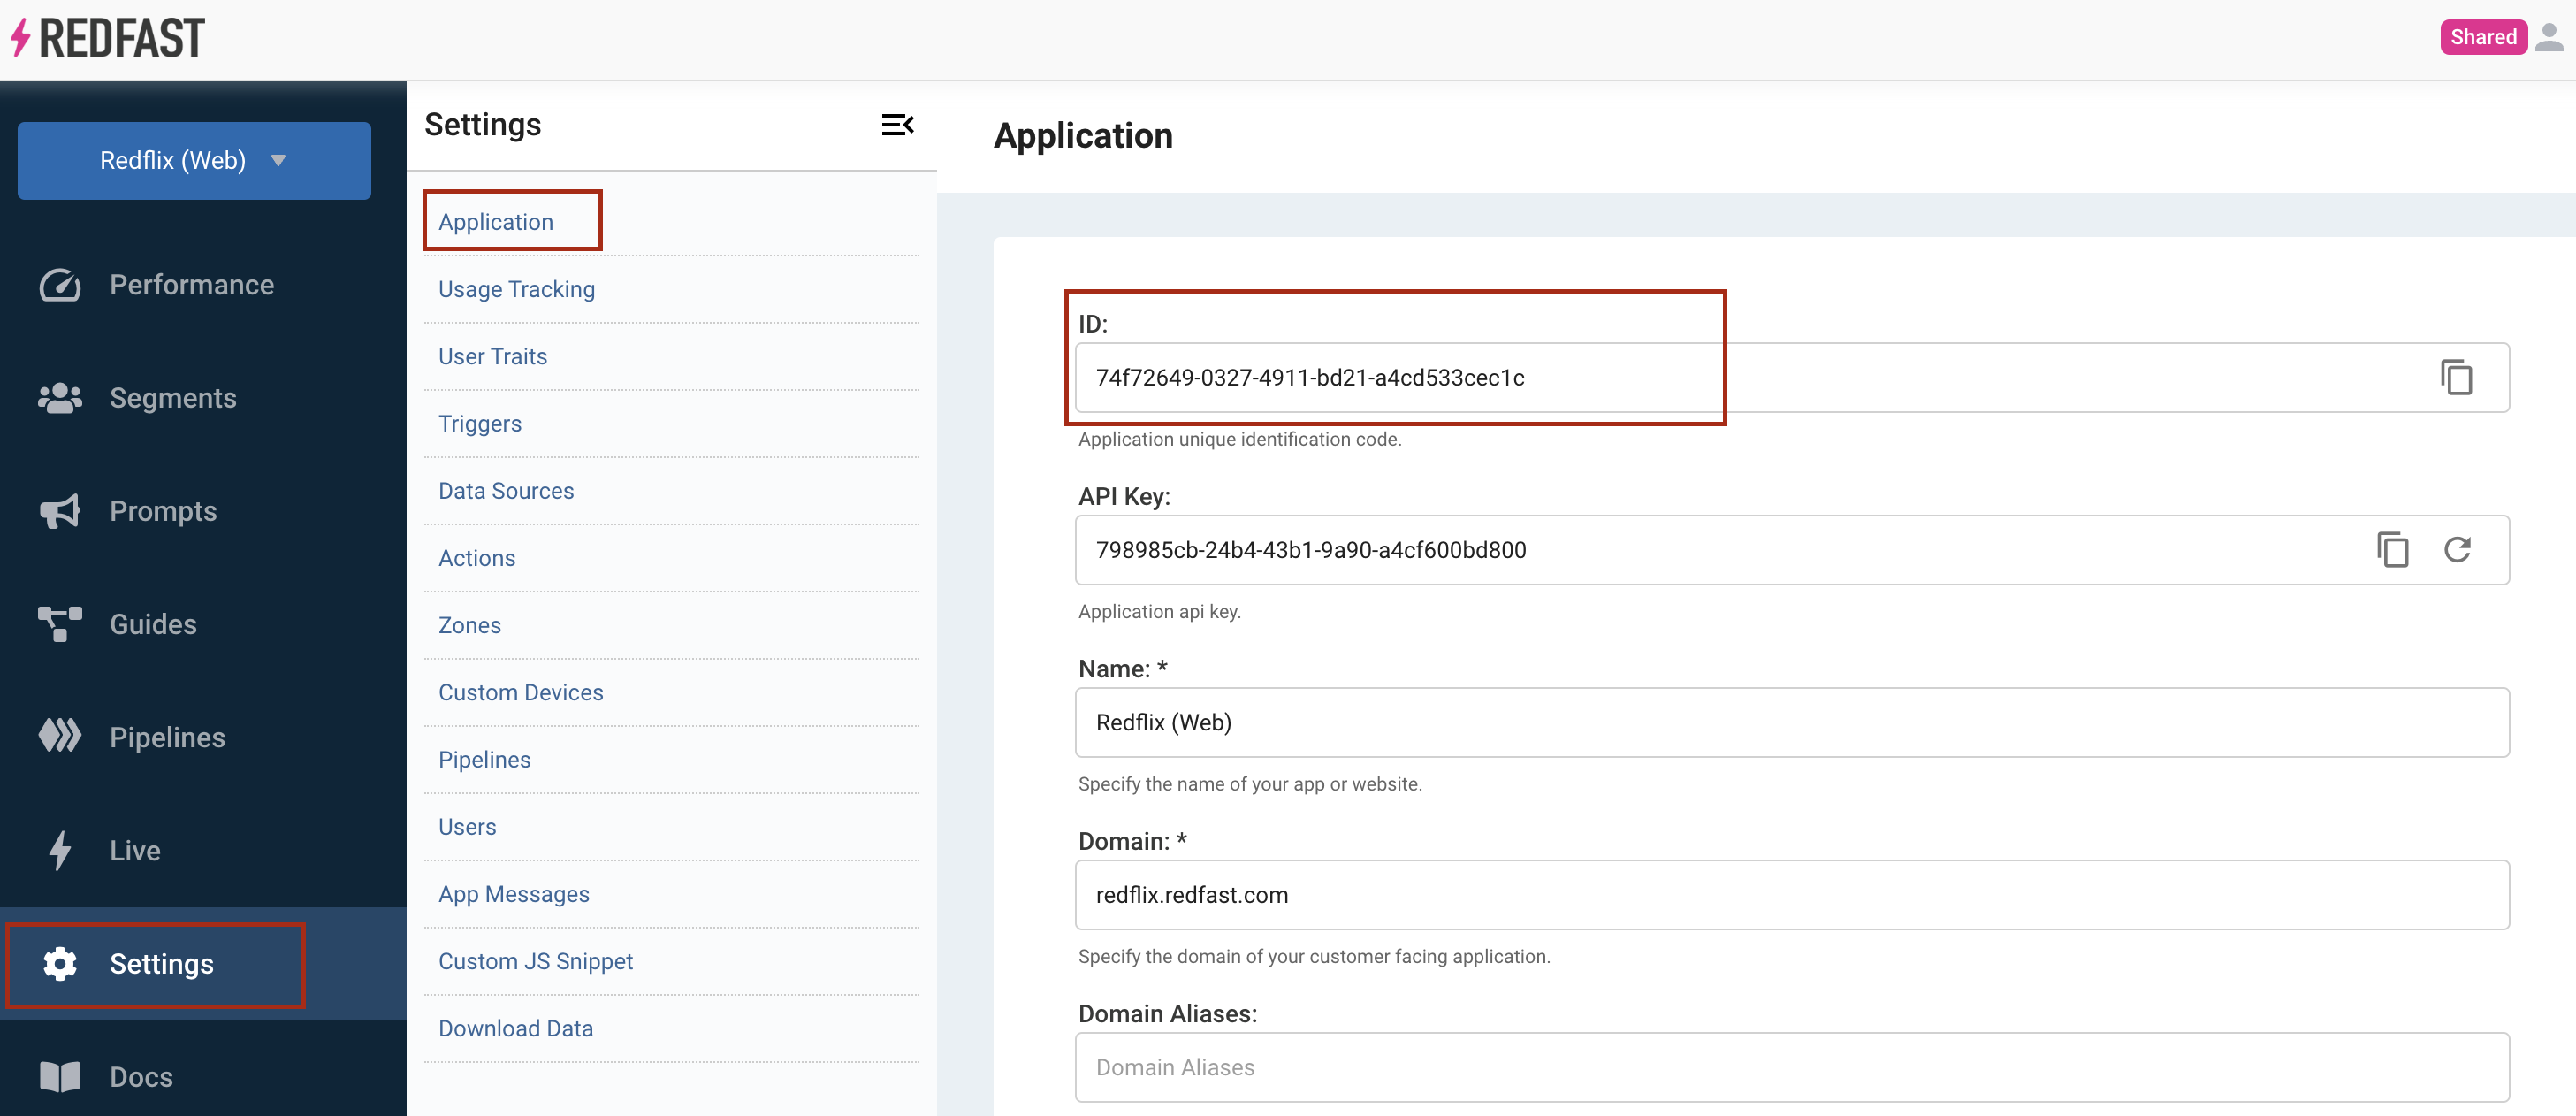
- You must have already created a Recurly Engage application and have its Application ID on hand.
Limitations
- You need publish permissions in the GTM container for your site.
Definition
The Google Tag Manager integration uses a custom GTM template to inject the Recurly Engage SDK onto every page you specify, enabling tracking and branded checkout across your site.
NoteFind the official template in the Google Tag Manager Gallery.
Key benefits
One-click setup
Install the SDK entirely within GTM — no manual code edits.
Centralized management
Control SDK triggers and updates from a single GTM interface.
Instant rollouts
Publish changes immediately, without redeploying your site.
Key details
Guide
1
Log in to Google Tag Manager
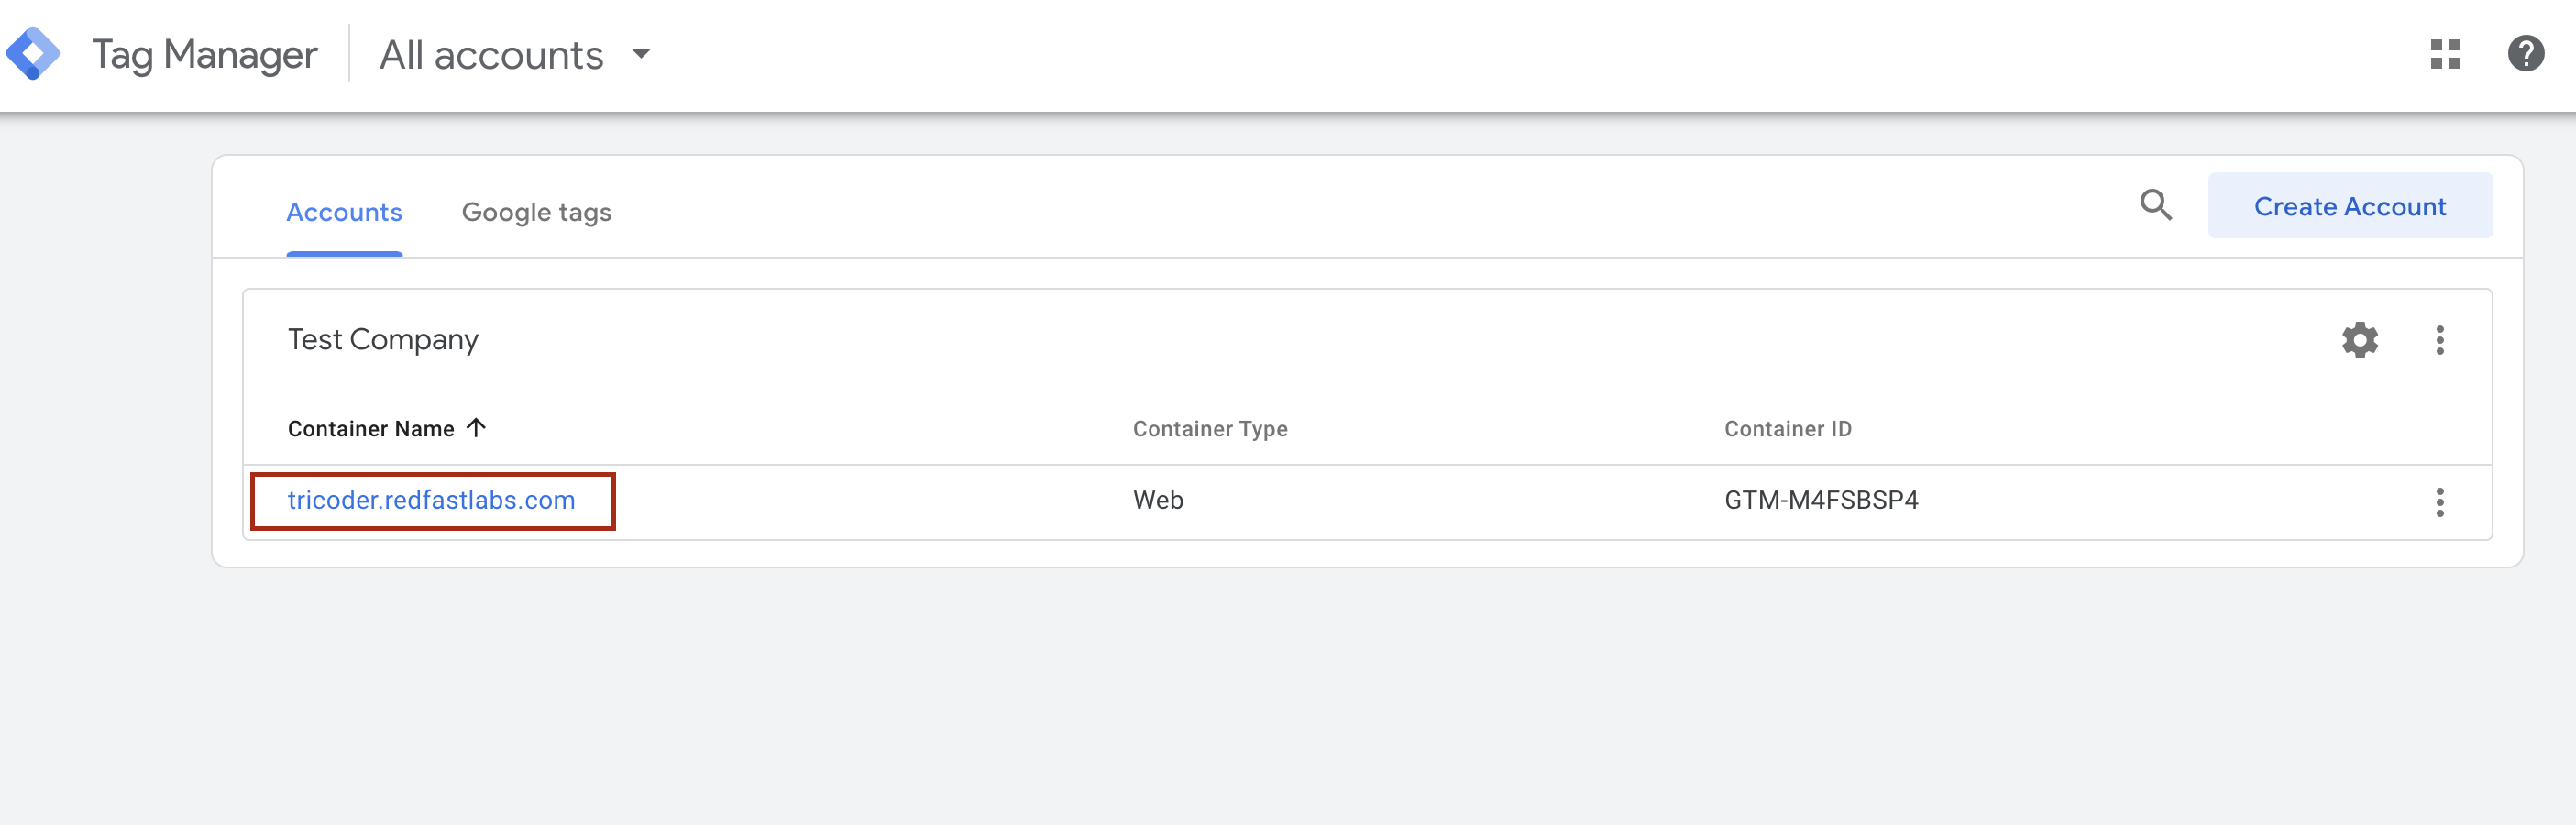
Visit GTM and open the container for your application.
2
Select your container
Make sure it matches the domain you registered during app setup.
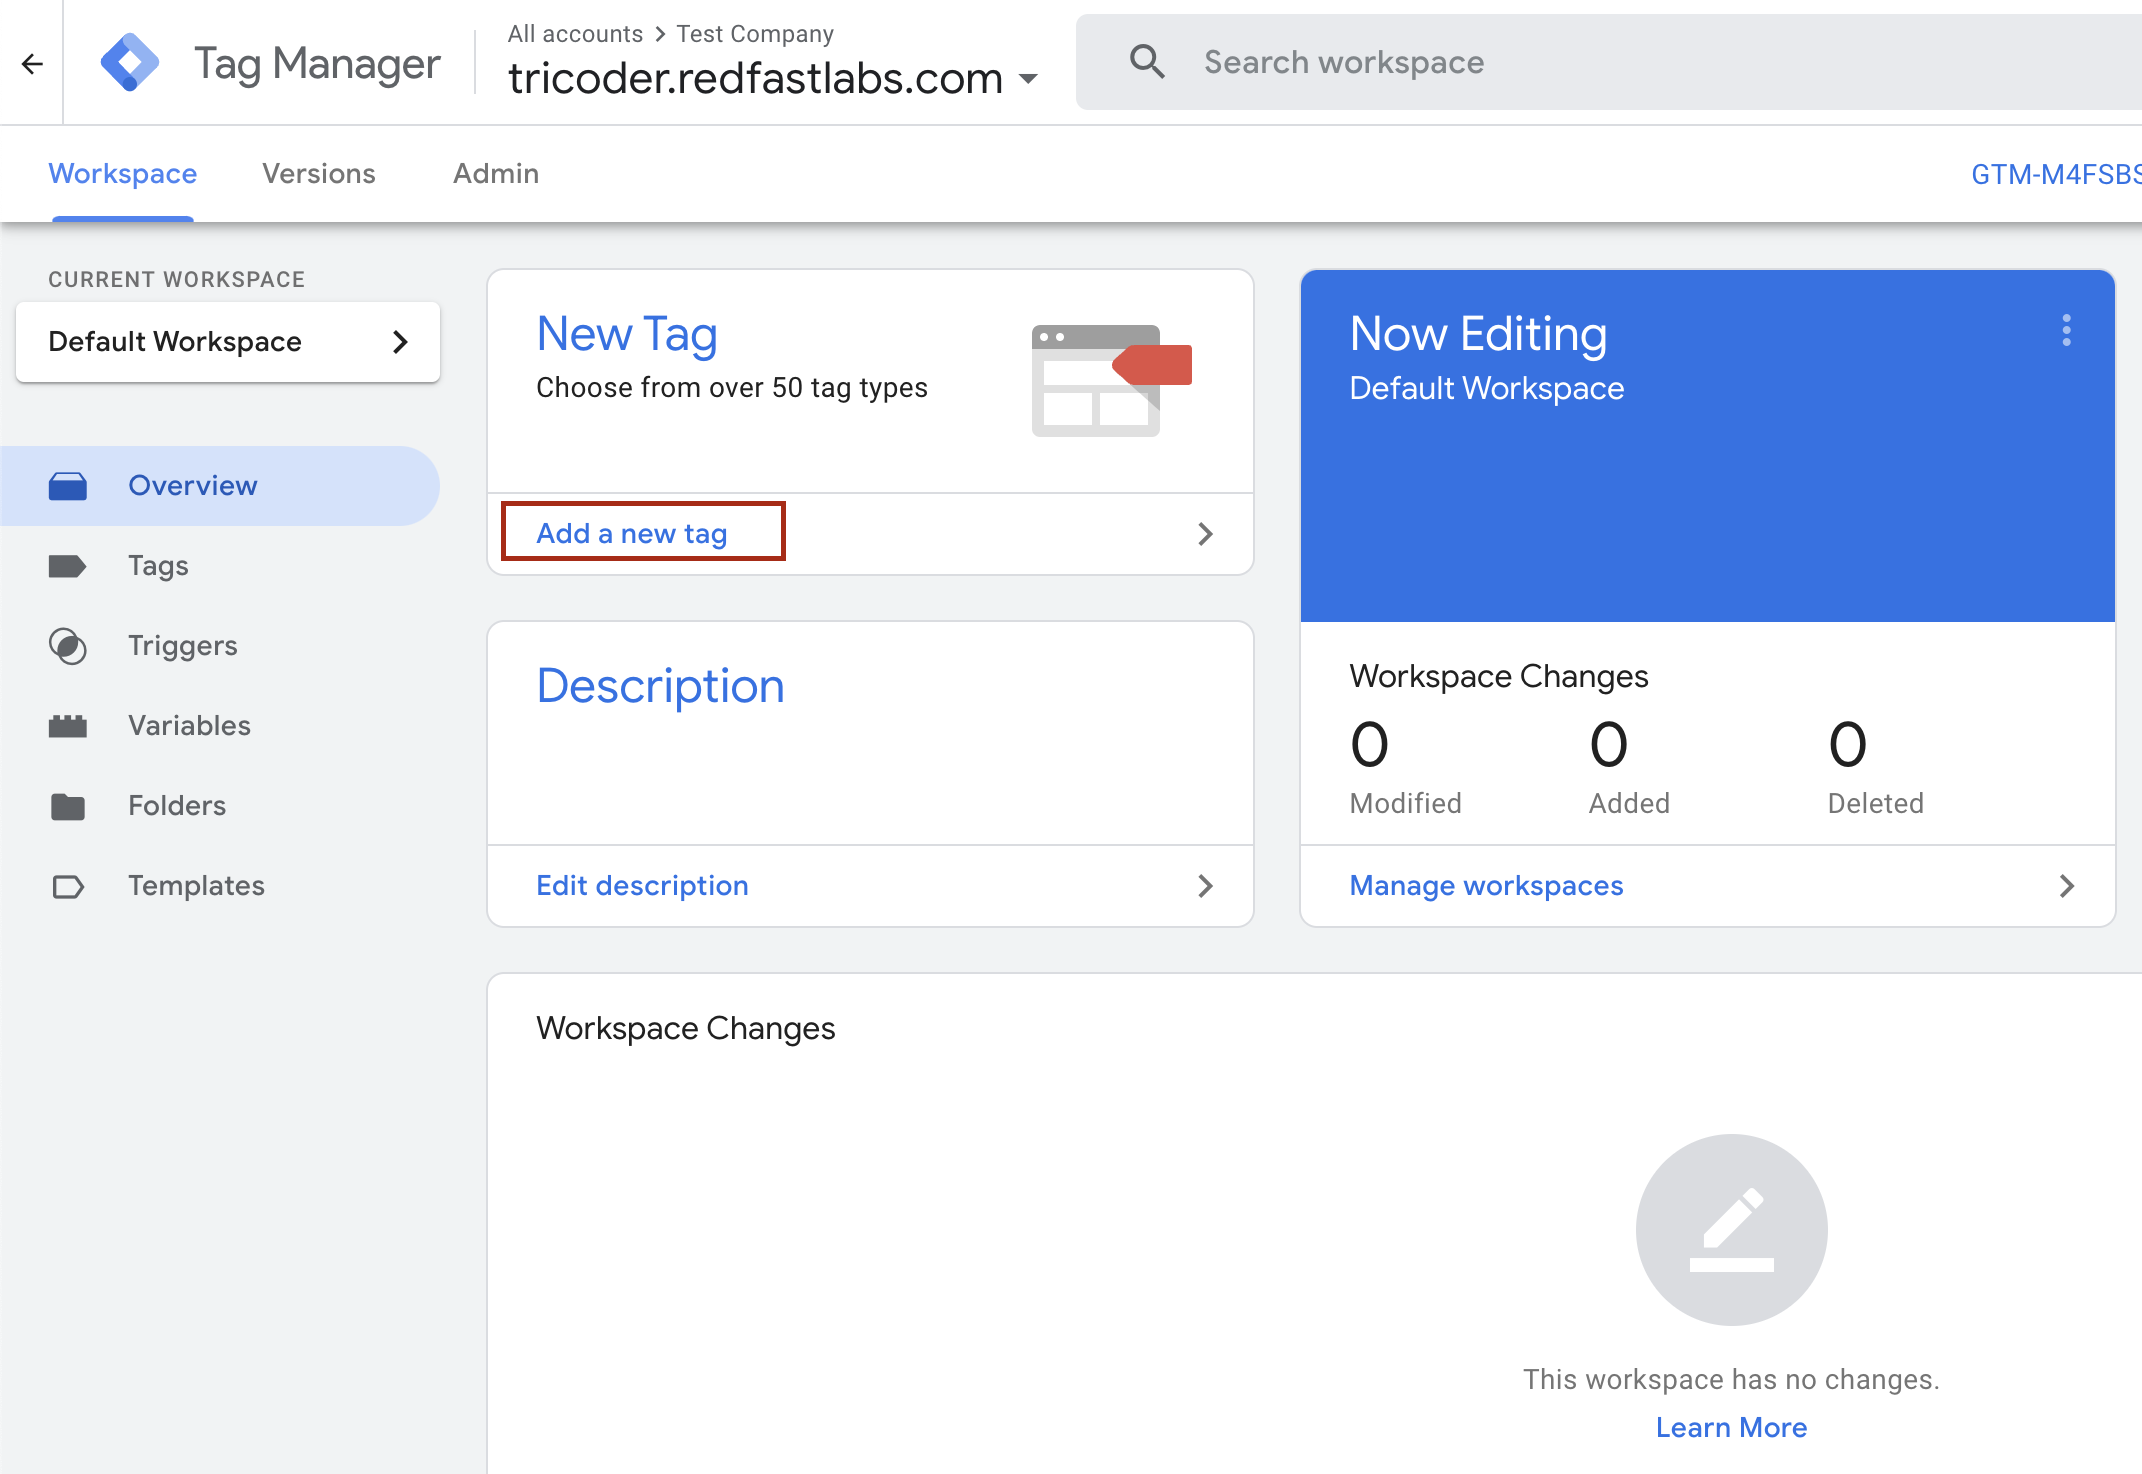
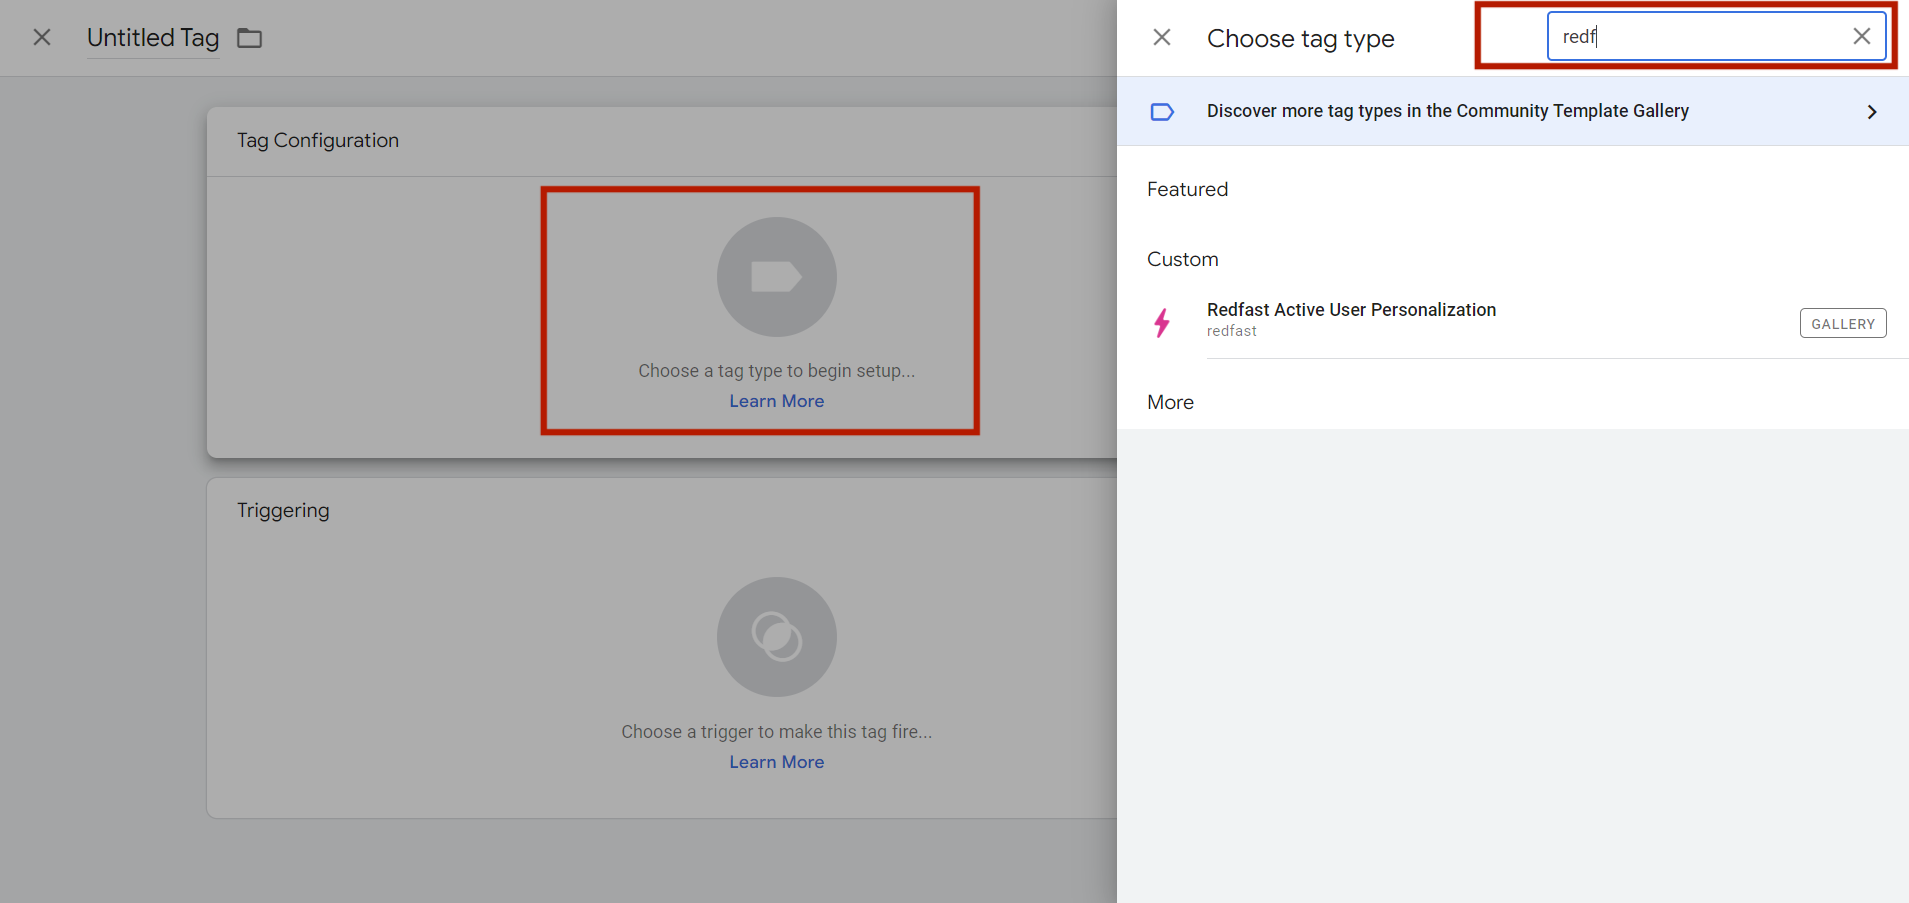
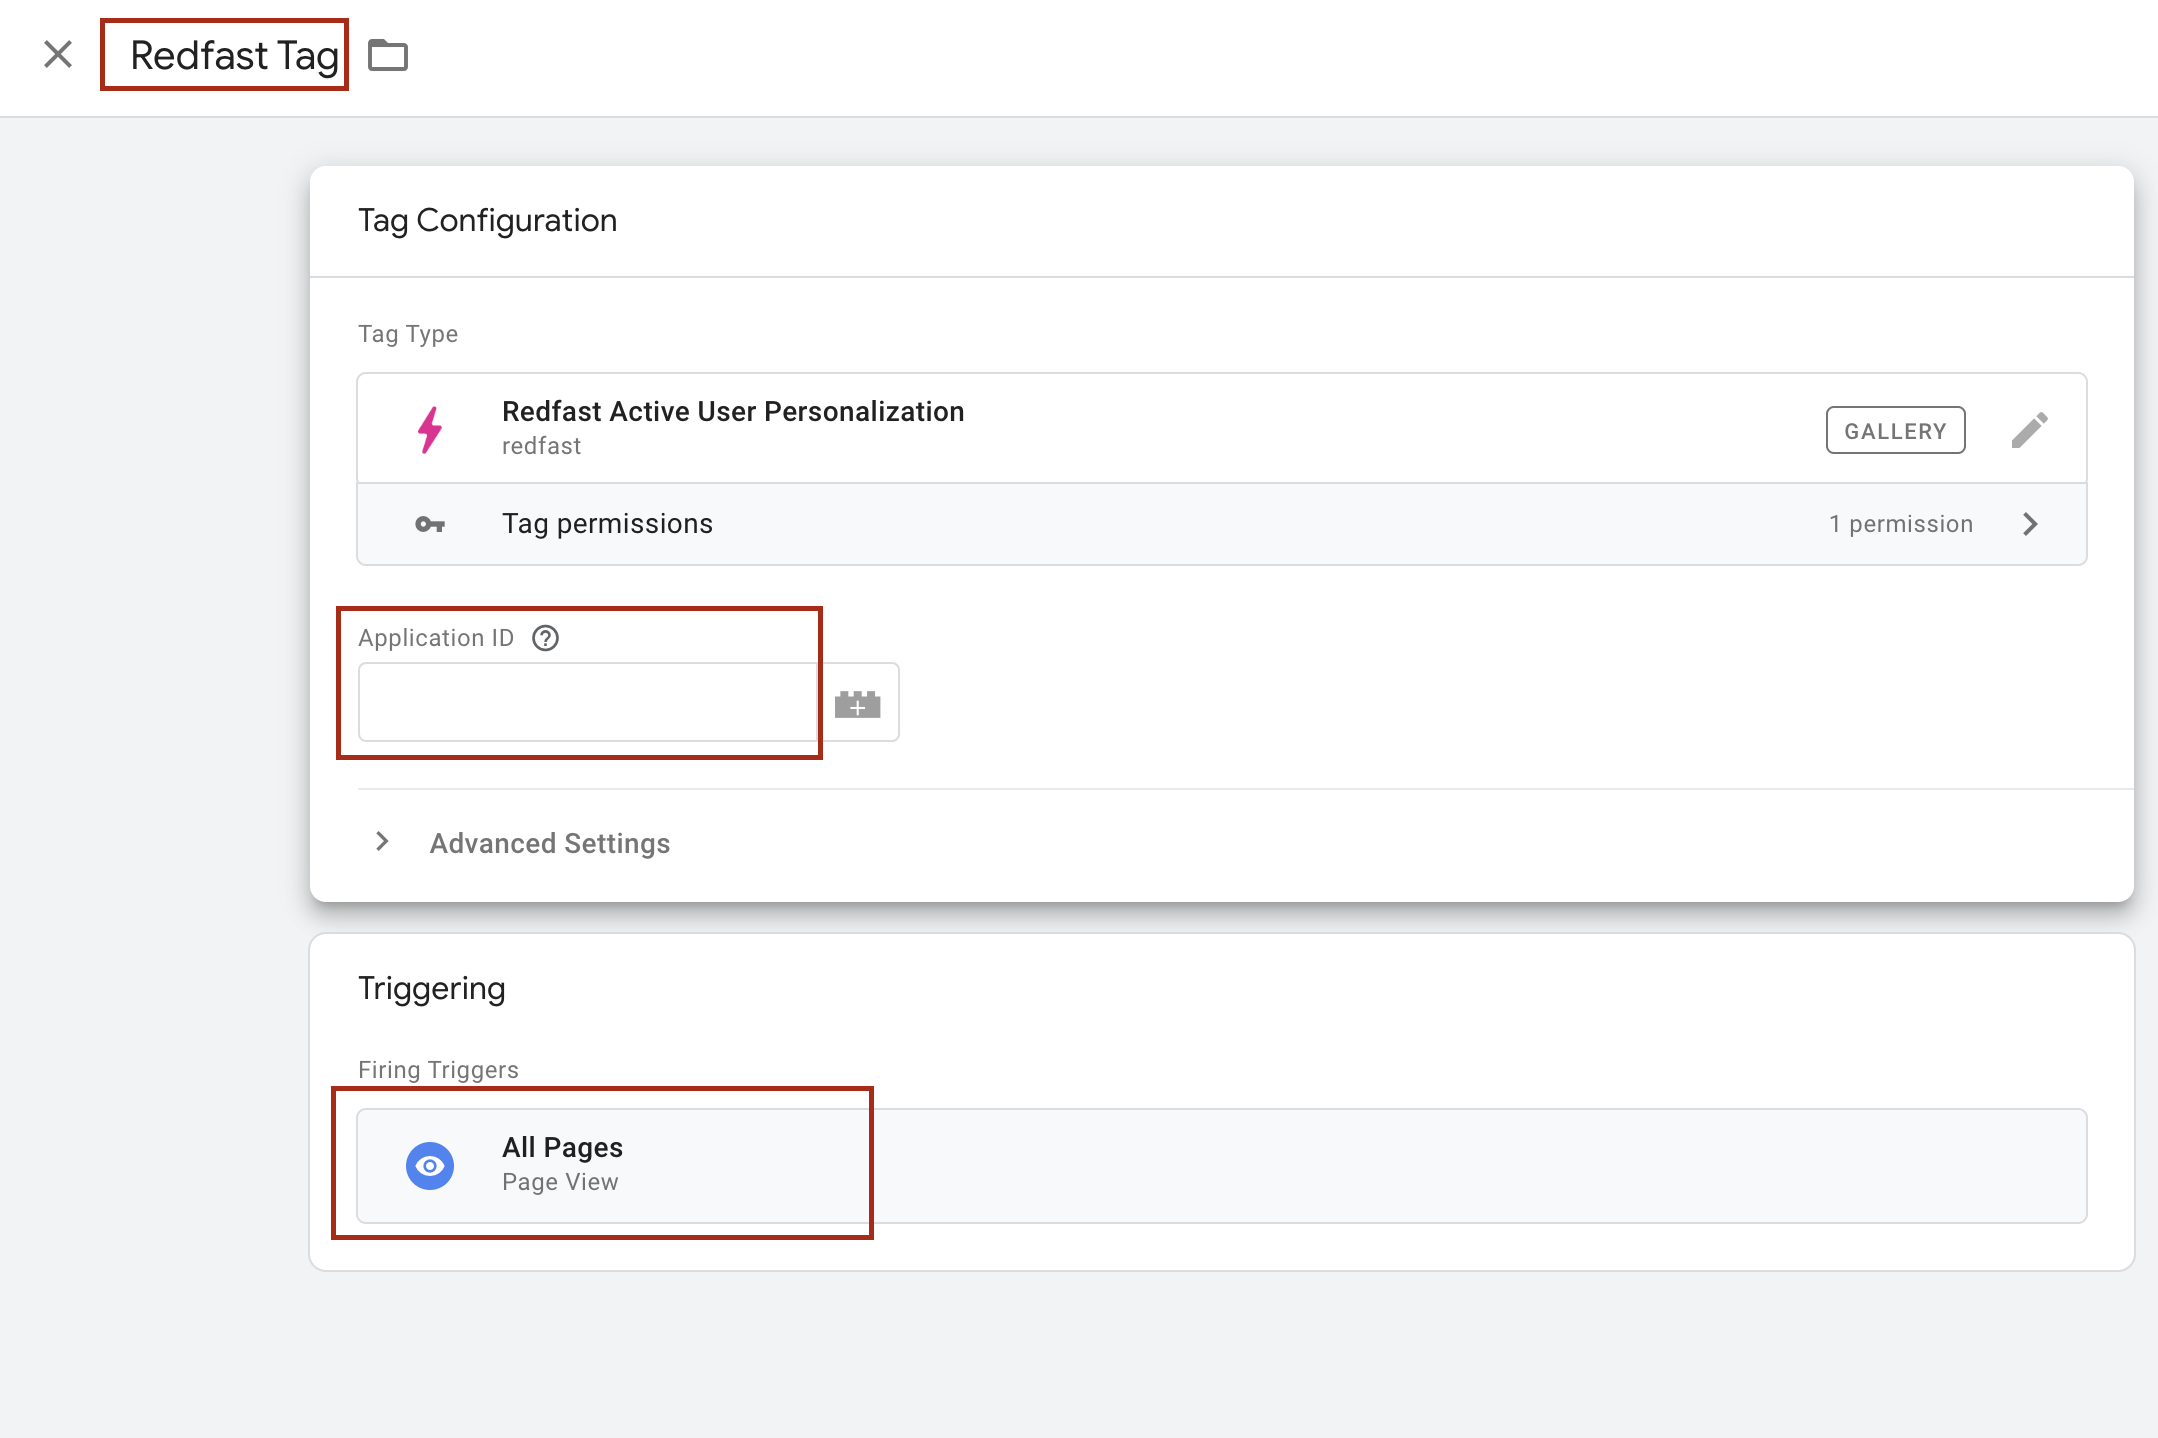
- Name it Recurly Engage Tag.
- Paste your Application ID into the template field.
- Under Triggering, choose All Pages.
- Click Save.
Updated about 1 month ago
Did this page help you?