Paywall & hardwall
Set up an Engage dynamic paywall to limit free content and convert readers into subscribers.
Overview
The Recurly Engage Dynamic Paywall & hardwall prompt types are specifically designed for publishers and content providers seeking to manage and monetize access to their digital assets. This solution effectively controls reader access, encouraging user sign-ups and subscriptions.
The solution allows a user to view a limited number of complimentary articles or paragraphs before requiring paid access. The content is typically visually obscured and interaction-blocked by an intrusive prompt that prevents scrolling past the designated limit.
Key benefits
- Maximized Content Value: Provides a proven method to convert frequent readers into paying subscribers by blocking the remainder of premium article content.
- Flexible Access Control: Content providers can define the precise number of complimentary visits a user is permitted to view, offering granular control over the pre-access user experience.
- Customizable Blocking: Providers can select from a range of methods to block content, including hiding, blurring, or custom CSS, with precise control over complimentary paragraphs or elements
- Versatile Conversion Experience: Supports a wide range of inline or standalone prompts. Content blocking persists after the prompt is dismissed or interacted with.
- Drives User Registration: Creates a clear incentive for users to sign up or register once they have utilized their introductory content quota.
- Focus on User Experience: Emulates UX patterns currently used in major publication sites today, proven to increase conversion, rather than intrusive block methods that penalize users.
- Optimize with Experiments: A/B test any part of the experience over time to improve conversion.
Key steps
Step 1: Add a new usage tracker:
- Navigate to Settings > Usage Tracking
- Select “+ Add new tracker”
- Fill out the required fields for Name, Label, Description. Select the Page tracker type, enter the relevant url path.
- Check the “Use as paywall tracker” select button.
Step 2: Create a zone
You will need to create a zone to define the article which contains the content to be blocked (Article Zone). If using an inline prompt, you can define a new zone as per normal to control where the prompt is displayed, or reuse the same zone. If using the same Article Zone, the prompt will be appended to the end of the zone.
- Navigate to Settings > Zones
- Select the New Zone button
- Enter the associated information for your zone. Your zone is the parent element containing the content you would like to block or hide.
Step 3: Create a new prompt
- Create a New Prompt Navigate to the main Prompts screen in your dashboard and click the + New Prompt button.
- Choose a desired prompt type.
- In the Edit Prompt Design view, scroll through the configuration options to locate the Paywall accordion menu.
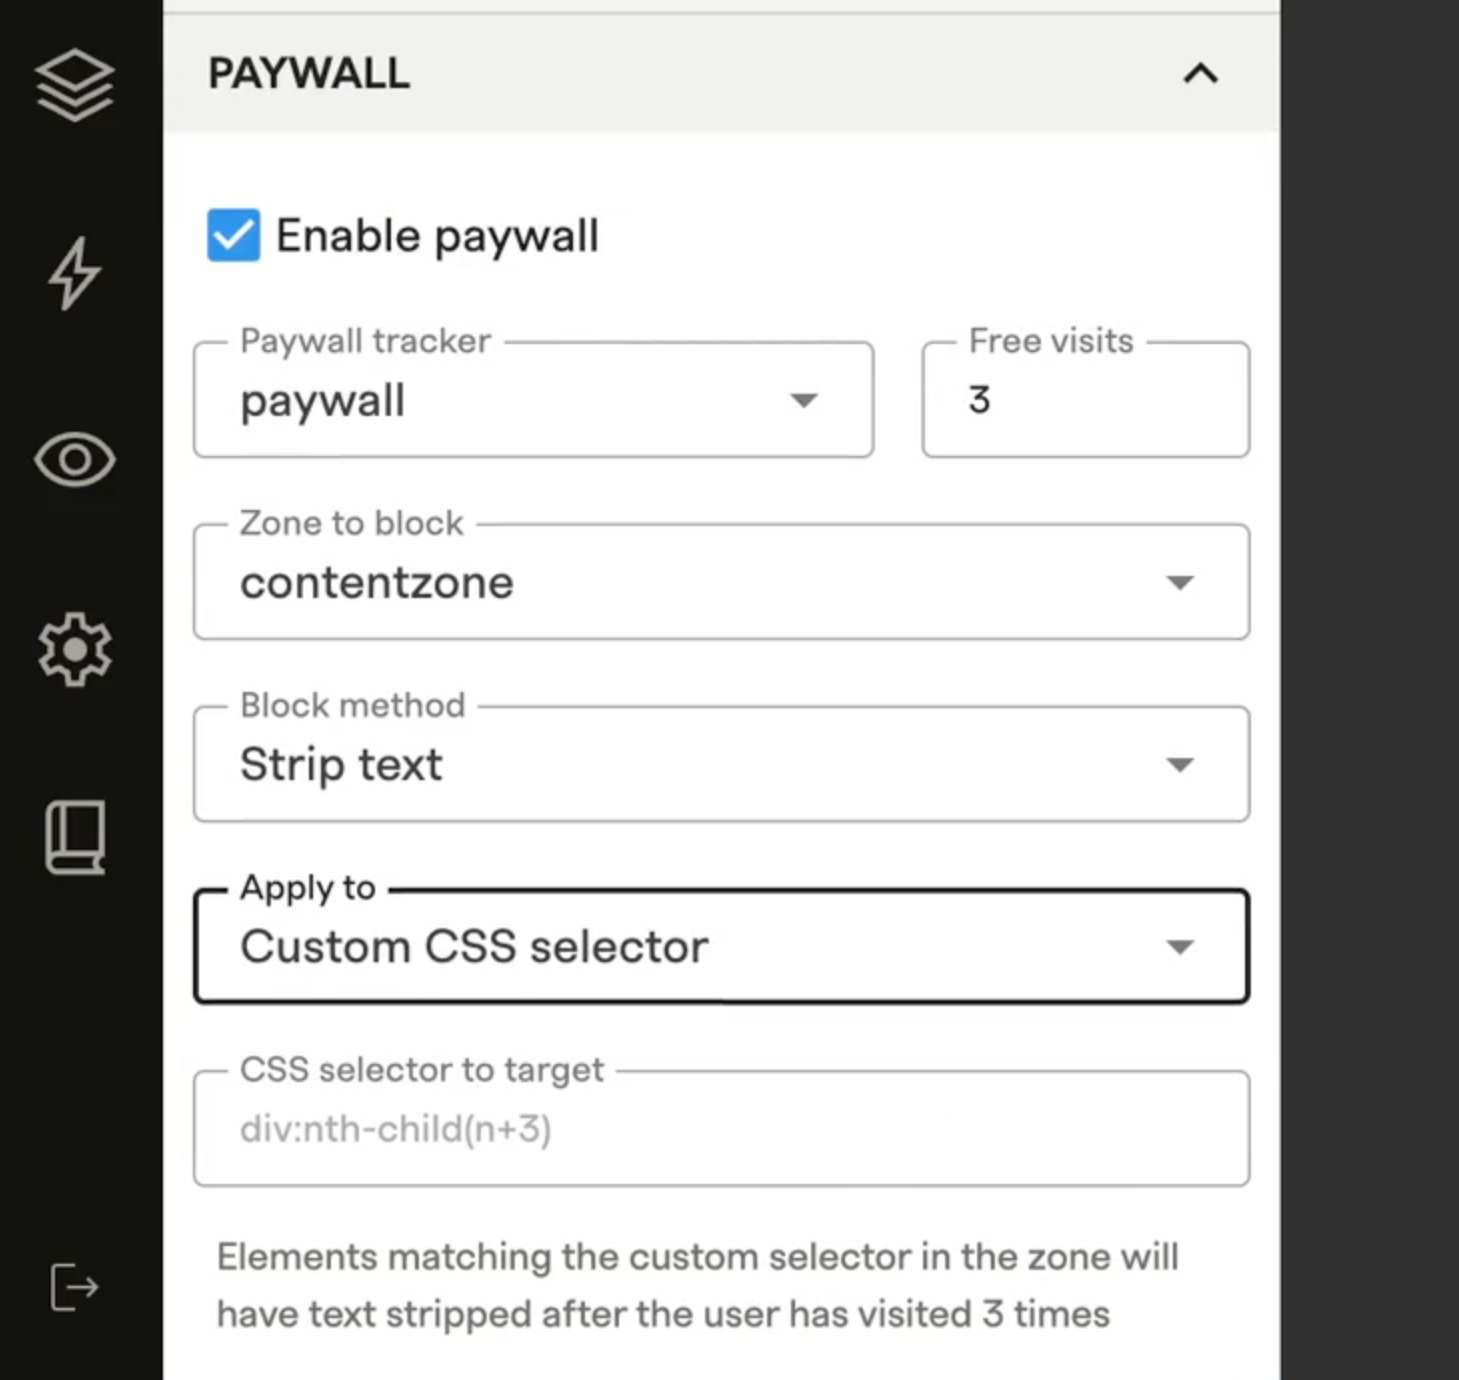
- Enable and Configure Check the box labeled Enable paywall. Select the zone created that defines the article (Article Zone)
- Select Settings for the paywall
- Paywall tracker: The usage tracker created from Step 1.
- Free visits: The number of visits for content the user is allowed to access before the paywall is enabled.
- Zone to block: The area that will be obscured.
- Block method: The way that the content will be removed or obscured from the page
- Blur: the content will remain on the page, but CSS styling will prevent it from being readable.
- Hide: The content will be hidden, but not removed from the page.
- Strip text: The text content will be removed from the DOM, but the DOM elements will remain (to avoid breaking any Javascript)
- Custom CSS: Enter your own custom css to block the content.
- Apply to elements: Which elements in the Article Zone the block method will be applied to. You can specify a custom CSS selector for precise control.
- Elements to allow: How many paragraphs or child elements in the Article Zone that will not be blocked (if not using a CSS selector in (e))
- Save and Activate: Once your limits are set and your copy is finalized, save your prompt to apply the paywall logic to your site.
Updated 5 months ago