iOS (Deprecated)
Configuration guide for the Recurly Engage iOS and tvOS SDK, enabling native prompt display and usage tracking in your mobile apps.
Overview
The Recurly Engage Apple SDK provides native support for iOS and tvOS apps, automatically handling modal, banner, video popups, and inline prompt rendering, as well as tracking user-triggered events.
Key benefits
- SDK integration: Seamlessly embed prompts and track user events in native iOS and tvOS applications.
- Automatic UI handling: Built-in support for modals, banners, and inline prompts without manual UI code.
- Deep linking & metadata: Leverage custom metadata and deep links for tailored in-app navigation.
Key details
The Recurly Engage Apple SDK brings the ability to monitor consumption and show configured prompts within your native iOS and tvOS apps. The SDK automatically handles display of modals (popups, video popups, and banners) and the related user-triggered events. Inline prompts are accessible via helper functions with the necessary metadata for rendering in chosen areas of the app.
Install the SDK
The Redfast Apple SDK includes support for iOS as well as tvOS devices. The latest SDK version as well as the source code of an example app is available here. Please reach out to your customer success manager if you would like the keys needed to run the example app.
Swift package manager
You may add the Redfast SDK from the public Github repository.
Steps:
- Add a new Package Dependency to your existing project.
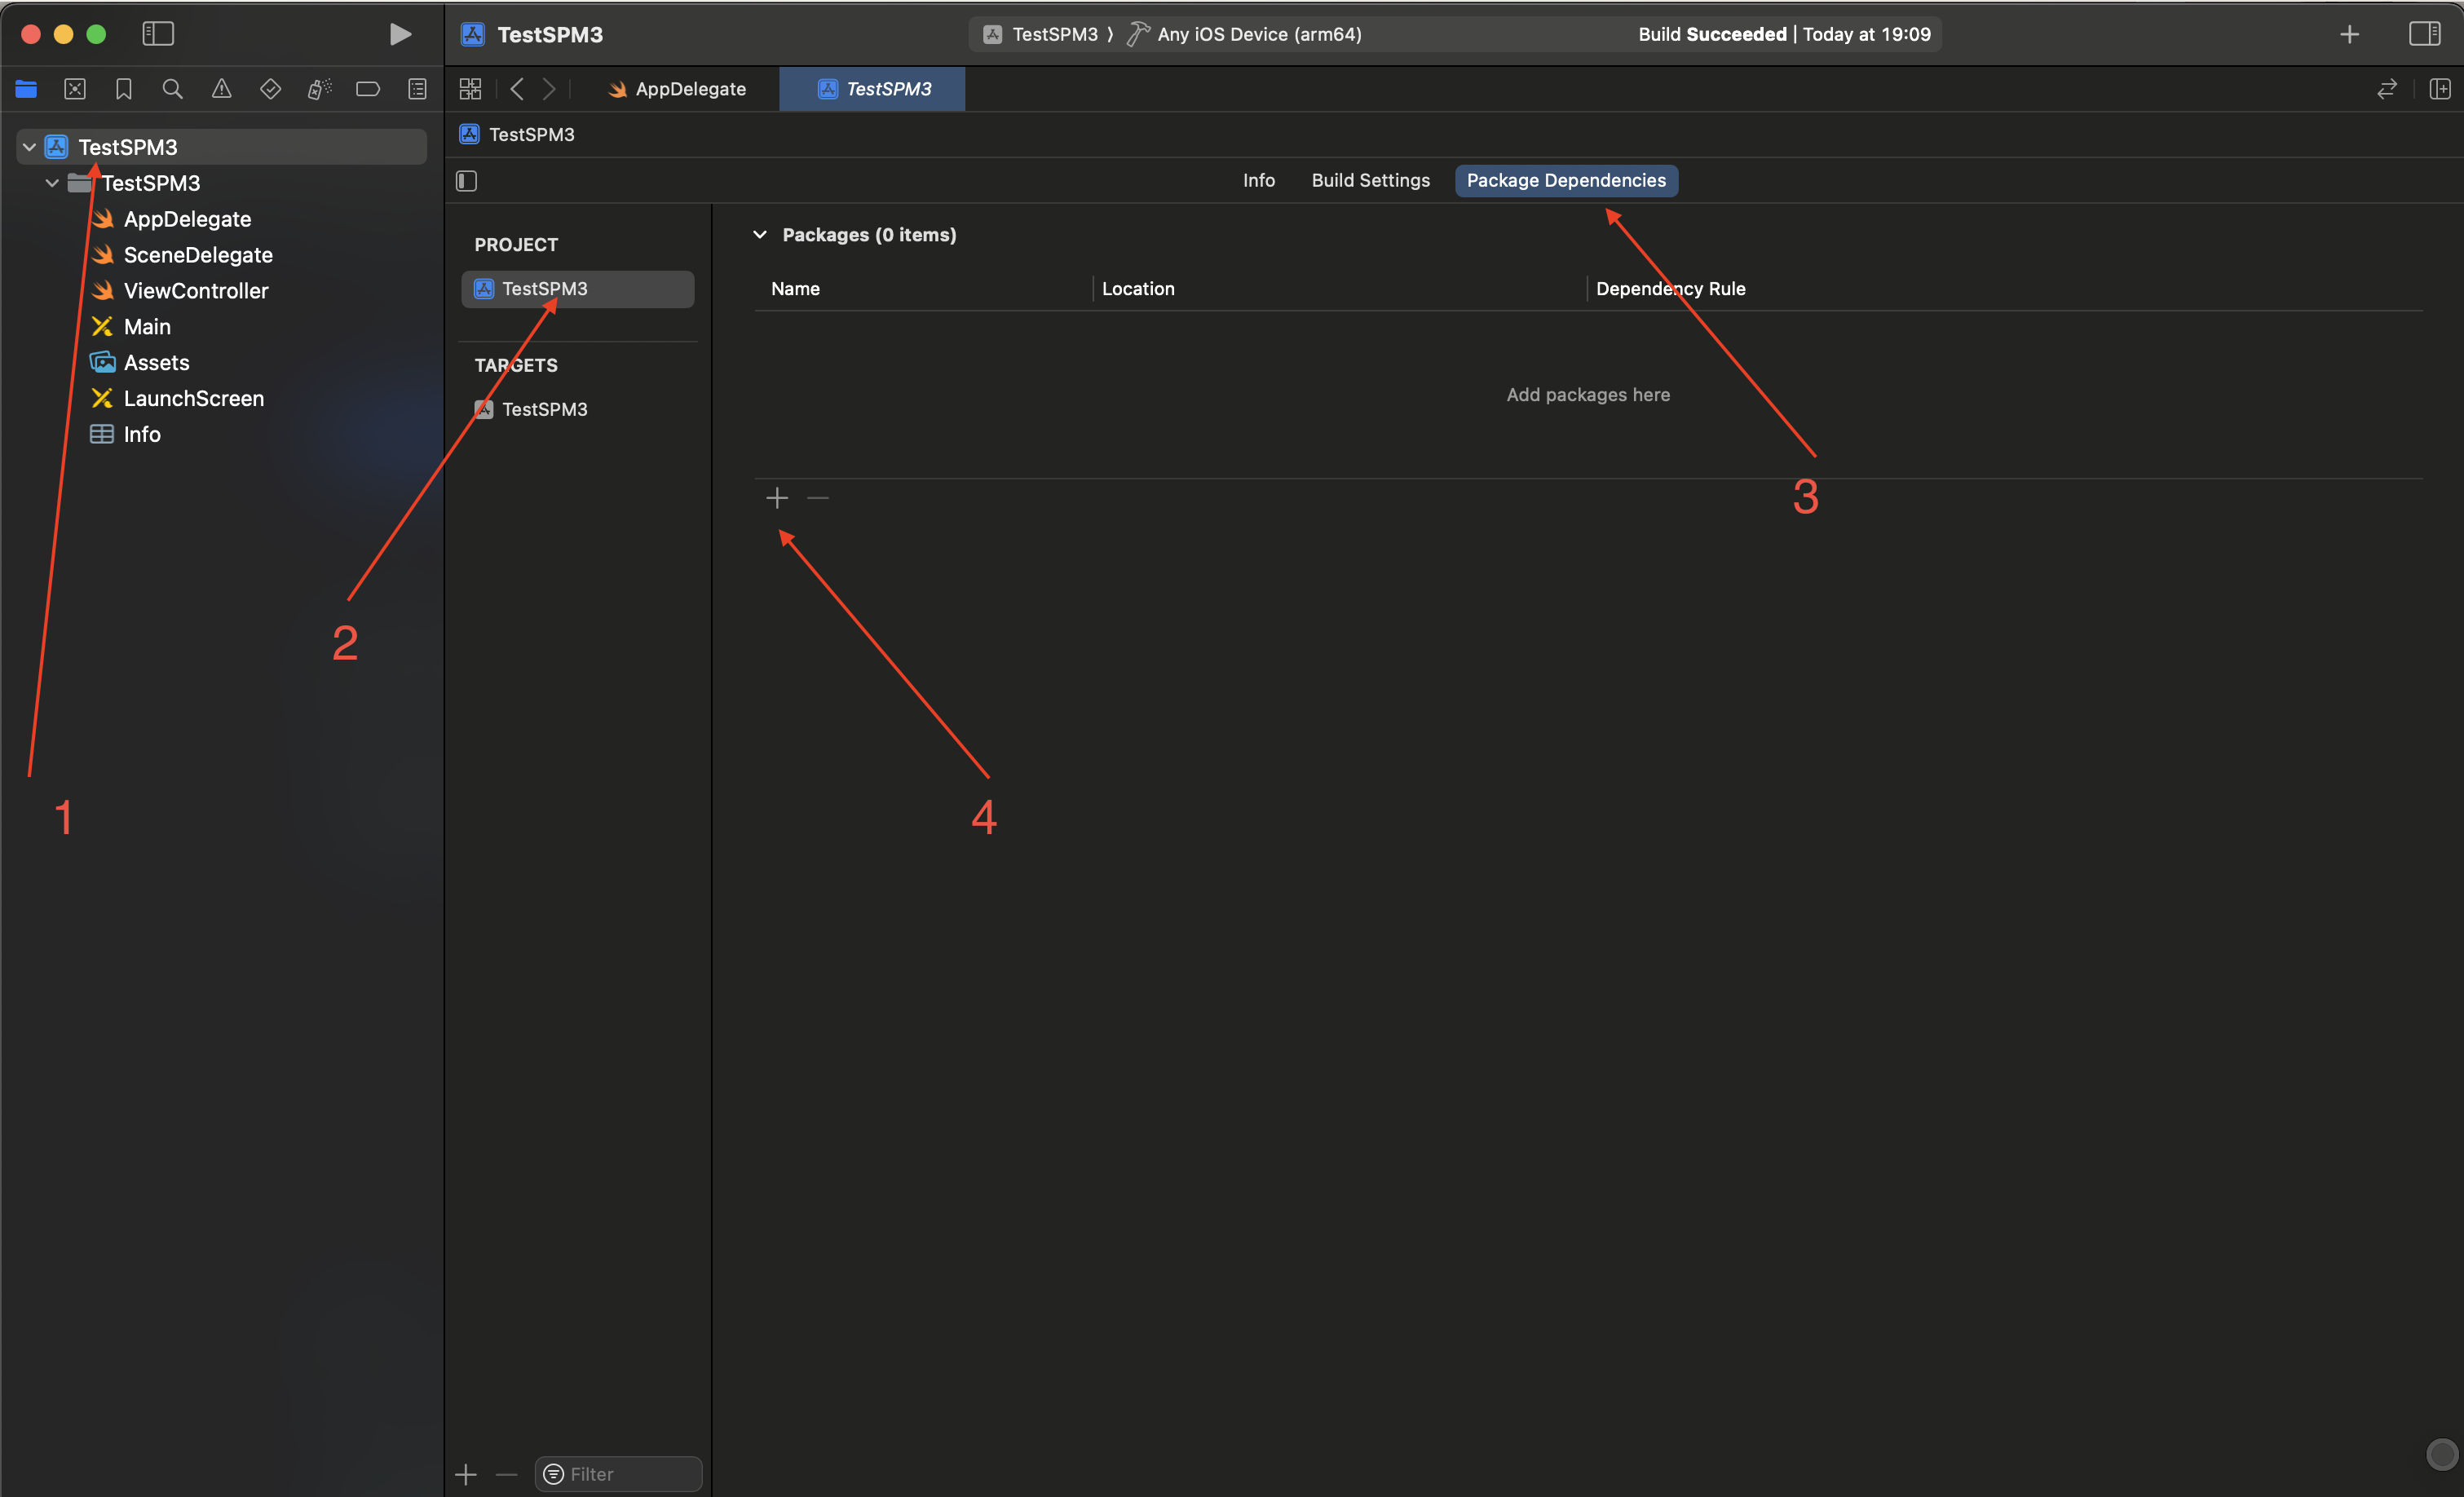
- Paste the Github repo URL and select appropriate Dependency Rule. Add to your existing project.
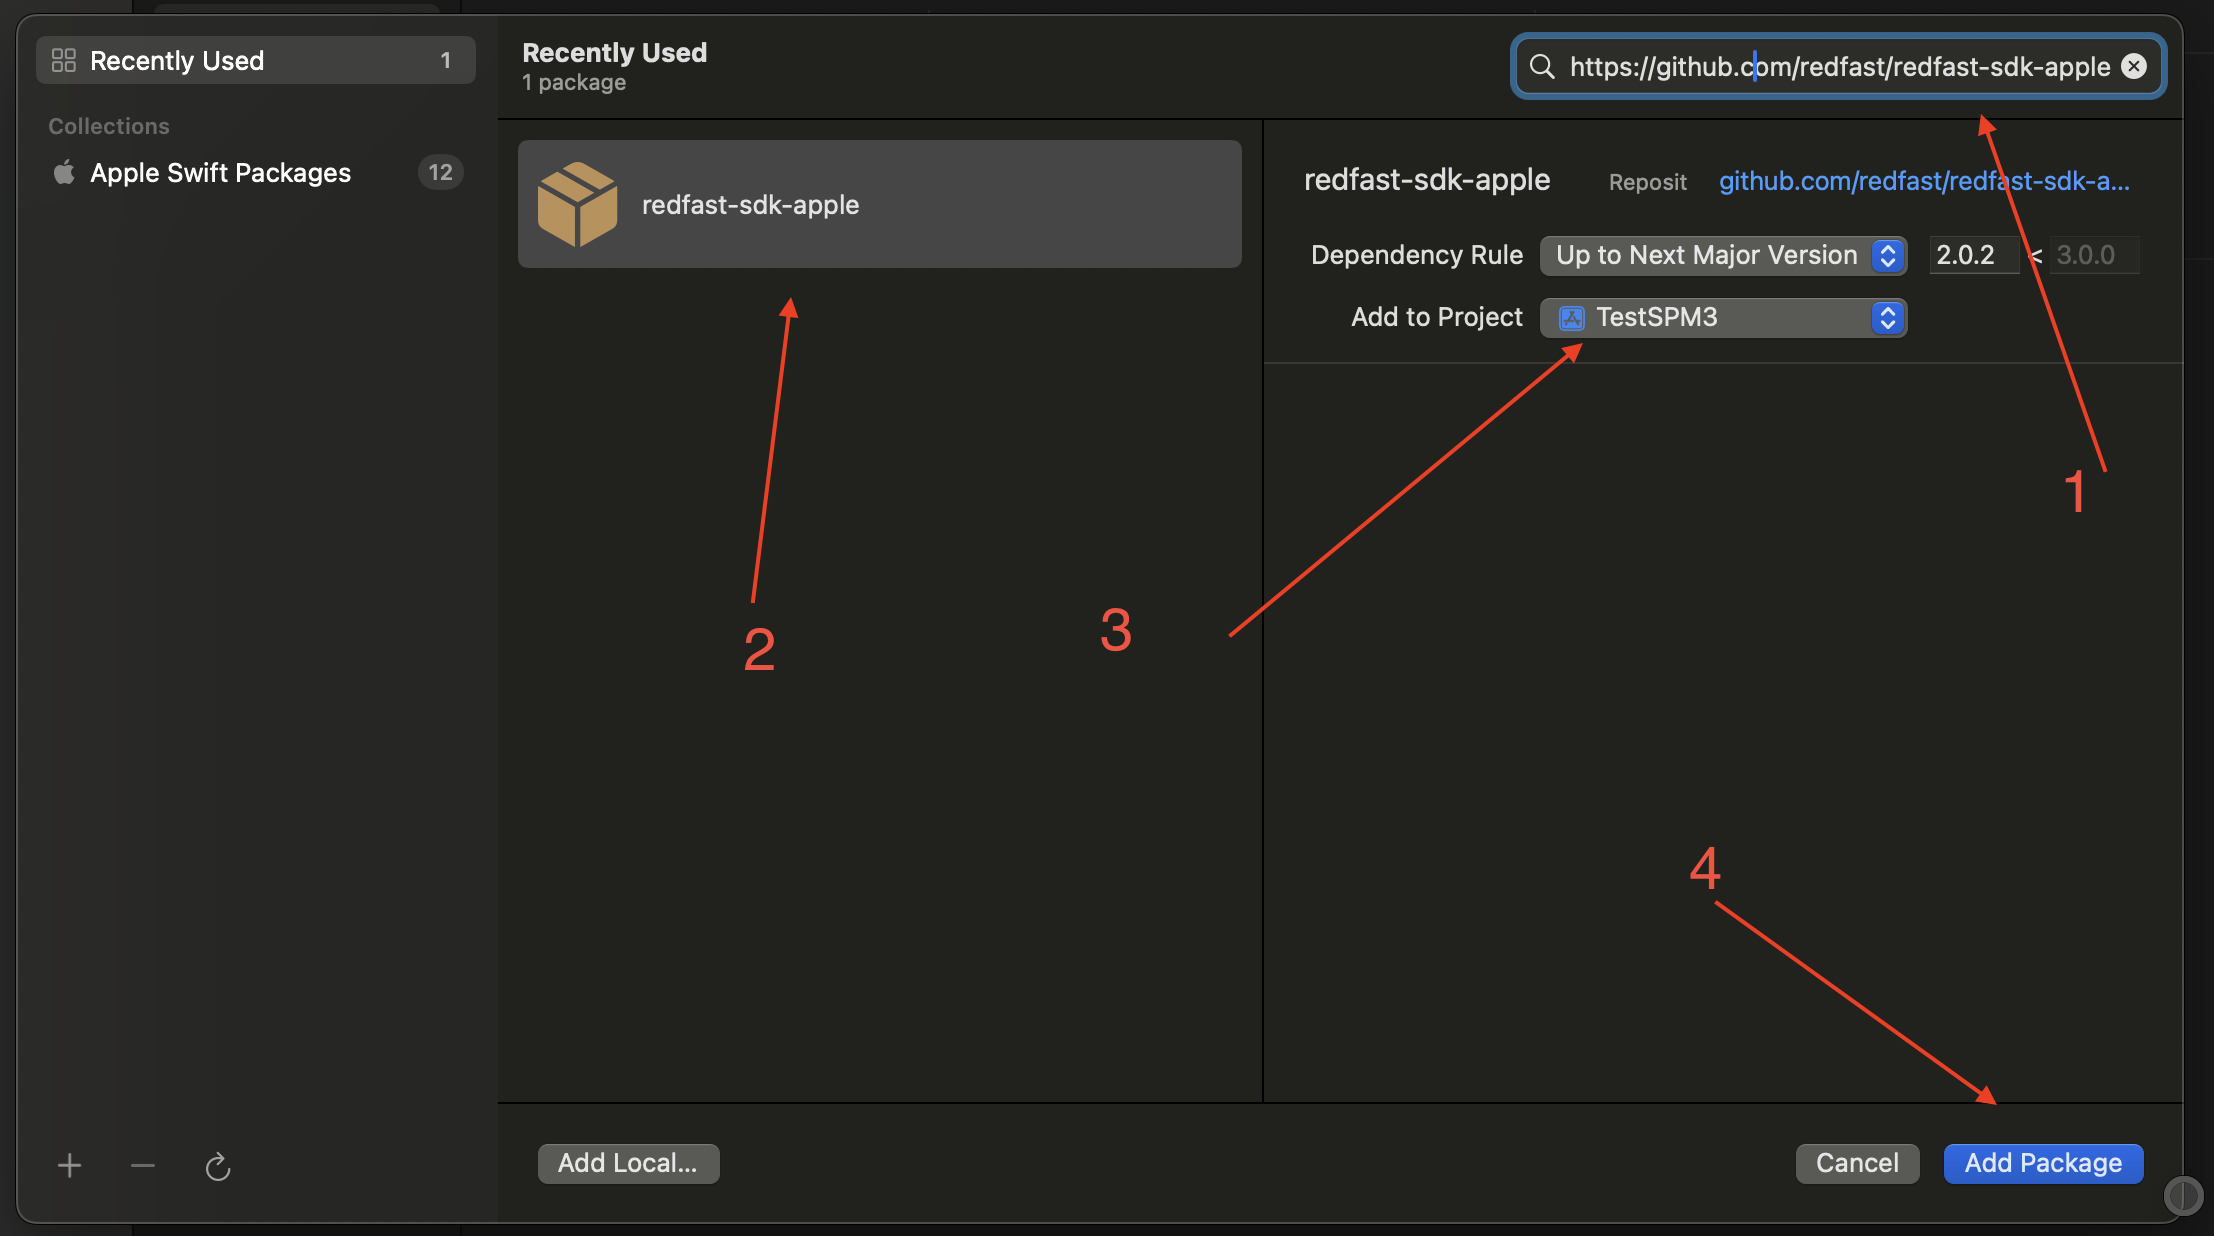
- Complete adding the package
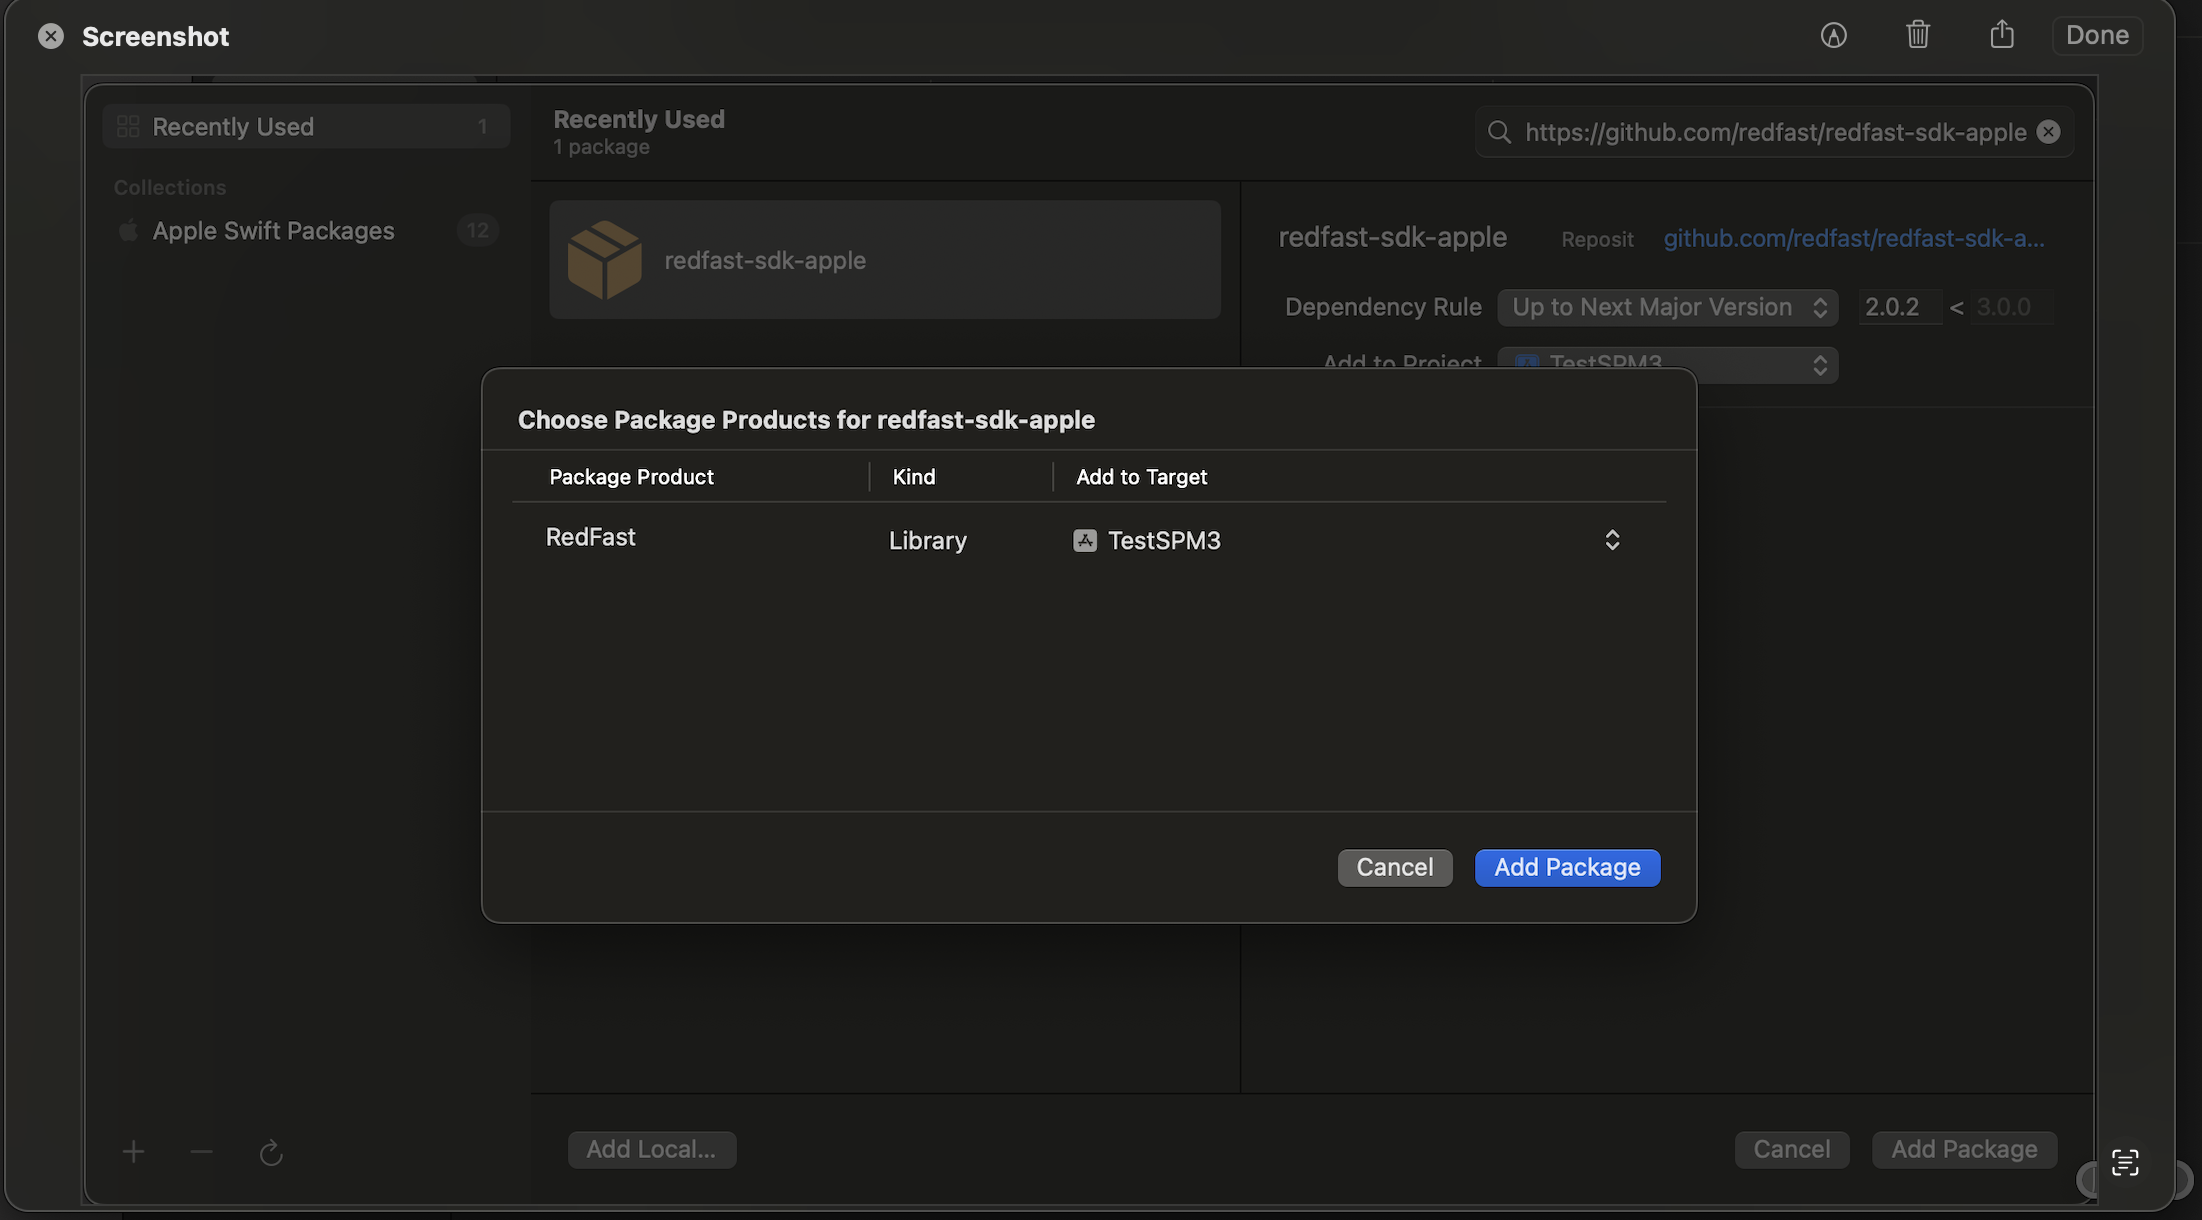
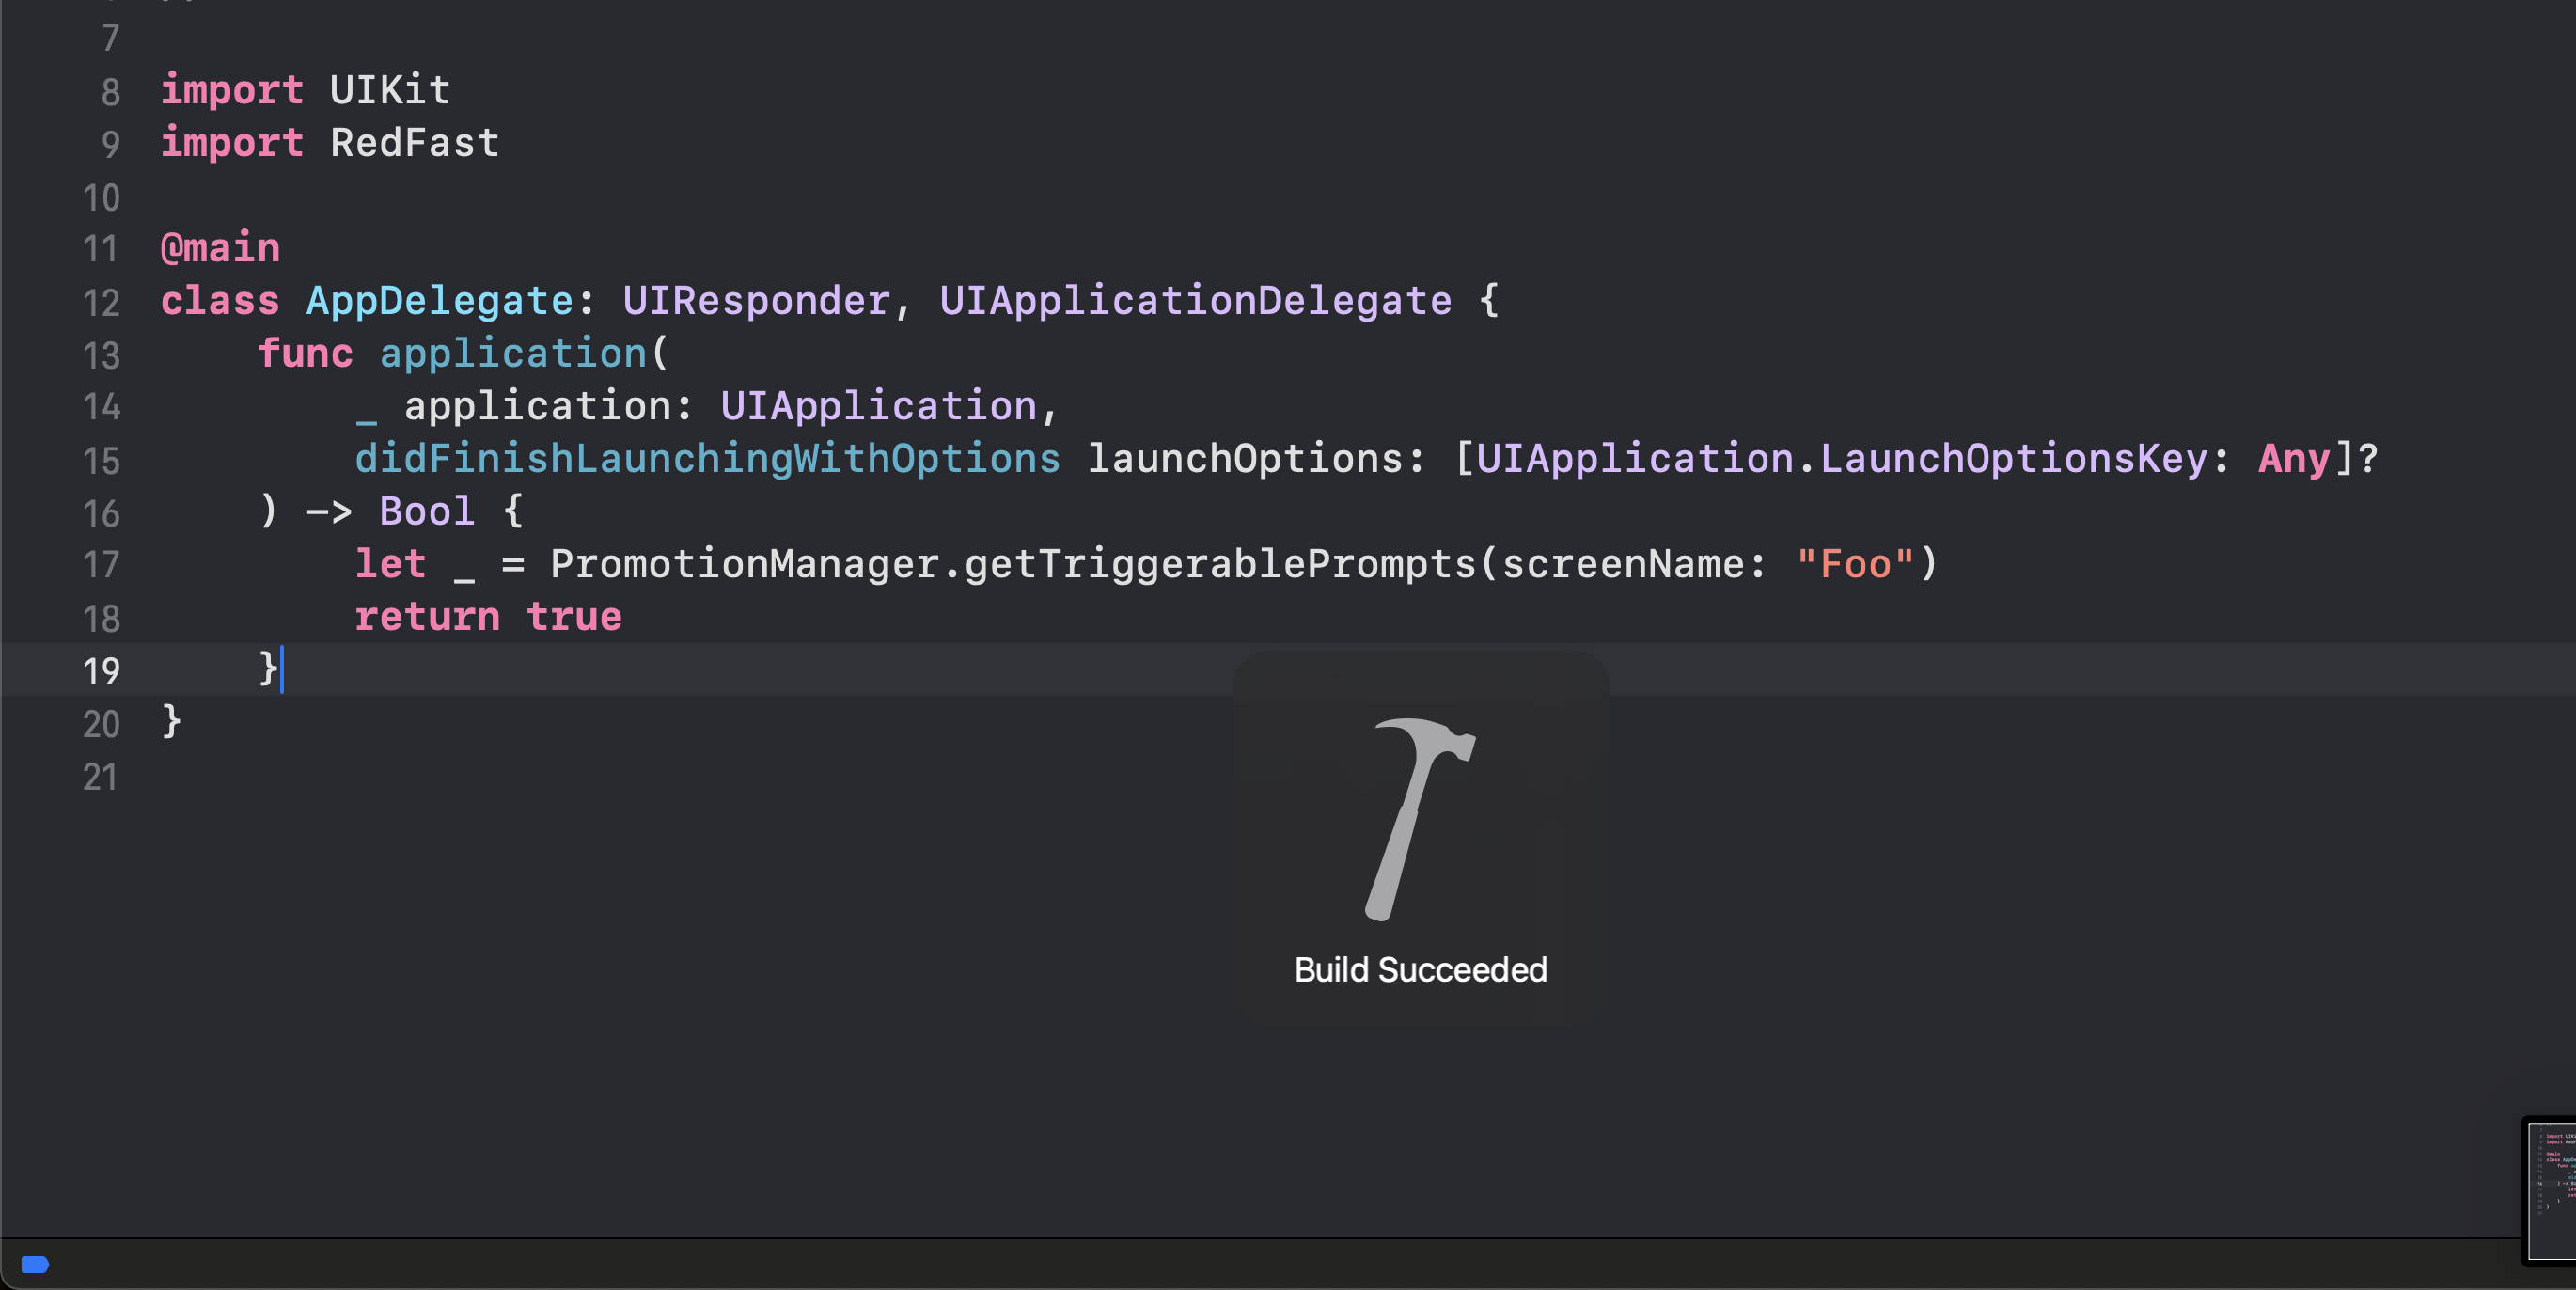
- Confirm successful package installation
Legacy installation via local SDK
Steps to utilize the local SDK:
-
Within Xcode, select Target > General > Frameworks > Libraries > Embedded Content and click on
+. -
Select "Add Other" on bottom left corner and choose "Add Files"
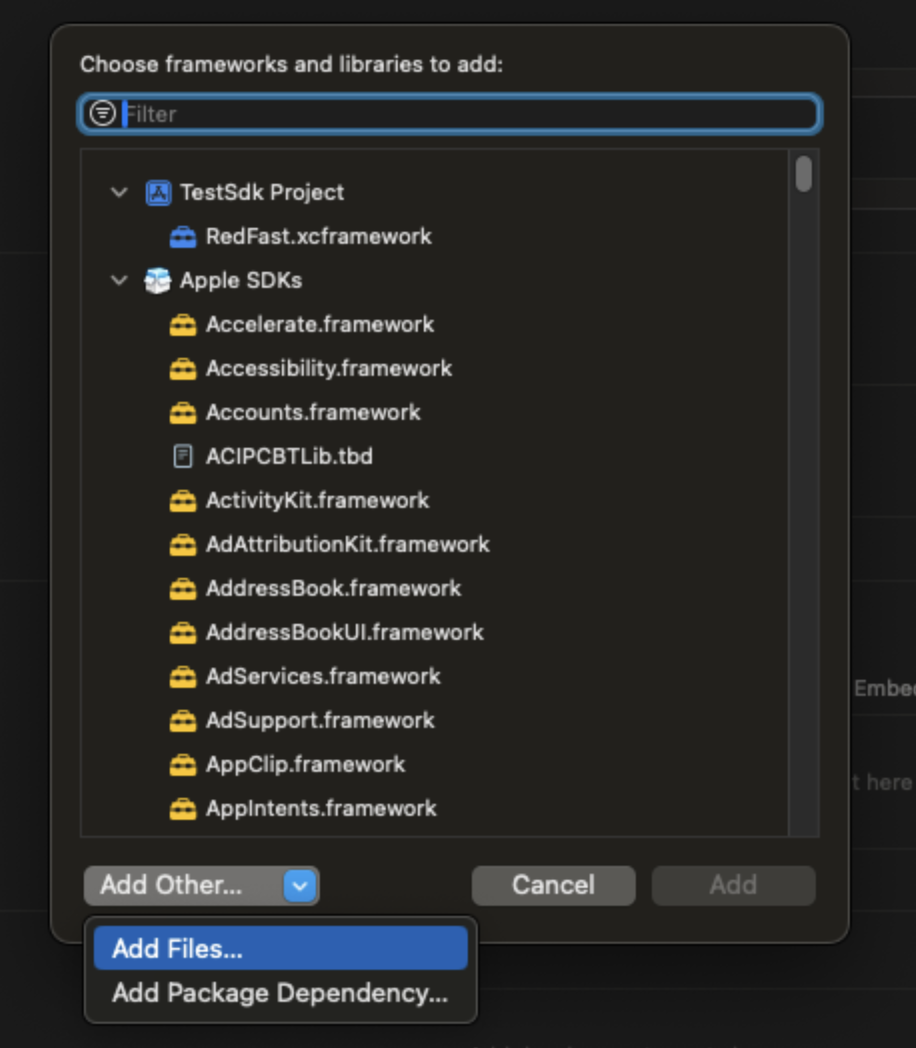
-
Open the
Redfast.xcframeworkfile -
Ensure the "Embed & Sign option is selected"
-
Import the SDK into your project
- Initialize the SDK per instructions below
Initialize Engage
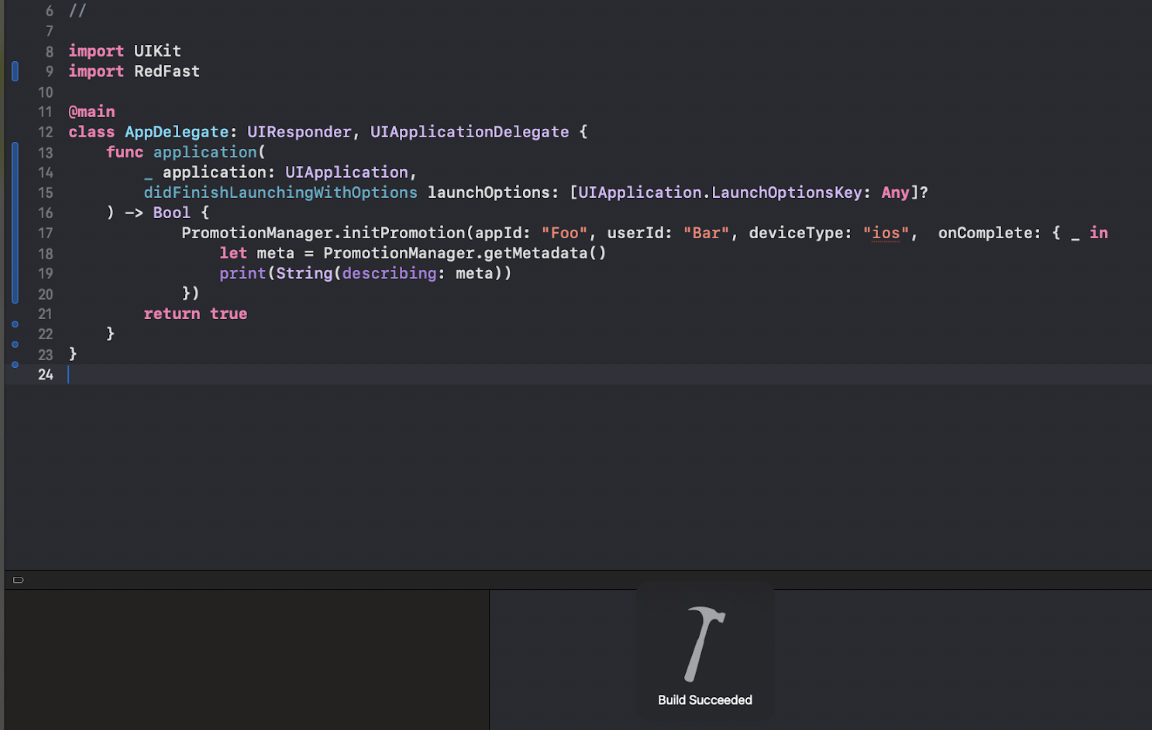
In the AppDelegate.swift file, add the following line into the application(_:didFinishLaunchingWithOptions:) function. Replace with your appID and userID. The appID may be found on the Settings > Application screen within Pulse.
func application(
   _ application: UIApplication,
      didFinishLaunchingWithOptions launchOptions: [UIApplication.LaunchOptionsKey: Any]?
  ) -> Bool {
      PromotionManager.initPromotion(appId: "[Your AppID]", userId: "[Your UserID]") { result in
          // ...
      }
      return true
  }
Trigger popup via screen name
Allow the Redfast SDK to display a popup for a specified view controller. Add the following line in the view controller's viewDidLoad function:
override func viewDidLoad() {
    super.viewDidLoad()
    // ...
    PromotionManager.setScreenName(self, "ViewController") { result in
        switch result.code {
        case .timerExpired:
            break
        case .declined:
            break
        case abort:
            break
        case .accepted:
            break
        default:
            break
        }
    }
}

// If no matching prompts, returns
// PromotionResult(code: RedFast.PromotionResultCode.notApplicable, value: nil, meta: nil, inAppProductId: nil)
// Otherwise Popup is rendered
Trigger popup via button click
This may be performed in addition to PromotionManager.setScreenName() if a trigger utilizes both Screen Name and Click ID. Add the following line in the button's touchUpInside handler:
@IBAction func buttonClicked(_ sender: Any) {
    PromotionManager.buttonClick(self, unsubscribe) { [weak self] result in
        switch result.code {
        case .accepted:
            // User accepted the promotion
            break
        case .declined:
            // User declined the promotion
            break
        case .timerExpired:
            // The promotion timer expired and was automatically removed from view
            break
        case .abort:
            // User clicked the `X` button to dismiss the promotion
            break
        default:
            break
        }
    }
}

// If no matching prompts, returns
// PromotionResult(code: RedFast.PromotionResultCode.notApplicable, value: nil, meta: nil, inAppProductId: nil)
// Otherwise Ppopup is rendered
Retrieve inline prompts
Use the following function to retrieve a inline prompt items that can be rendered within the desired app screens. Any activity relating to the prompts should be reported via the user activity functions specified below. The screenName argument may be left undefined if the desired trigger(s) are eligible for all screens.
func foo() async {
      let prompt = PromotionManager.getTriggerablePrompts(screenName: "screenName", clickId: "clickId").first
      // Prompt properties
      let id = prompt.id
      let deviceMeta = prompt?.deviceMeta
      // Can also access via: prompt?.deviceMeta?.decodeValue(to: Meta.self)
      let deepLink = prompt?.deepLink
      let button1Color = prompt?.button1Color
      let button2Color = prompt?.button2Color
      let button3Color = prompt?.button3Color
      let timerSeconds = prompt?.timerSeconds
      let timerText = prompt?.timerText
      let timerTextFontSize = prompt?.timerTextFontSize
      let timerTextFontColor = prompt?.timerTextFontColor
      let properties = prompt?.properties
      let bannerPosition = prompt?.bannerPosition
      let bannerOffsets = prompt?.bannerOffsets
      let bannerSize = prompt?.bannerSize
      let deviceMeta = prompt.deviceMeta?.decodeValue(to: Meta.self)

      // Report user activity
      try? await prompt?.impression()
      try? await prompt?.dismiss()
      try? await prompt?.timeout()
      try? await prompt?.holdout()
      try? await prompt?.click() // button1
      try? await prompt?.click2() // button2
      try? await prompt?.decline() // button3
    }
The following function is deprecated and will be removed in a future SDK update.
PromotionManager.getInlines(.featured) { prompts in
    let billboards = prompts?.compactMap {
        $0.compositeBgImage
    }
}
Deep link to a media asset
You can insert deeplink key-value pairs in Pulse. When the user invokes the CTA, you can utilize these key-value pairs to send the user to a specific media asset within the app.
The deeplink value is saved in the completion callback for setScreenName, buttonClick, and getInlines.
Access custom metadata
Custom key-value pairs can be added to an item via Pulse. These values may be used to perform an action that is not the typical media asset deep link, like sending the user to a registration screen or performing an operation on behalf of the user.
The custom metadata is available in the completion callback for setScreenName(), buttonClick(), and getInlines(). You may access the custom metadata from getTriggerablePrompts() return objects with this example code: prompt?.deviceMeta?.decodeValue(to: Meta.self).
Send usage tracking event
Your app can send custom track events using the SDK. If configured as a tracker within Pulse, these custom events can be used to target prompts at specific sets of users.
Task {
    try? await PromotionManager.customTrack("[customTrackId]")
}
Set UserId
You may change the userID after the SDK has been initialized, for example, when the user authenticates mid session. Note that it may take several seconds for the user's prompts to refresh.
PromotionManager.setUserId("[New UserID]")Debug view
The SDK provides a debug view modal, in which you can use the onscreen keyboard to either Reset the current user or Set a new user id. Resetting the current user will allow all eligible prompts to be available to the user again, bypassing cases in which prompts may be suppressed due to various frequency capping or interaction configuration.
To trigger the debug view for a specific screen, you can call the PromotionManager.showDebugView function by providing the screen's UIViewController object.
Updated 2 months ago