Performance obligation
Configure performance obligations (POBs) in Recurly RevRec, including recognition rules, POB rules, and revenue forecasting for ASC 606 and IFRS 15 compliance.
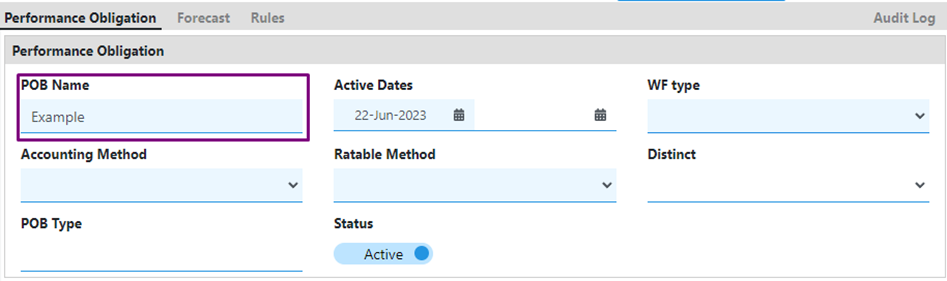
Adding POBs

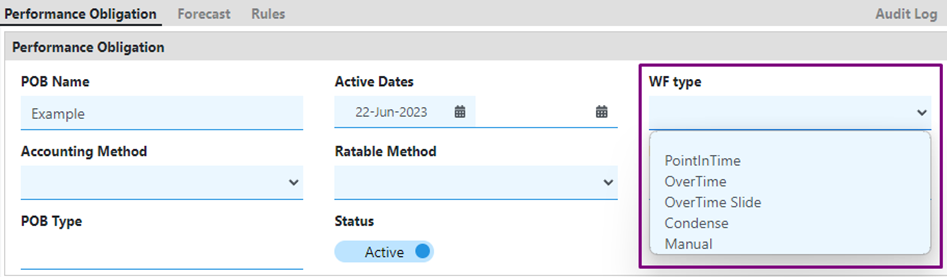
Performance obligations are recognized at a single point in time.
Performance obligations are recognized over the contract period.
Recognized over the contract period, with a delayed release date that extends revenue recognition.
Recognized based on the release date, with recognition adjusted according to event timing.
Revenue is realized based on manual input.
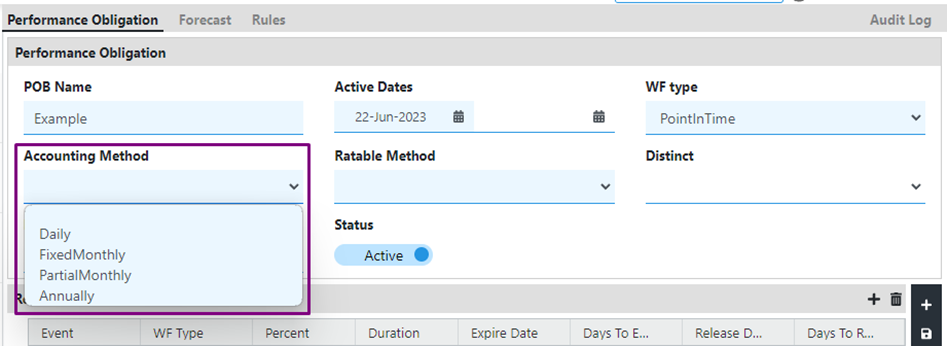
Revenue is recognized daily, based on the number of days in the contract.
Revenue is calculated in fixed amounts based on the number of months in the contract, with adjustments for the start date.
Revenue is calculated partially for the first and last months of the contract, with equal recognition for the remaining months.
Revenue is calculated annually.
Revenue is amortized on a prorated basis, with catch-up applied in the current open period.
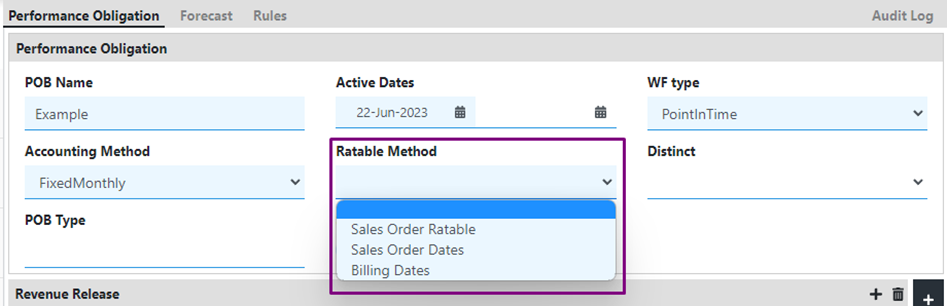
Revenue is scheduled based on the start and end dates of the sales order lines.
Revenue is scheduled based on the start and end dates of the billing or invoice.
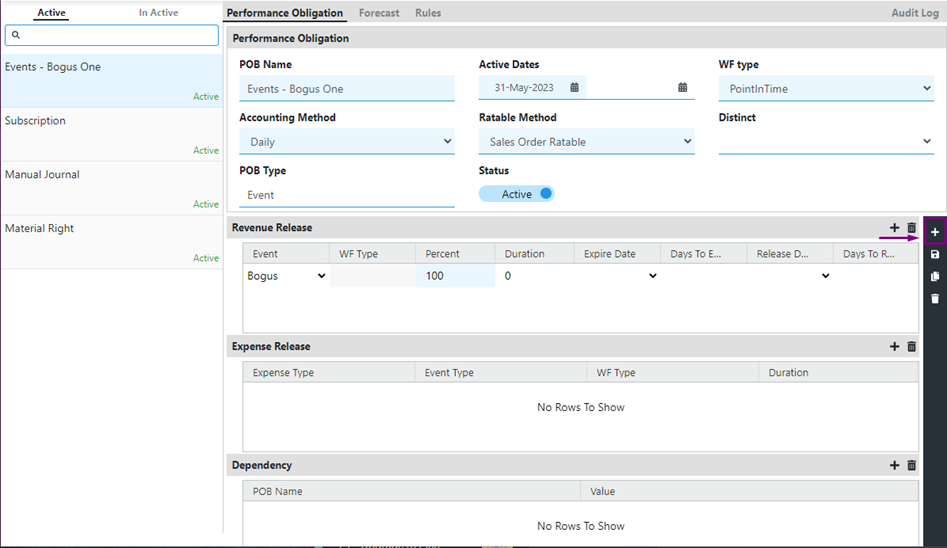
After completing steps 1–6, save your changes. Your POB should look like this:

- Default (Blank): The waterfall remains unchanged.
- Cumulative Date Change: The entire waterfall is recalculated, considering both past and future payments, so the total amount is distributed accurately based on the new dates.
- Prospective Date Change: Only future payments are adjusted to reflect the new dates. Past payments remain unaffected.
- Select the desired event from the dropdown menu.
- Enter the percentage of revenue release applicable for this event.

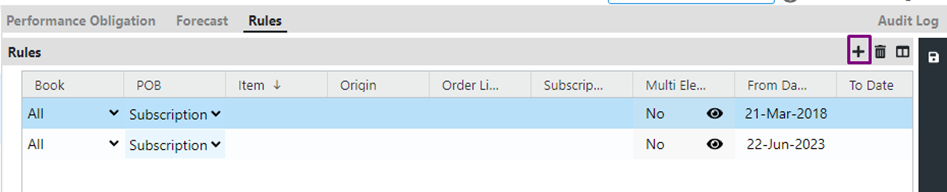
Adding POB rules
You can access POB rules using one of two methods:
- Go to the Rules section in the navigation menu.
- Select "Rules" under the Performance Obligation menu.
- Open the desired POB.
- Navigate to the "Rules" tab at the top.
Once you're in the Rules section, follow these steps to add a POB rule:
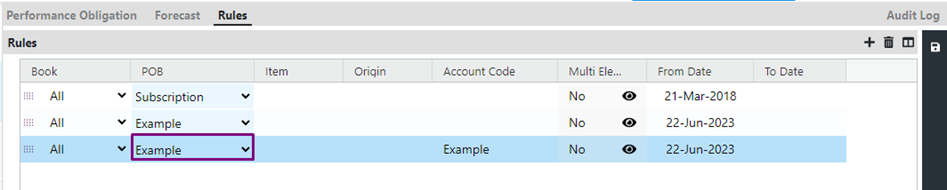
Define the attribute
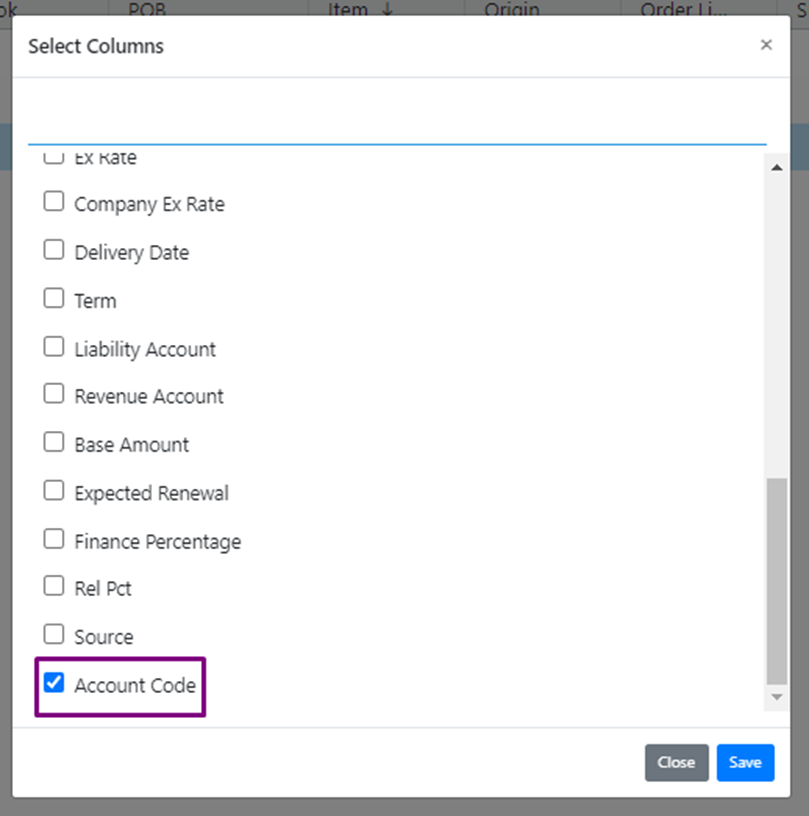
Define the attribute value used for recognizing the POB — for example, "Item." If the value you need isn't available, select the window-shaped button, choose the attribute from the window that appears, then select "Save." In this example, "Account Code" is used as the attribute for POB recognition.


- Avoid editing the default POBs, such as "Material right" and "Manual journal."
- Multiple release events can be associated with a single POB, but the total release percentage must equal 100%.
- Every POB requires an assigned rule to function properly.
- You can change the hierarchy of POB rules by dragging and rearranging them using the drag icon.
- Remember to save any changes you make to rules or hierarchy.
- To delete a POB rule, select the rule and select the Delete icon, then select Save to confirm the deletion.

POB forecasting
In most cases, revenue is recognized on the date a contract is booked or billed. For some contracts, though, revenue recognition is delayed until a specific external event occurs.
Forecast Management lets you forecast revenue based on both external events and billing dates. Even if the exact date of an external event — like a product release — is unknown, you can still factor it into your forecast by assuming it happens by the contract end date. This lets you plan revenue around a predictable contract end date.
Configuring forecasting for a POB
Updated 21 days ago