
Create a subscription plan
Learn how to create a subscription plan in Recurly Commerce, from choosing a plan type through configuring products, purchase options, schedules, and additional settings.
Limitations
- Only products without an existing subscription offer can be selected when creating a new offer.
- Not every option in this flow is available for every plan type — see Subscription management for the full feature availability breakdown by plan type.
Definition
Key benefits
Key details
Recurly Commerce walks you through building a subscription offer in a guided, step-by-step flow. Progress is tracked in the left-hand rail, and a Plan Summary panel on the right keeps a running snapshot of your selections as you go.
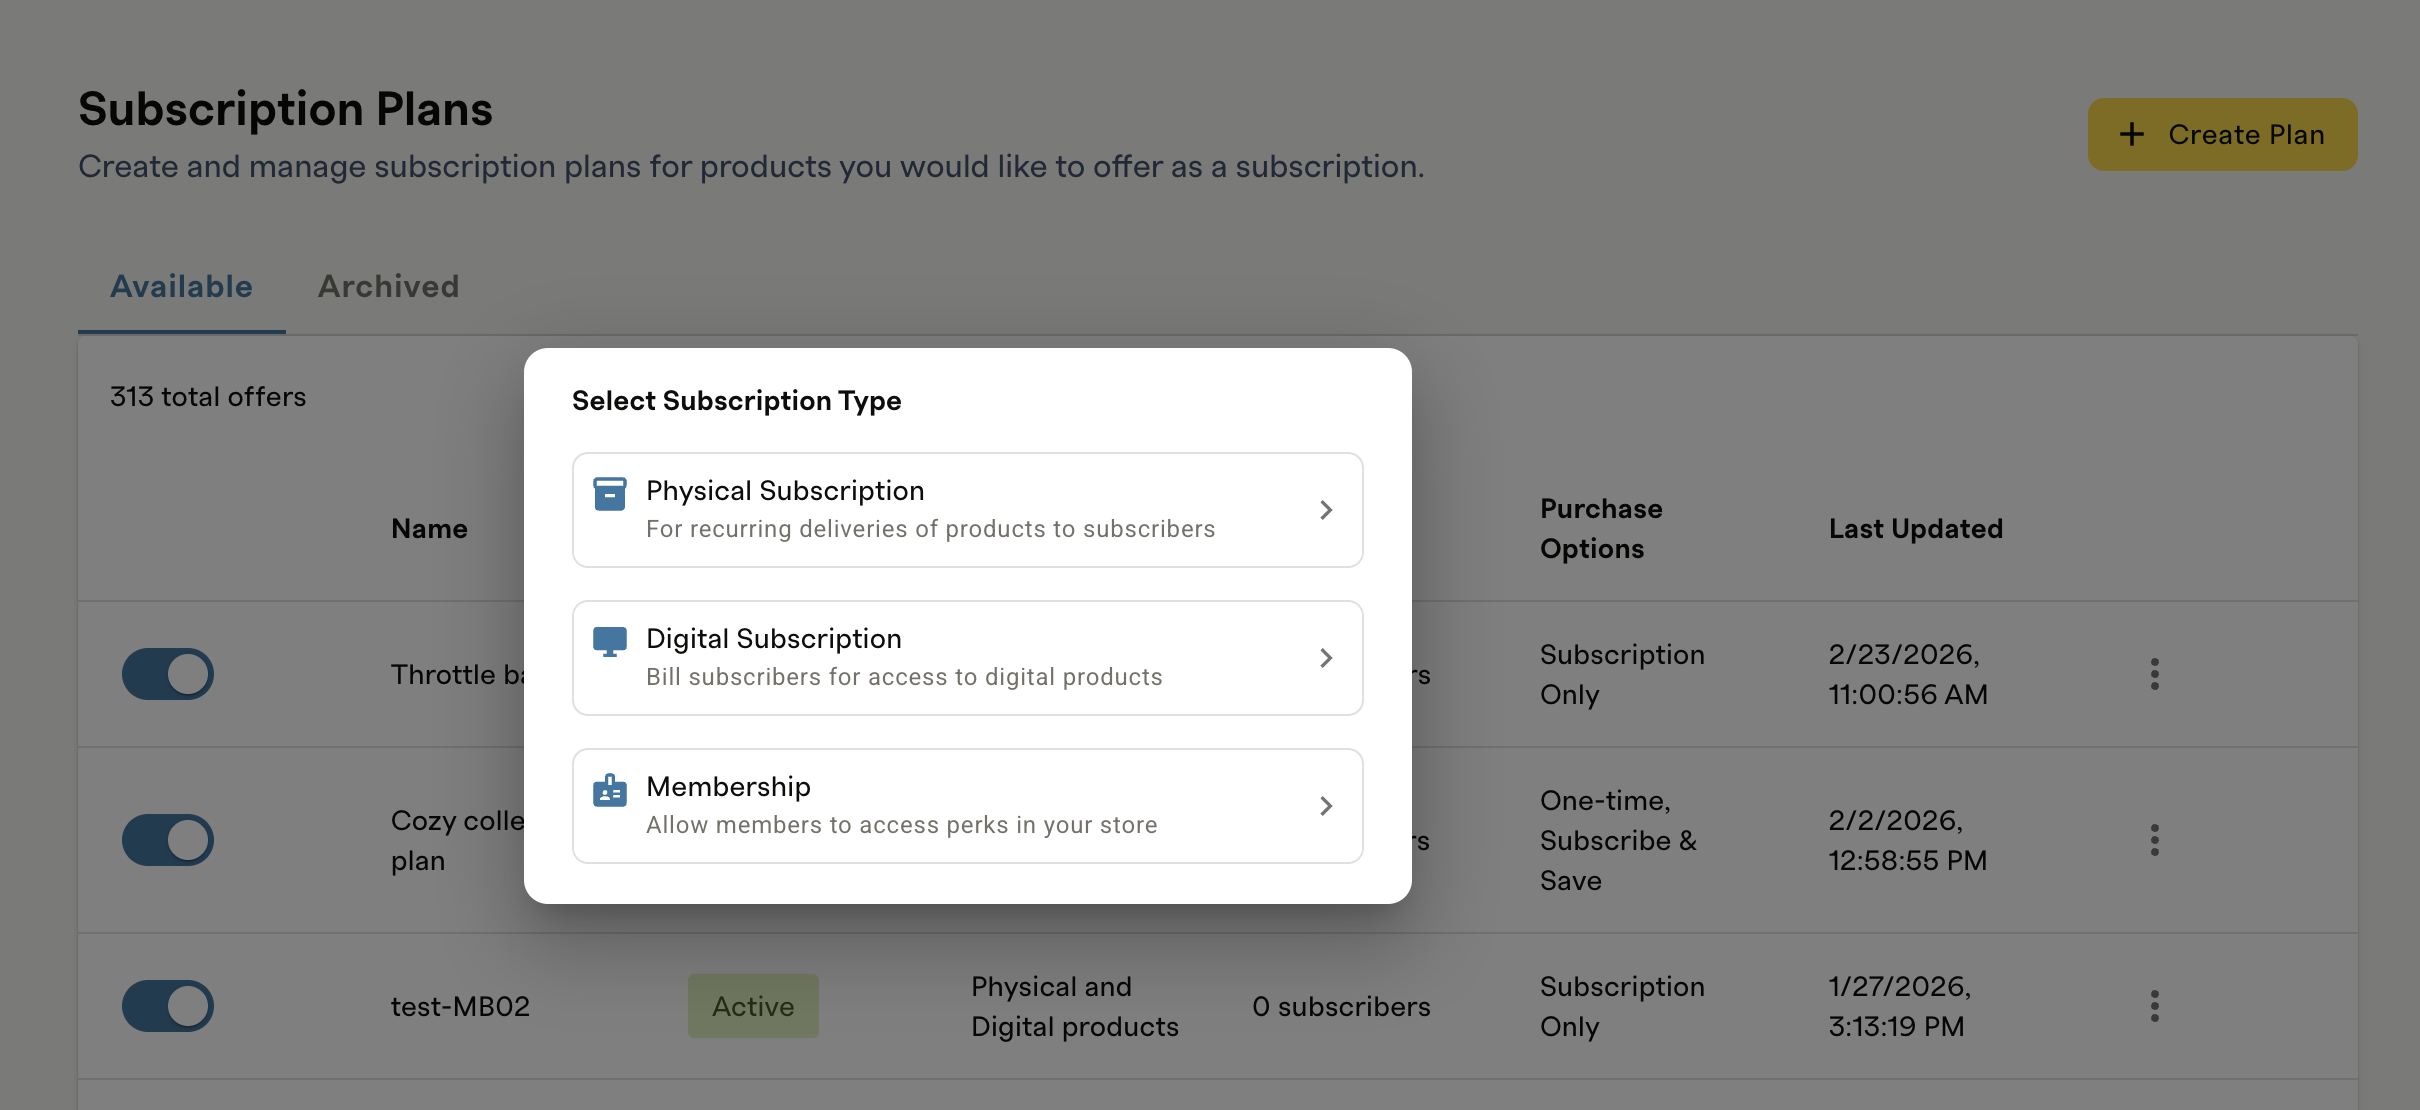
- Physical Subscription — for recurring deliveries of products to subscribers.
- Digital Subscription — bill subscribers for access to digital products.
- Membership — allow members to access perks in your store.
Your selection determines which products are available later in the flow, how some field labels appear (see Step 6), and which of the options in this flow apply to your plan.
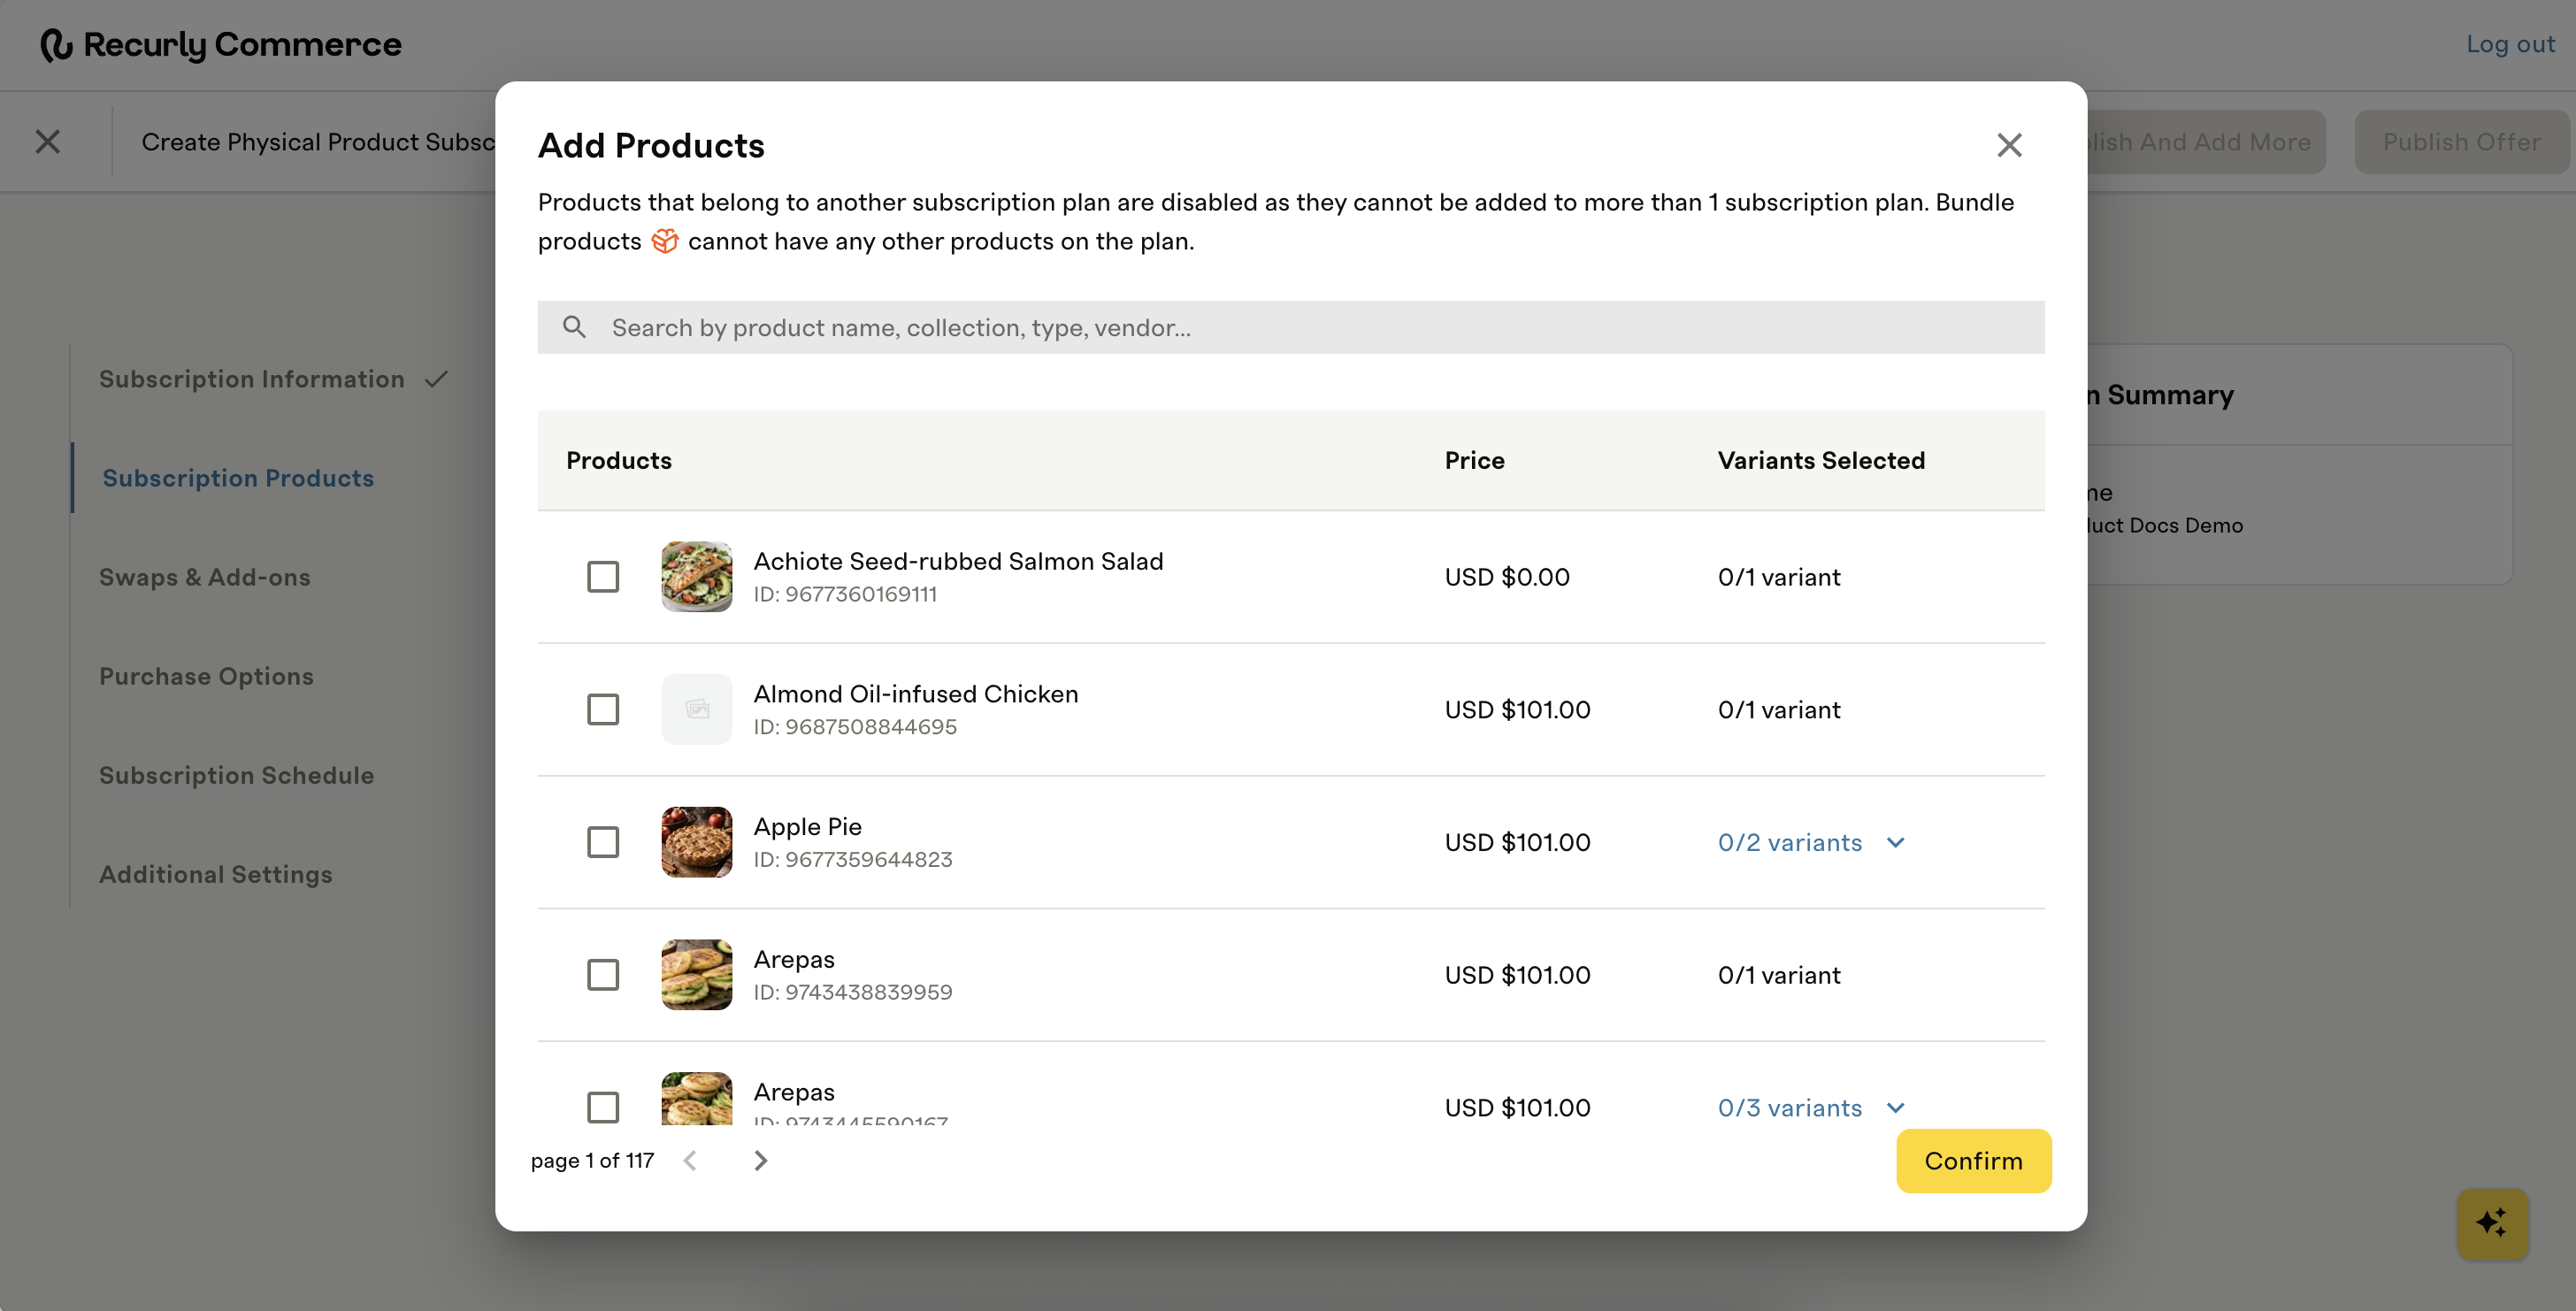
Each product you add appears as a row in a table showing its price (or price range, for products with multiple variants) and how many variants are selected. If a product has multiple variants, select the variant count — for example, "4/5 variants" — to expand the row and choose which specific variants to include or exclude. Repeat to add as many products as your plan needs, then select Next to continue.
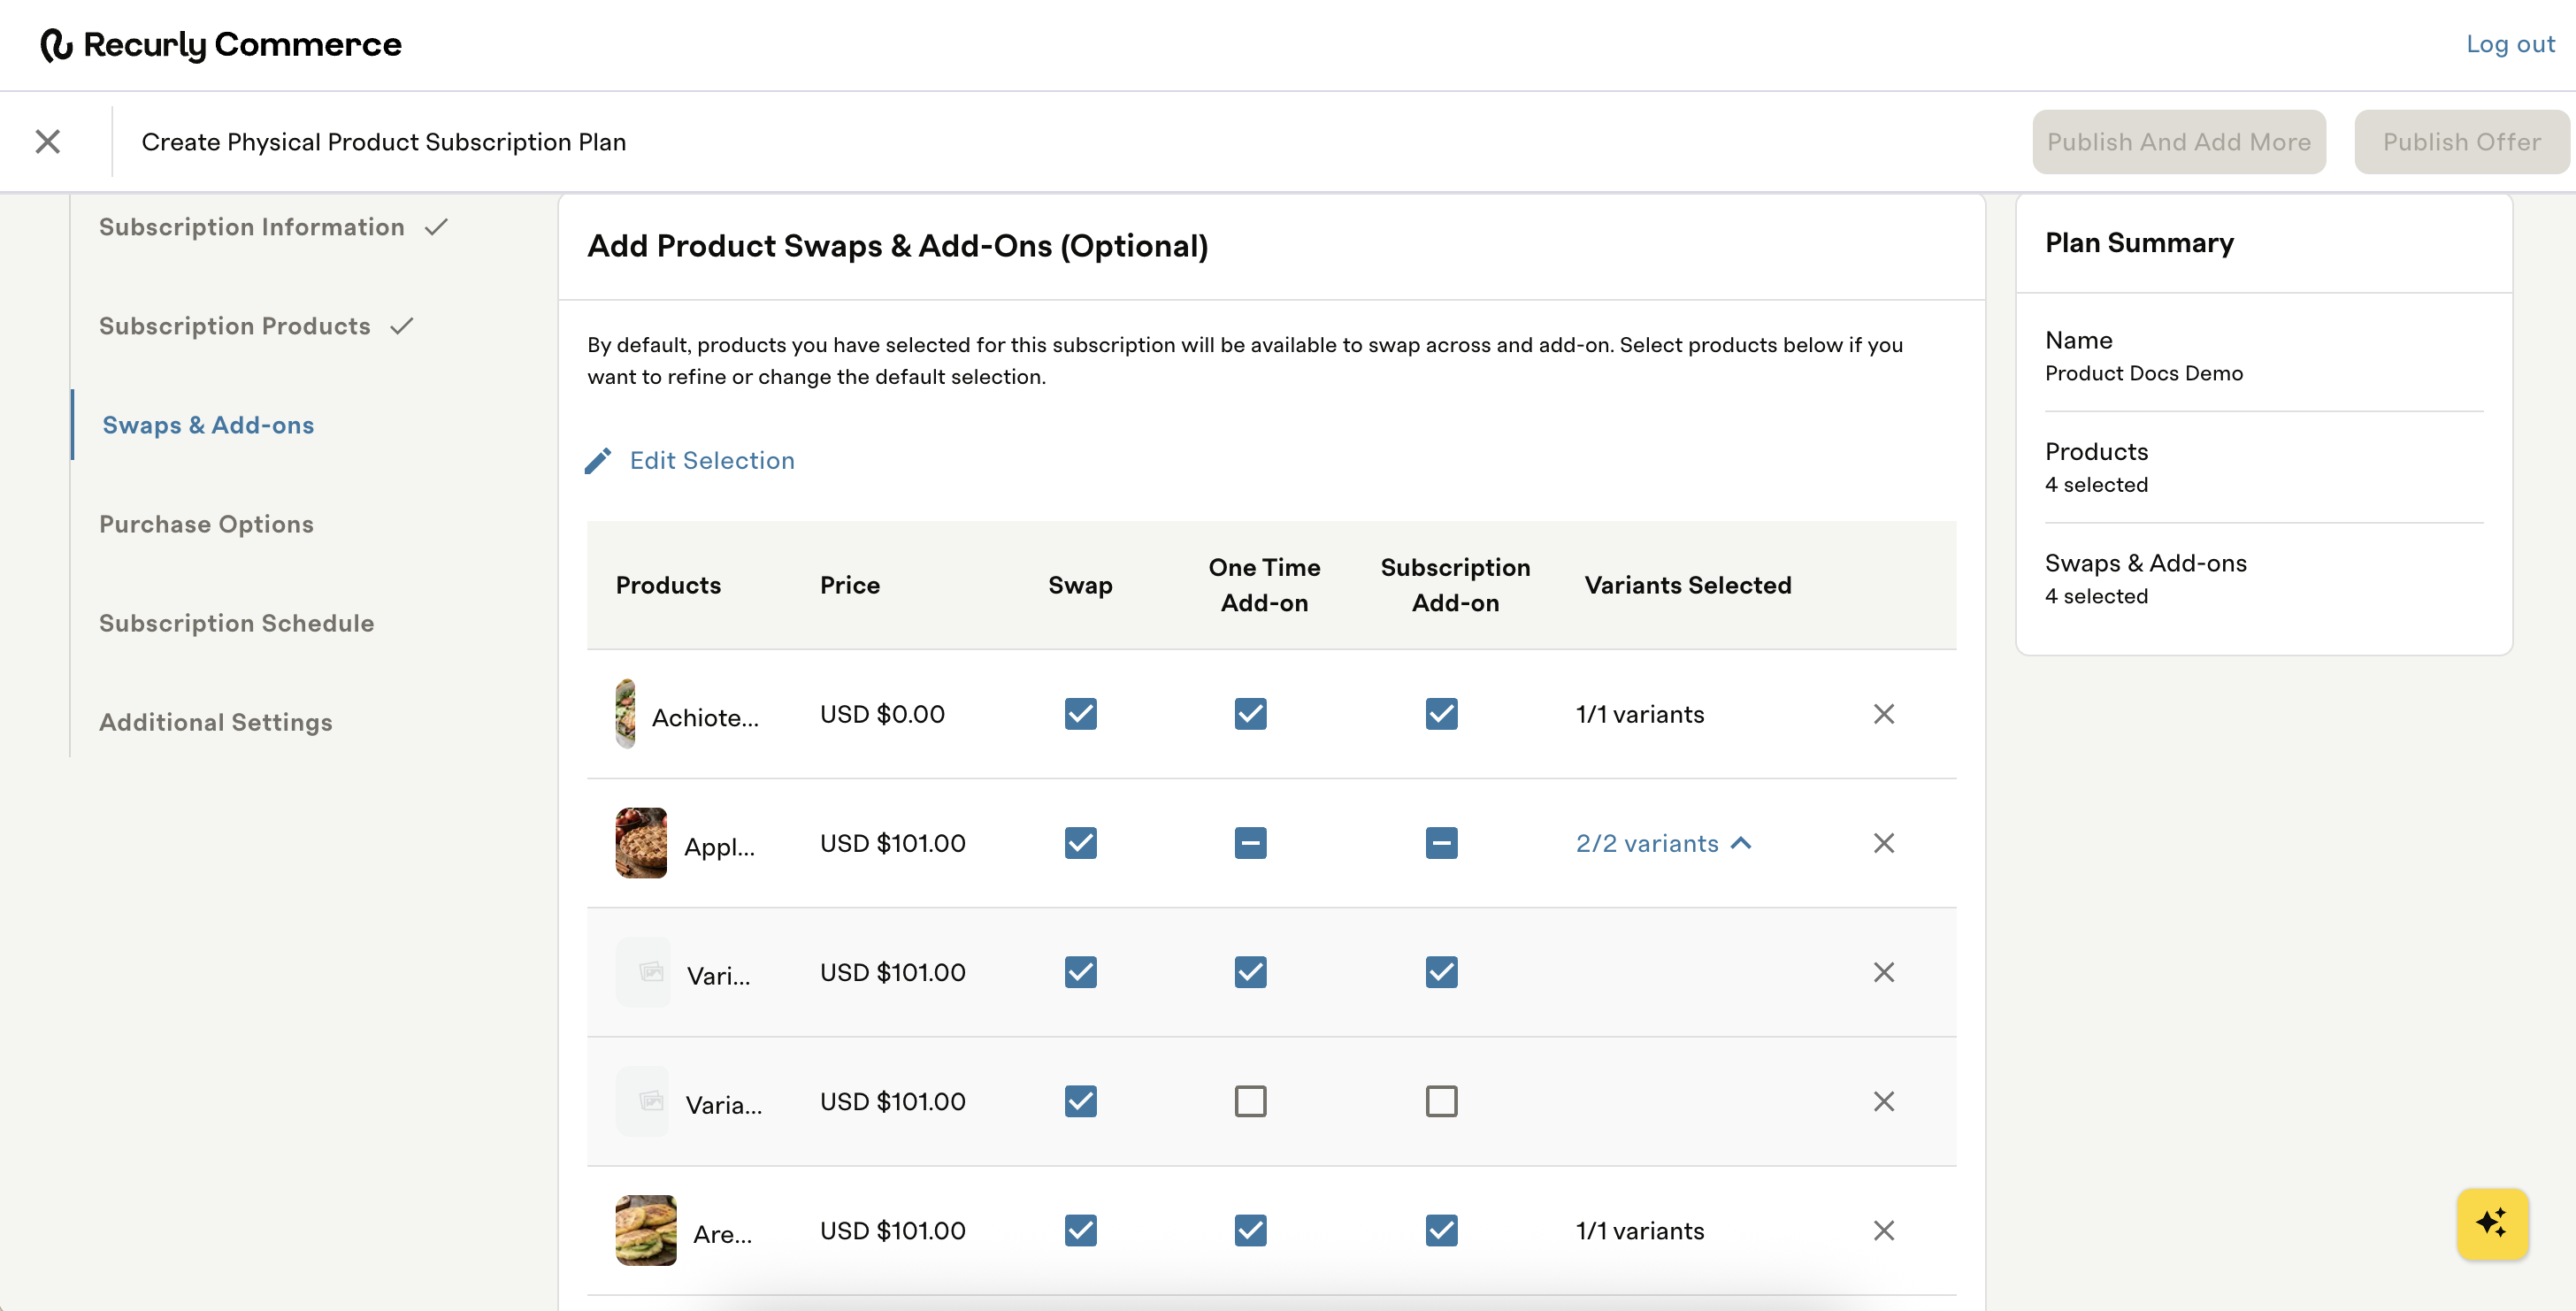
- Swap — allow subscribers to swap this SKU for any other plan product at renewal.
- One-time Add-on — let subscribers select this (or another store) SKU as an optional extra on a single delivery.
- Subscription Add-On — let subscribers add this SKU to their subscription so it ships with every renewal until they choose to remove it, for staples your subscribers always need.
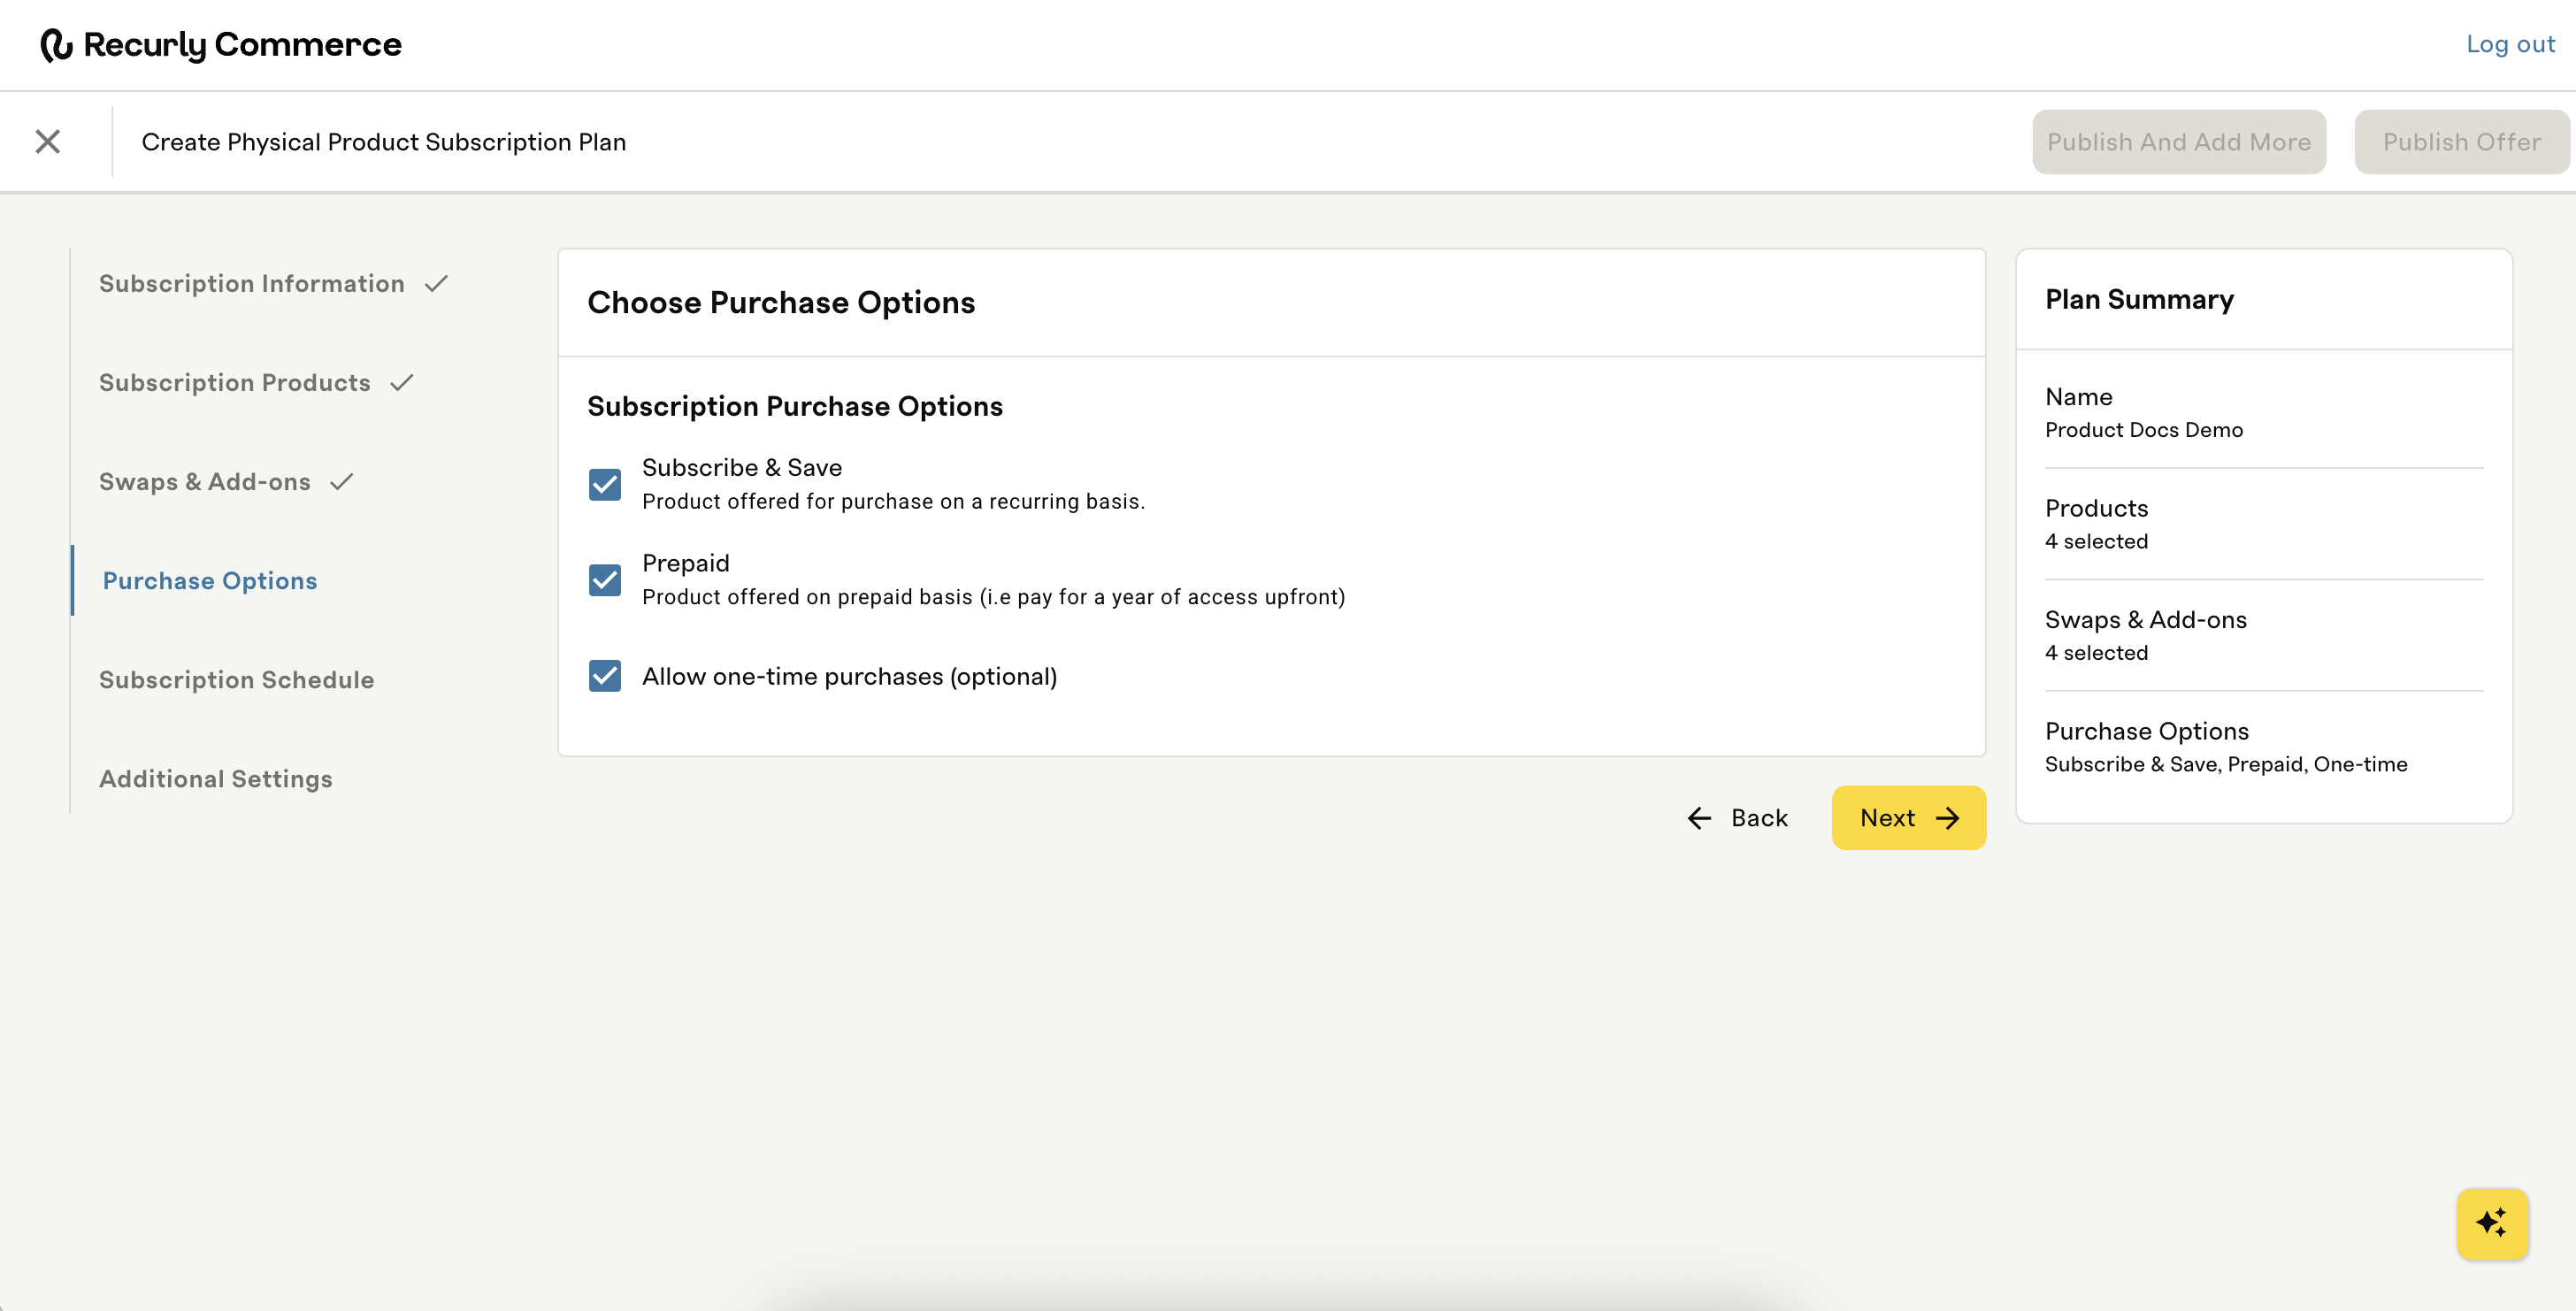
- Subscribe & Save — product is offered for purchase on a recurring basis.
- Prepaid — product is offered on a prepaid basis, for example, pay for a year of access upfront.
- Allow one-time purchases (optional) — lets customers buy the product a single time, without committing to a subscription, alongside whichever recurring options you've enabled above.
You can select Subscribe & Save, Prepaid, or both — the discounts and delivery schedules for each are configured independently in the next step.
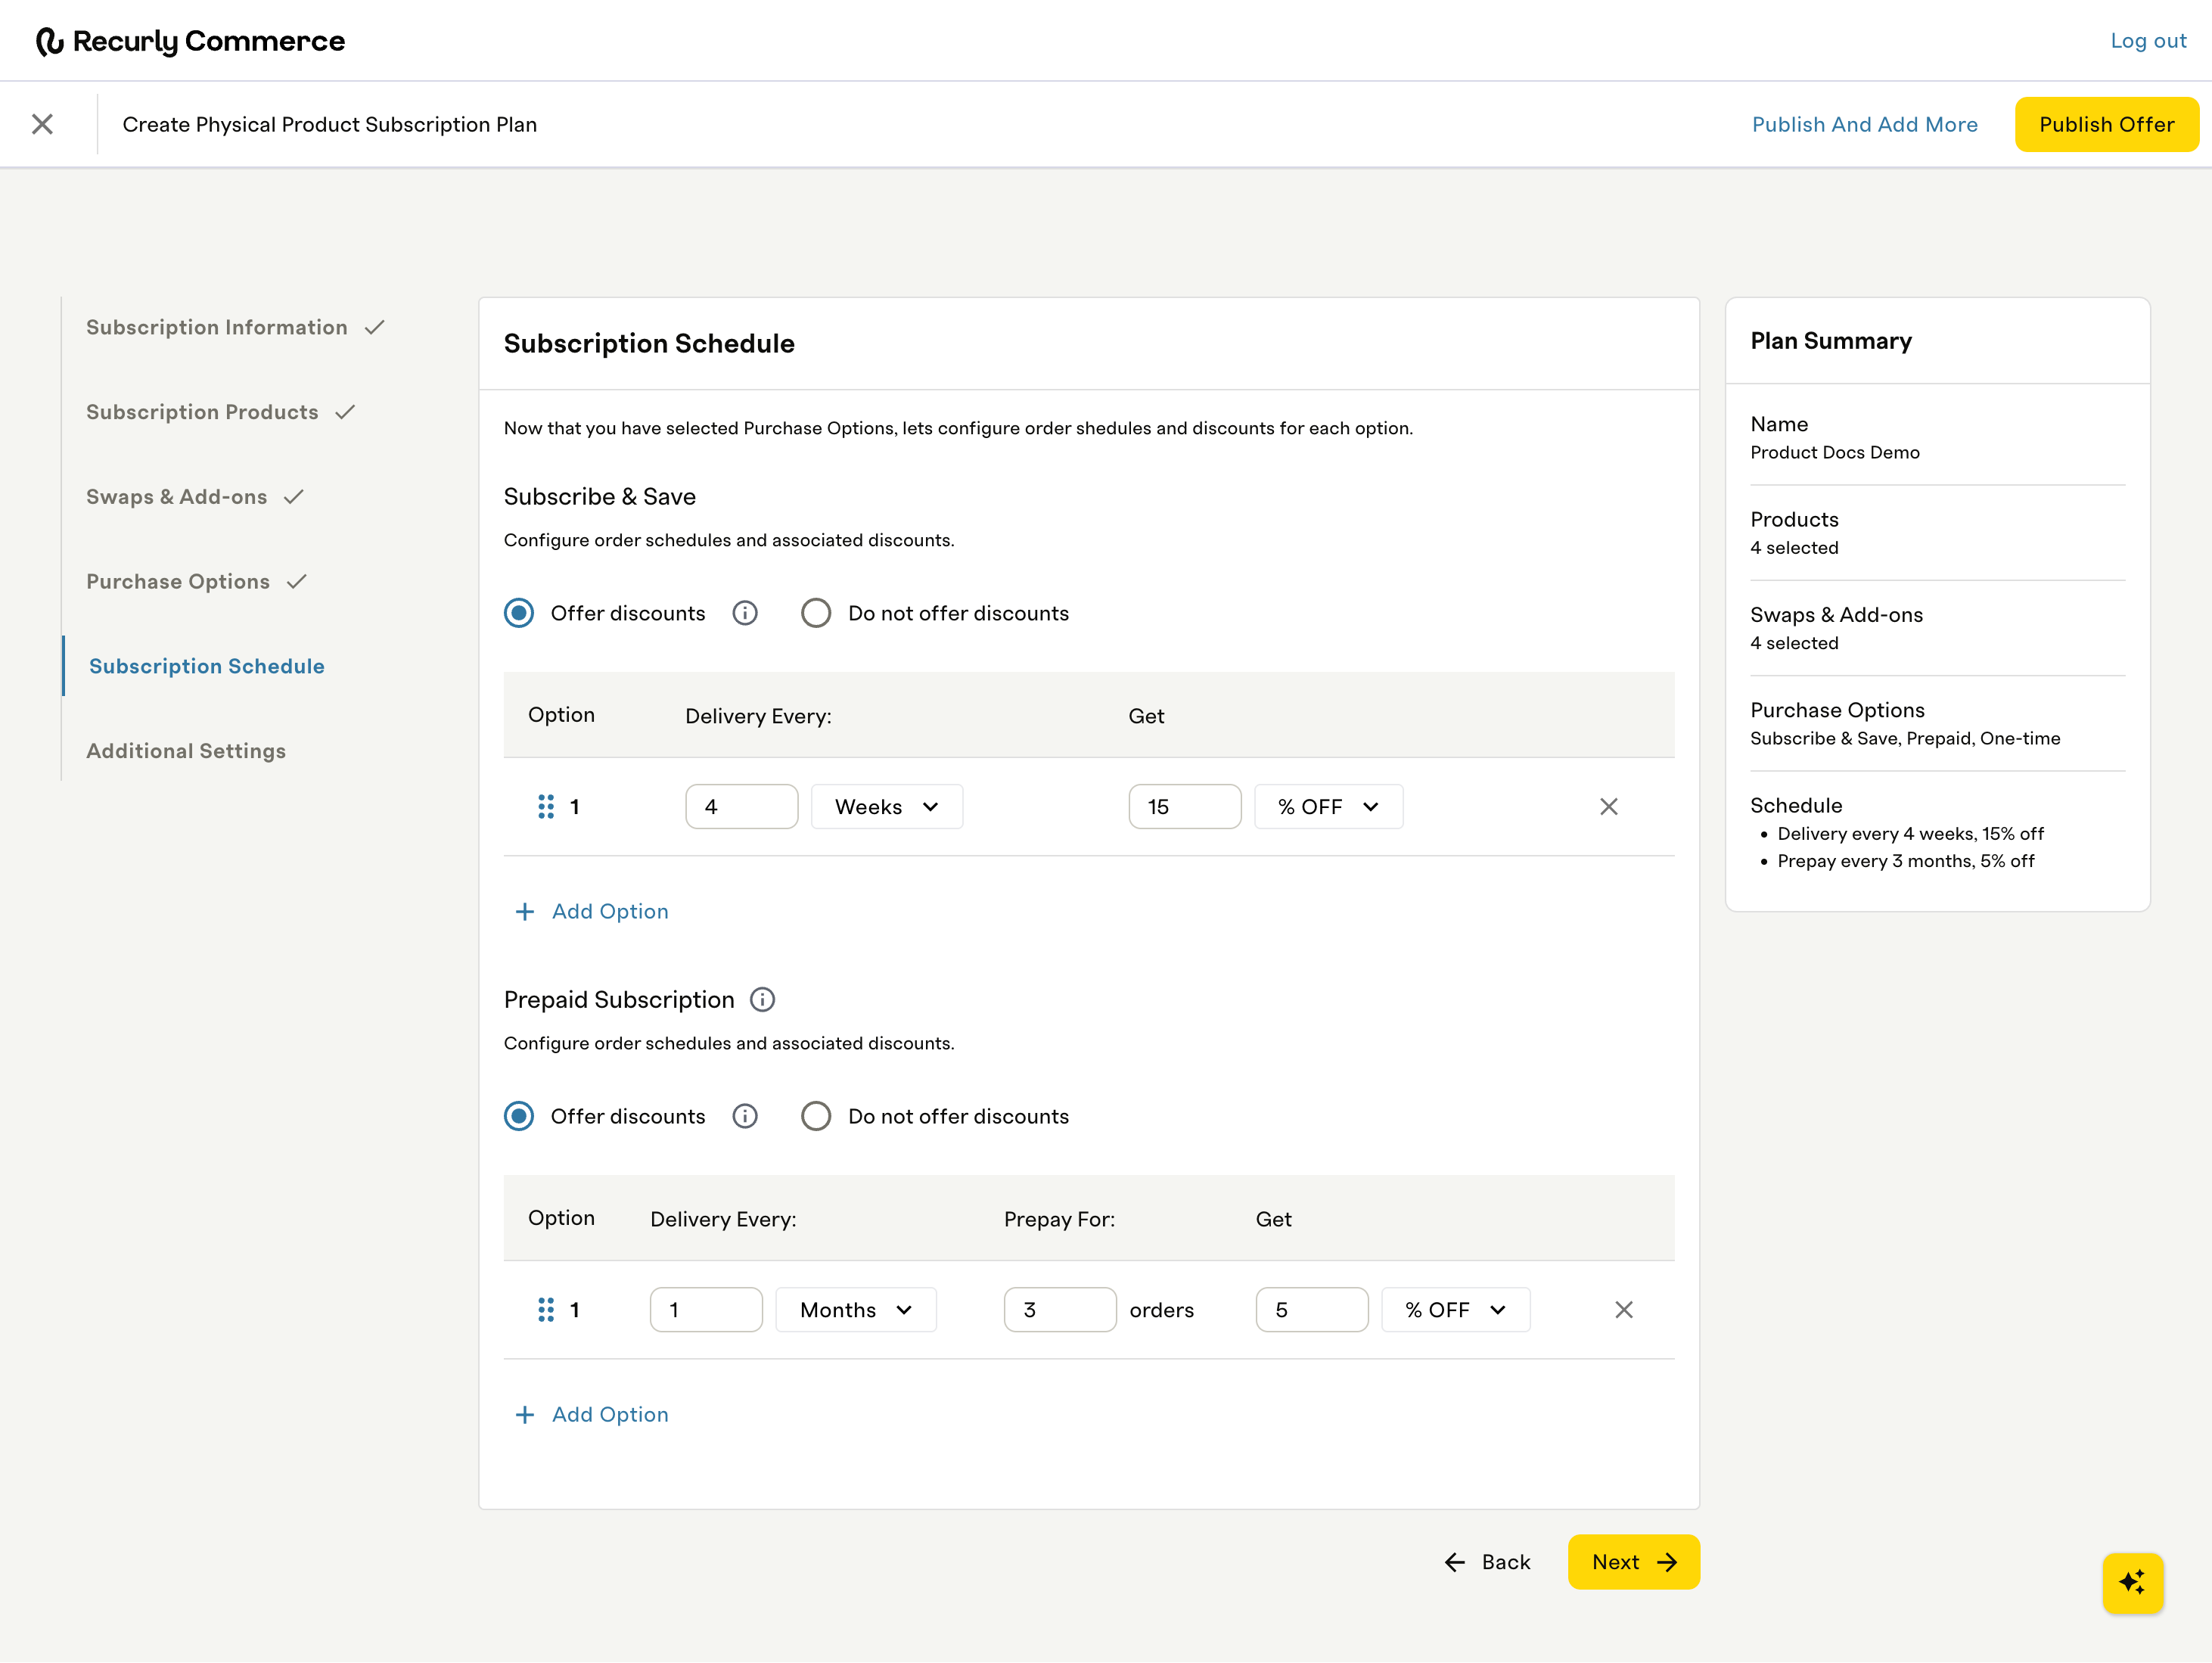
Subscribe & Save
- Choose Offer discounts or Do not offer discounts.
- If offering discounts, select + Add Option to define each delivery frequency.
- For each option, set Billed every (Digital) or Delivery Every (Physical) — the delivery interval, for example 1 month or 2 months — and Get, the discount amount, for example 30% off.
- Add as many frequency options as you'd like; each appears as its own row.
Prepaid Subscription
- Choose Offer discounts or Do not offer discounts.
- If offering discounts, select + Add Option to define each prepay term.
- For each option, set Order every (Digital) or Delivery Every (Physical) — the delivery interval within the prepaid term — Prepay for — the number of orders the customer is paying for upfront — and Get, the discount amount.
- Add as many prepay terms as you'd like; each appears as its own row.
Gifting option
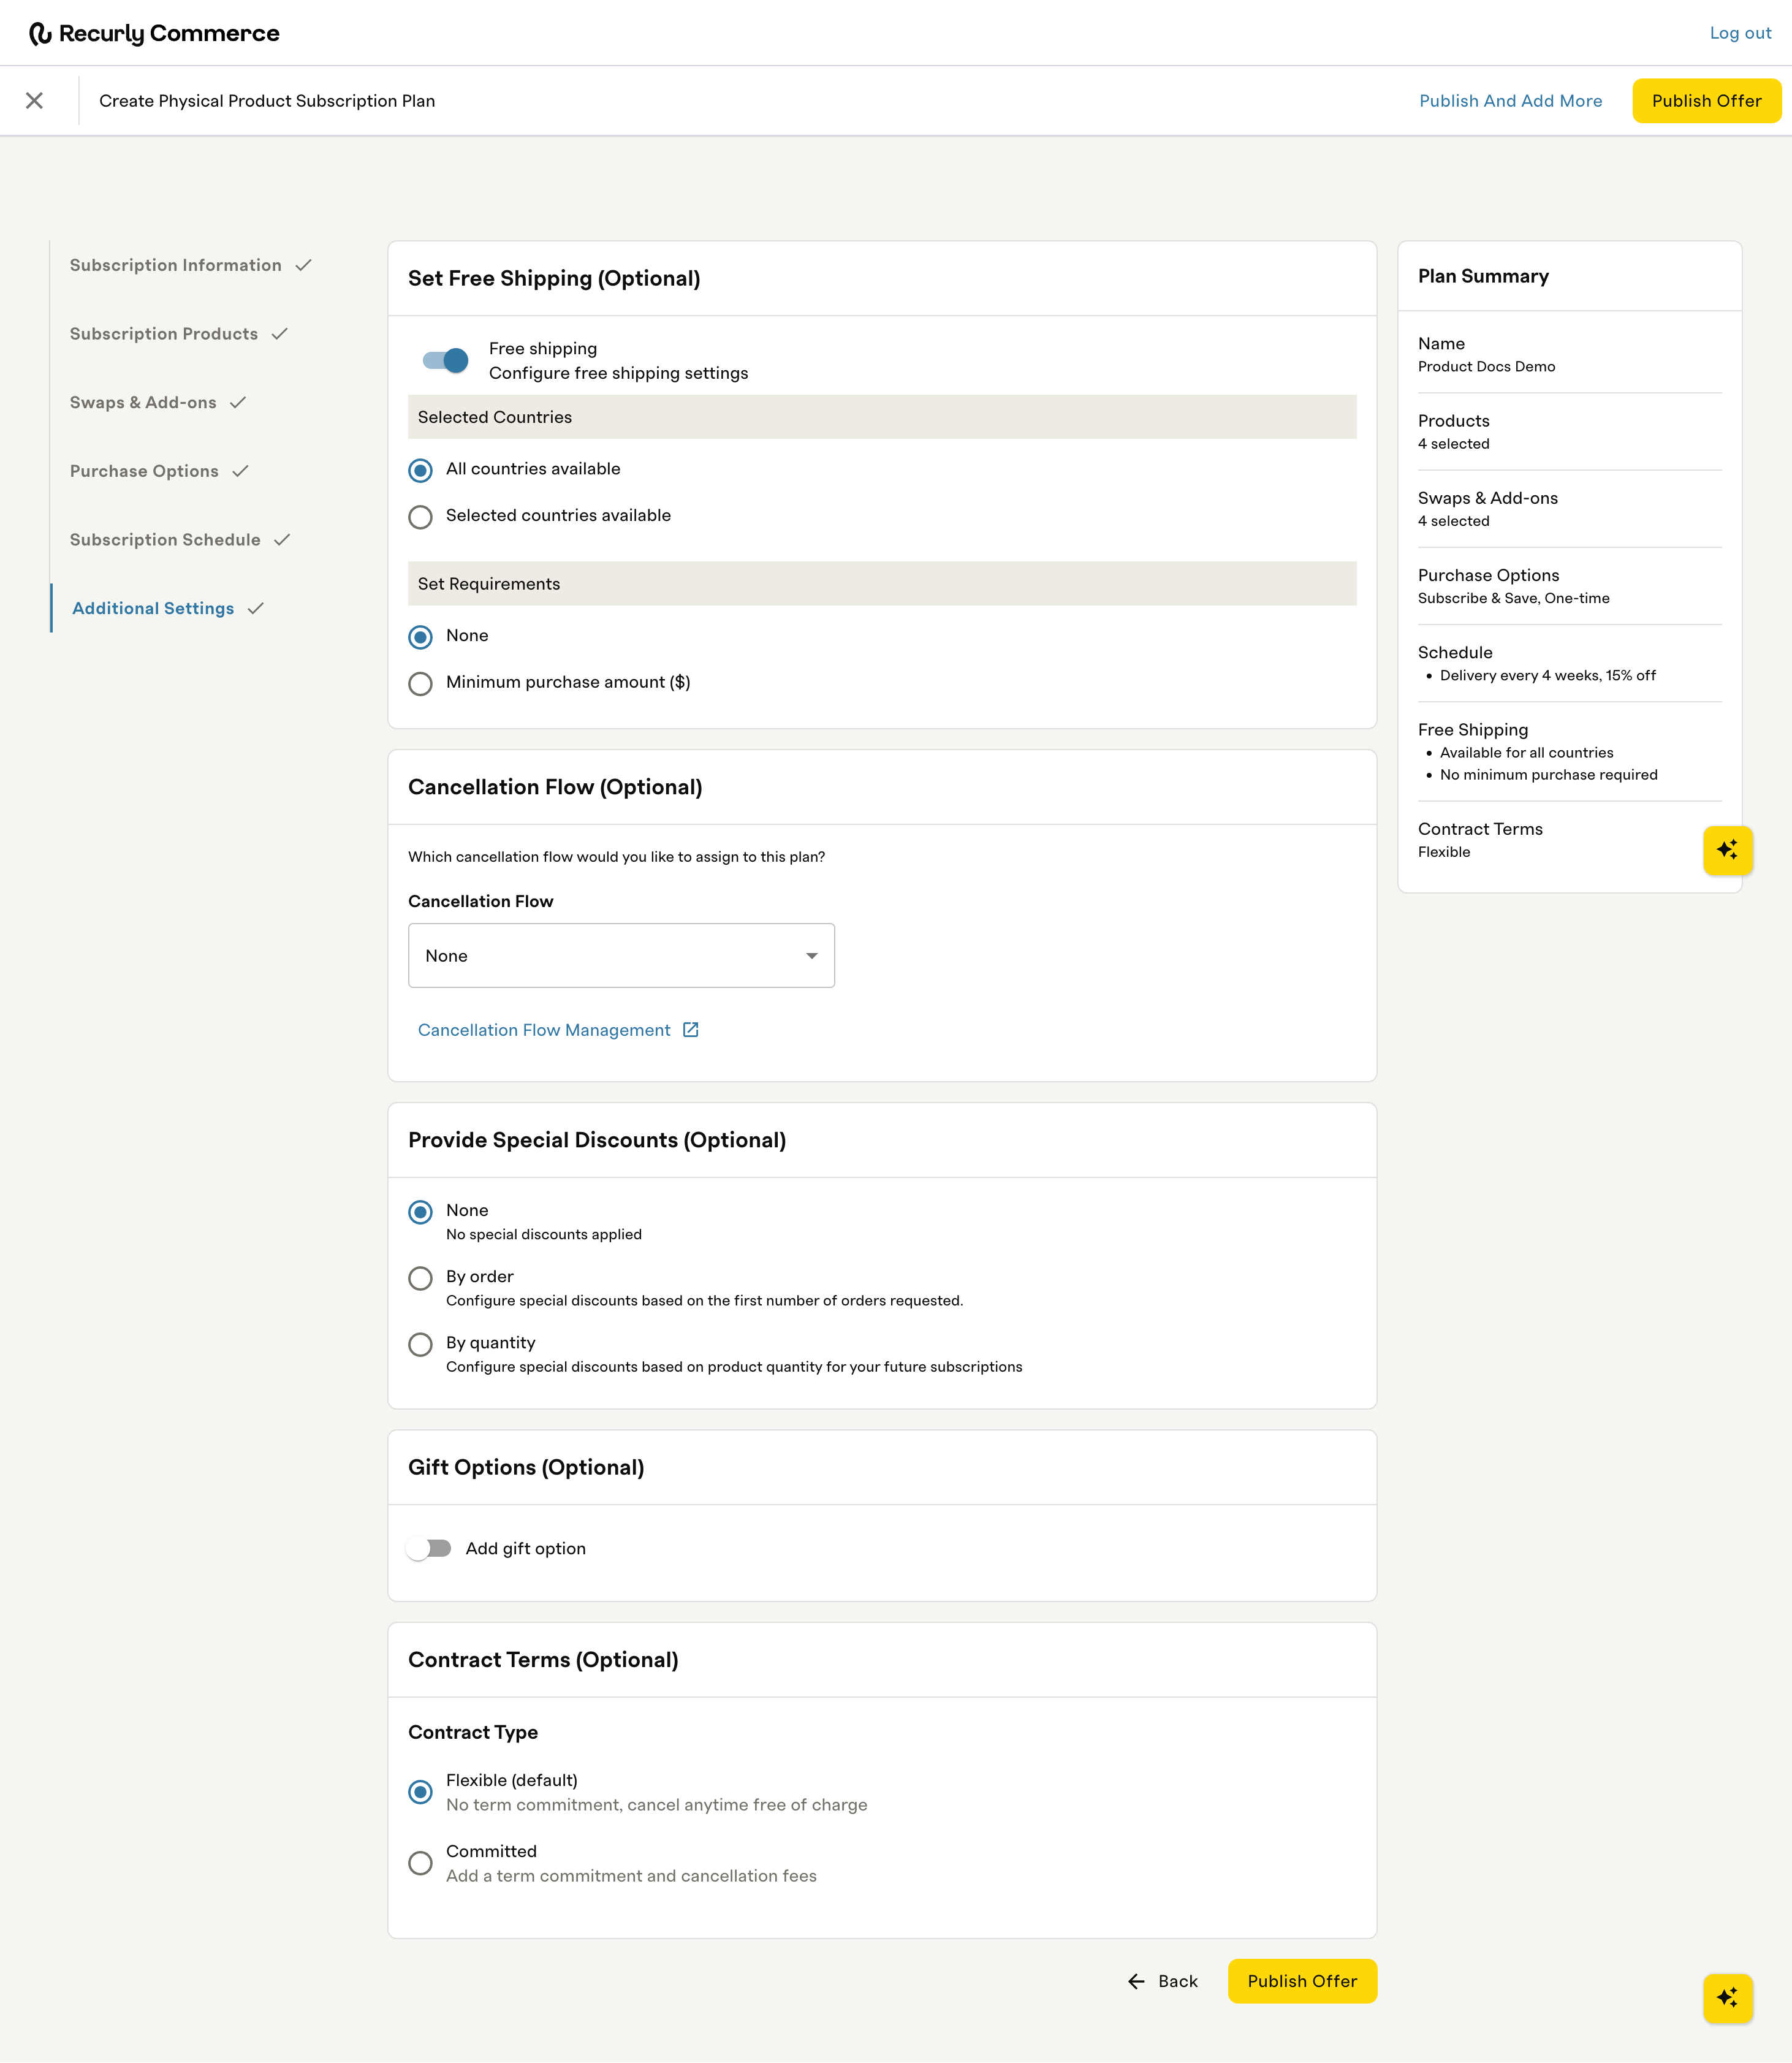
Toggle Add gift option on to include an "Is this a gift?" prompt below the subscription choices. This adds a radio button customers can select to flag their order as a gift.
Free trial (only available for digital subscriptions)
Configure a free trial period subscribers receive before their first paid renewal.
Special discounts
In addition to the recurring frequency discounts configured in the previous step, you can grant one-time promotions based on order count or quantity:
- By Order — apply a special discount to the first N deliveries.
- By Quantity — discount based on the total quantity of products, for example 10% off when ordering 2 products or 15% off when ordering 3 products, to encourage larger carts. Select + Add Discount Tier to add additional discount tiers by quantity.
Free shipping
Toggle Free shipping to define the countries where free shipping applies. Select All countries available or Selected countries available.
Contract Type
The Contract Type determines if the subscription plan requires a term commitment and allows for charging a cancellation fee.
- Flexible (default) — no term commitment; the customer can cancel anytime free of charge.
- Committed — add a term commitment and cancellation fees.
To set a term commitment, define the Term Commitment Length — the total number of deliveries your customer agrees to as part of the plan (minimum 1 delivery).
To enable an early cancellation fee, select the corresponding checkbox, choose the Fee Product you've configured in Shopify, and choose whether to Prorate the cancellation fee. If prorated, the fee is based on the remaining term.
Creating the fee product in Shopify
- Go to Products > Add Product.
- Set a clear Title, for example "Cancellation Fee."
- Under Price, ensure the product is not taxable.
- Under Inventory, either disable tracking or ensure adequate stock.
- Under Publishing, set the "Online Store" sales channel to Unpublished.
- Set the product Status to Active.
Cancellation flow
Set up your desired Cancellation Flow to prevent cancellations with timely incentives, gather customer feedback with surveys, and personalize the subscriber experience with relevant messaging and upsells. Select None in the Cancellation Flow dropdown to select from your list of Cancellation Flows.
Cancellation and churn prevention flows overview
Updated 15 days ago