Forms
How to add input fields or survey options to your prompts and handle submitted values in actions.
Overview
Enhance your prompts with up to three input fields or five survey options to collect data from users directly within the in-app message.
Required plan
This feature or setting is available to all customers on any Recurly Engage subscription plan.
Prerequisites & limitations
- You must have Company, App Administrator or App member permissions in Recurly Engage.
- Maximum of three input fields per prompt, or up to five survey choices.
Definition
Forms in Recurly Engage prompts allow you to gather user input—text entries or survey selections—raising engagement and capturing valuable feedback.
Key benefits
- Direct feedback: Collect emails, names, or other details without redirecting users.
- Quick surveys: Gather opinions or preferences in-context.
- Actionable data: Pass form responses into API, connector, or website actions for immediate processing.
Key details
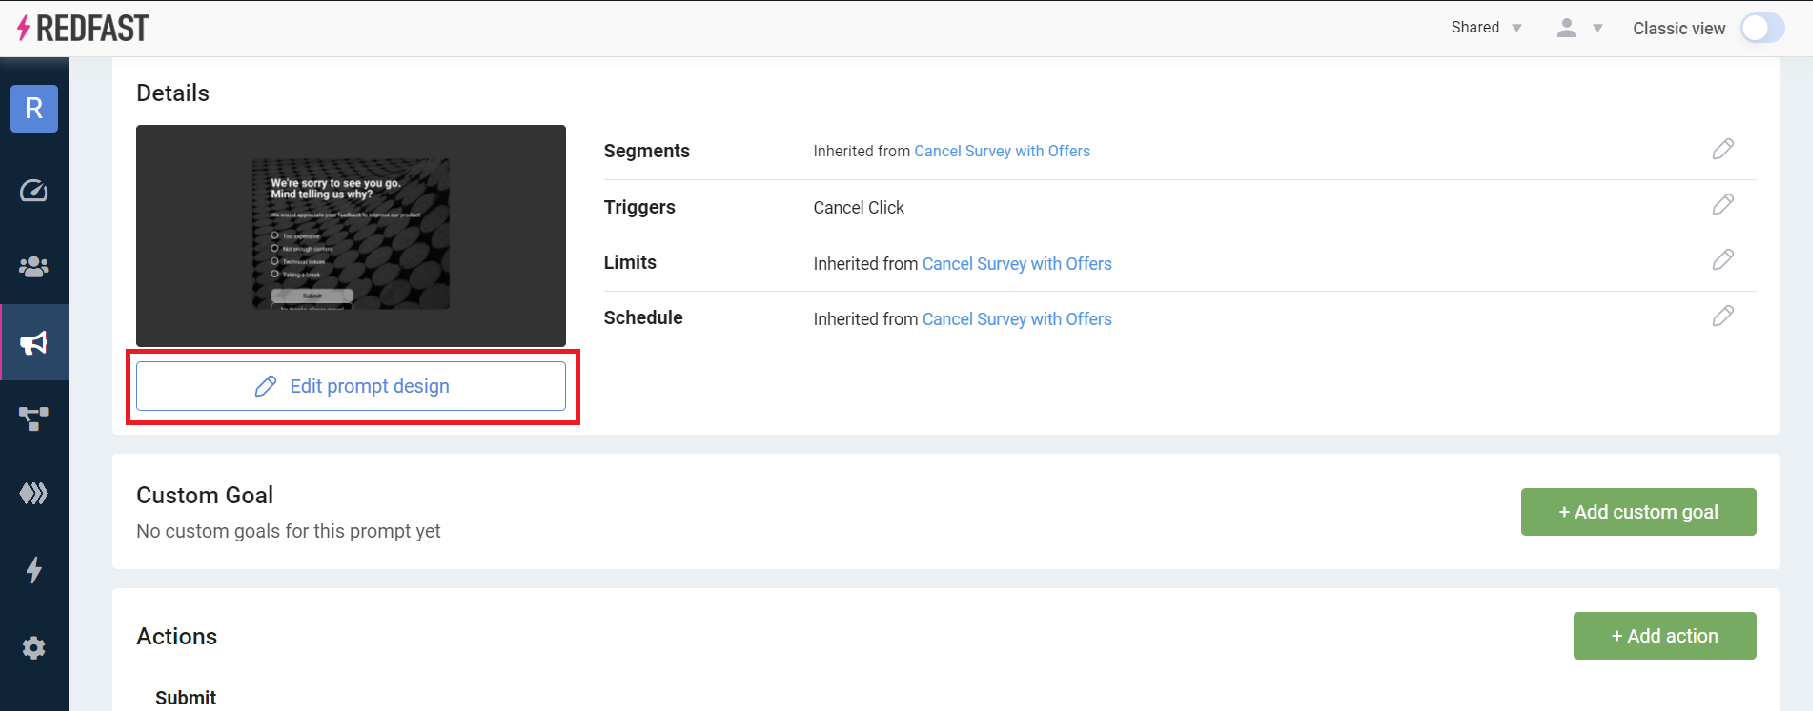
Adding form fields to a prompt
- Open Prompts and select the prompt you wish to enhance.
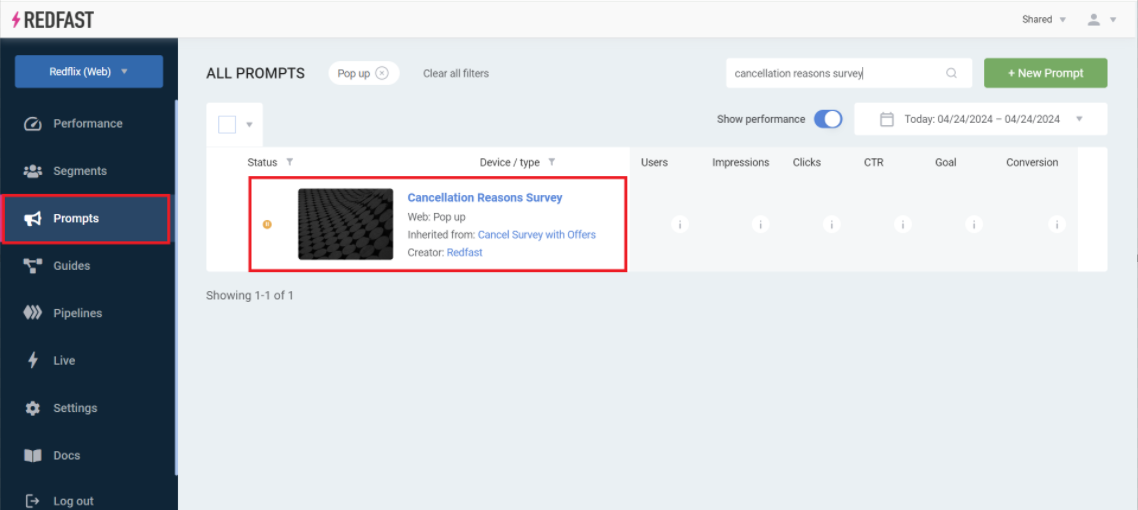
- Click Edit prompt design to launch the editor.
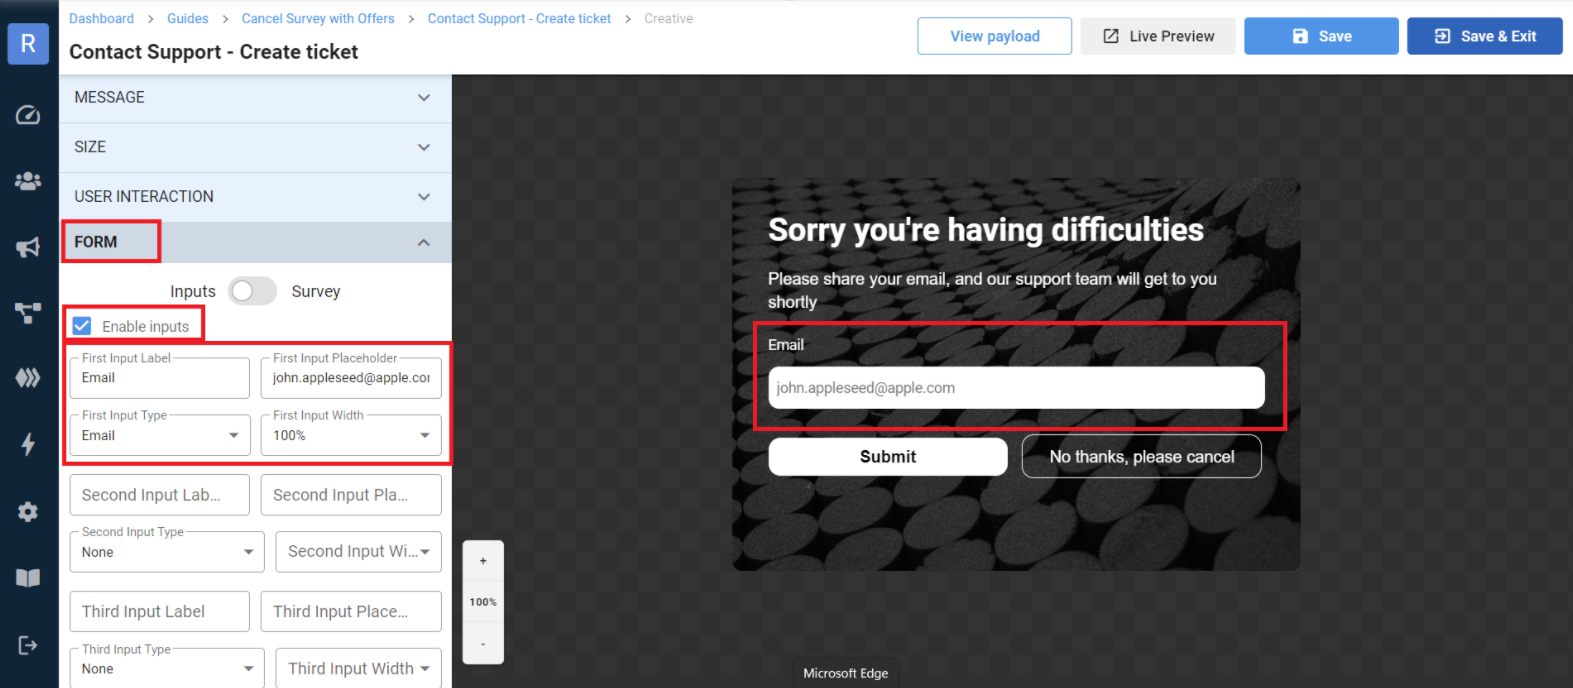
Adding input fields
- In the Forms panel, enable Inputs.
- Configure each input field (label, placeholder, validation). Preview updates live.
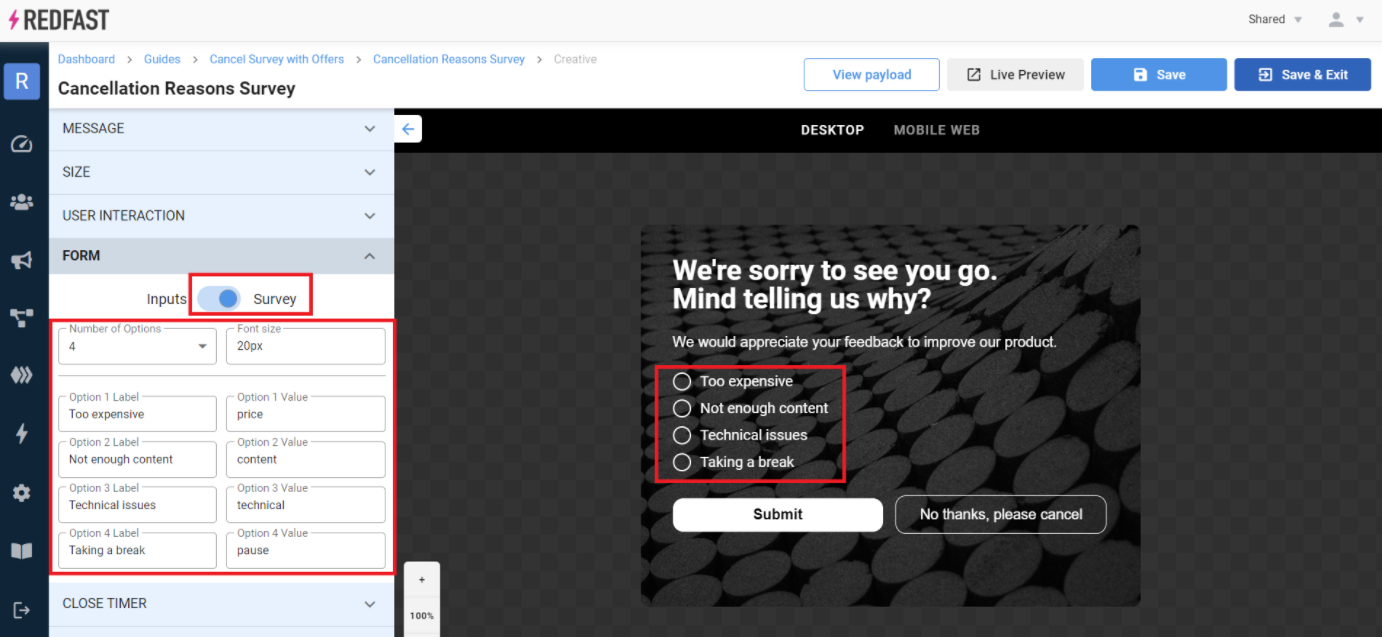
Adding a survey
- In the Forms panel, enable Survey.
- Define up to five survey options with labels and values. Preview updates live.
Handling form submissions
Form inputs and survey selections can trigger downstream actions:
- Connector Actions: Send data to services like SendGrid, Braze, Freshdesk, or Iterable.
- API Actions: Call your custom APIs with the form data.
- Website Actions: Execute custom JavaScript; submitted values are available in the
argsobject. For example:
// args example when user submits an email field
{
  promoInput1Value: "[email protected]"
}
Example use case: Capture an email via an input field, then use a SendGrid connector action to send a templated email to that address. SendGrid connector details
When you’re done configuring fields, click Save & Exit to apply your changes and deploy the updated prompt.
Updated 10 days ago