
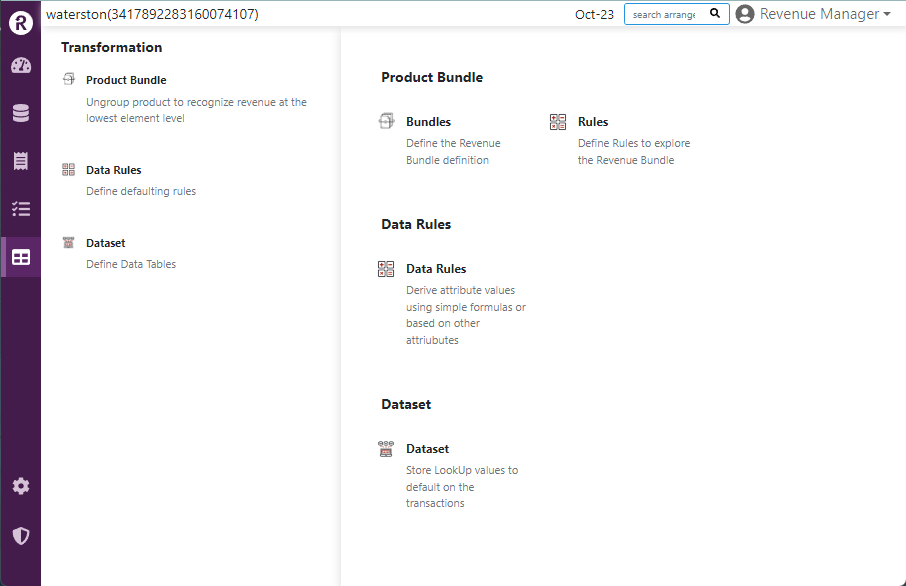
Data transformation
Recurly Revenue Recognition Advanced: Transforming data for accurate financial reporting.
Overview
This feature is part of our product, Recurly Revenue Recognition Advanced. [Learn more here].
Prerequisites
- Familiarity with the organization's revenue recognition standards.
- Understanding of product bundling and data rule configurations.
- Knowledge of the desired attributes for dataset creation.
Limitations
- Once a dataset is created, it cannot be deleted, only inactivated.
- Data Rules in Recurly Revenue Recognition Advanced cannot be deleted but can be set to an inactive status.
Definition
Data transformation encompasses various functionalities in Recurly Revenue Recognition Advanced. It includes configuring product bundles where multiple products are grouped together and sold as a single unit. Data Rules allow the definition of transaction-specific criteria based on formulas or attributes. Datasets are created for comprehensive data analysis, with fields from different attributes. Once created, datasets refresh daily and can only be inactivated. These features enable businesses to transform data, manage product bundling, apply customized rules, and analyze data effectively for accurate revenue recognition.
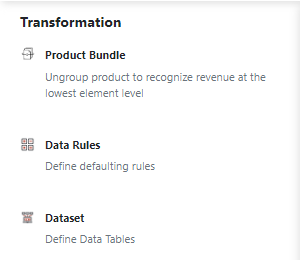
Product bundle
Product Bundle allows grouping multiple individual products into a single unit for simplified sales. In Recurly Revenue Recognition Advanced, you can configure product bundles based on the Parent Identifier. When the sales order (SO) file is uploaded with the parent identifier, Recurly Revenue Recognition Advanced automatically separates it into child lines. The child lines inherit the Sell Price, List Price, and Cost Price based on the formulas specified in the Product Bundle configuration for each child line. This feature streamlines the management of bundled products and ensures accurate pricing and cost allocation.
How to configure product bundles
- Navigate to the Transformation section and select Product Bundle.
- Click on the New icon to create a new Product Bundle configuration.
- Provide a unique name for the Product Bundle.
- Select the Parent Identifier attribute from the attribute list. This will determine how the system segregates the Product Bundle into child lines.
- Toggle the Revenue Recognition, Cost, and Commission Attribution options to activate if the Product Bundle is eligible for these features.
- Set the status of the Product Bundle to active or inactive by toggling the active option.
- Specify the effective start and end dates for the Product Bundle.
- Click on the Save icon to save the configuration.
- To edit a Product Bundle configuration, make the desired changes and click on the Save icon.
- To delete a configuration, click on the Delete icon.
These steps allow you to efficiently manage and customize your Product Bundles in Recurly Revenue Recognition Advanced.
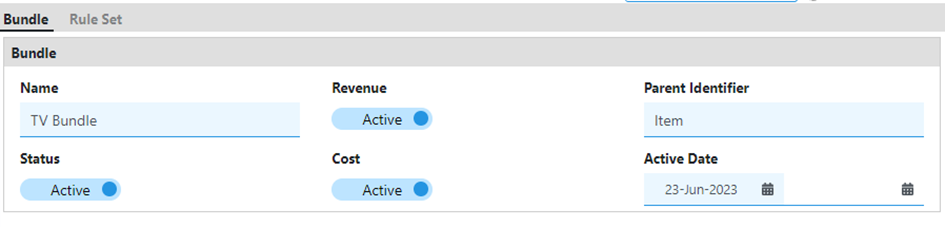
Please find below a screenshot illustrating the configuration of a TV Bundle in the Recurly Revenue Recognition Advanced system based on the Parent Identifier. This TV Bundle is eligible for Revenue, Cost, and Commission Attribution.
-
Go to the Rule Set page by clicking on "Rule Set" at the top.
-
To add new lines, click on the "New" icon. This will allow you to define child lines under the Rule Set.
-
In the Rules section, under the Parent Identifier column, enter the Parent value corresponding to the selected attribute in the Product Bundle main screen.
-
For each child line, enter the Sales Price Formula, List Price Formula, and Cost Formula based on a percentage. The system will calculate the child line sales price, list price, and cost using the total values mentioned in the SO file for the Parent line.
-
If each child line has a different quantity regardless of the quantity mentioned in the SO file, specify the quantity in the Rule under the Quantity column for each child line.
-
Click on the "Save" icon to save the configuration.
-
If any lines in the Rules need to be edited, make the necessary changes and click on "Save."
-
To delete a line in the Product Bundle Rules, select the line and click on the "Delete" icon.
Example:
In Recurly Revenue Recognition Advanced, let's consider the example of configuring a TV Bundle under the Rule Set of Product Bundle. To set it up, we add 5 child lines in the Rules section, specifying the Parent Identifier as "TV Bundle." For each child line, we define the Sales Price formula, List Price formula, and Cost Formula. We can also set the desired Quantity values for each child line, independent of the Quantity mentioned in the SO File. Once the configuration is finalized, we save it to apply the specified calculations and rules to the TV Bundle in Recurly Revenue Recognition Advanced.

Once the above setup is configured in Recurly Revenue Recognition Advanced, when an SO file is uploaded to the system and contains the correct Parent Identifier, the system automatically splits the transaction into child lines based on the configured rules and criteria. This segmentation allows for accurate revenue recognition, cost allocation, and commission attribution at the individual product or bundle level. The system applies the specified formulas and quantities to calculate the sales price, list price, and cost for each child line, ensuring precise tracking and management of revenue and costs associated with the bundled products.
Data rules
Recurly Revenue Recognition Advanced allows for the configuration of data rules to apply specific criteria and formulas to transactions during the upload of sales orders, ensuring accurate revenue recognition, contract management, and cost allocation.
How to configure data rules
-
Navigate to the Transformation section and select Data Rules.
-
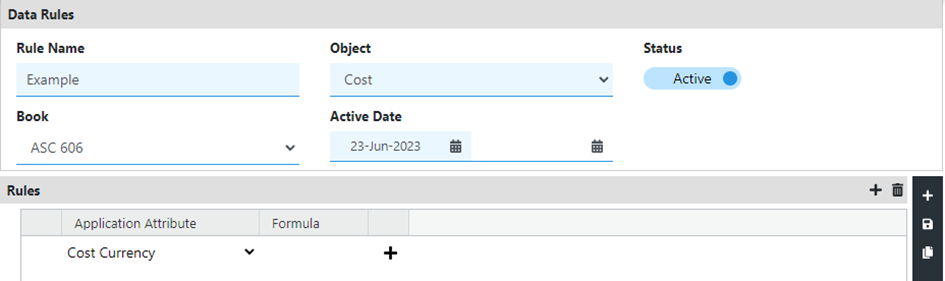
Enter a unique name for the data rule in the "Rule Name" field.
-
Select the desired object from the drop-down list (Contract, Order Line, Doc Line, or Cost) to determine at which level the rule should be applied.
-
Choose the appropriate book from the drop-down list for which the data rule configurations should apply.
-
Specify the active dates for the data rule by entering the start date and end date.
-
Click on the Save icon to save the data rule.
Notes:
- Once configured, Data Rules in Recurly Revenue Recognition Advanced cannot be deleted but can be set to an inactive status.
- To change the status of a Data Rule, click on the option under the Status column and switch it from Active to Inactive. Remember to save the changes by clicking on the Save icon.
- f you need to make edits to a Data Rule configuration, you can modify the necessary fields and save the changes using the Save icon.
- While deletion is not possible, you have the flexibility to update and adjust Data Rules to suit your business requirements as needed.
How to configure the Rules section under the data rules
-
In the Data Rule you want to edit, click on the Add icon to add a new rule under the Rules tab.
-
Select the Application attribute from the dropdown menu based on your object selection. For example, if you selected Contract or Order Line, choose from the Contract attribute list.
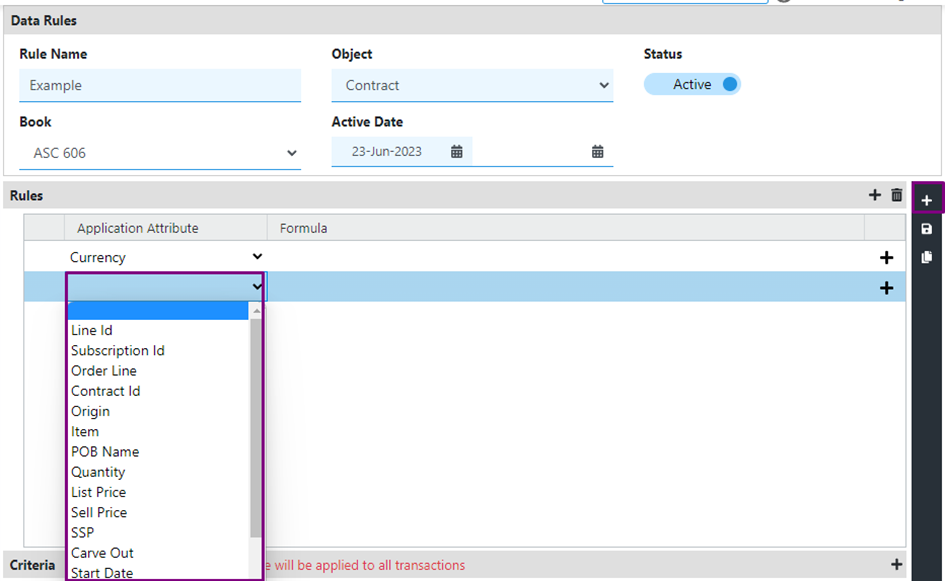
-
Specify a formula or value under the Formula column to calculate or display the value for the Application attribute.
-
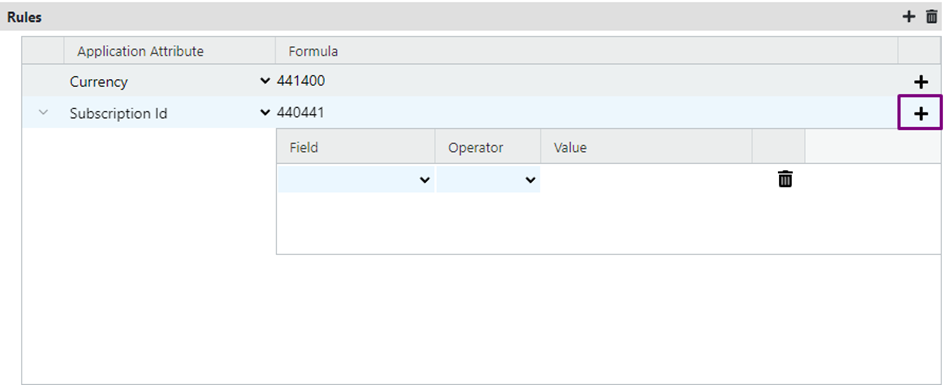
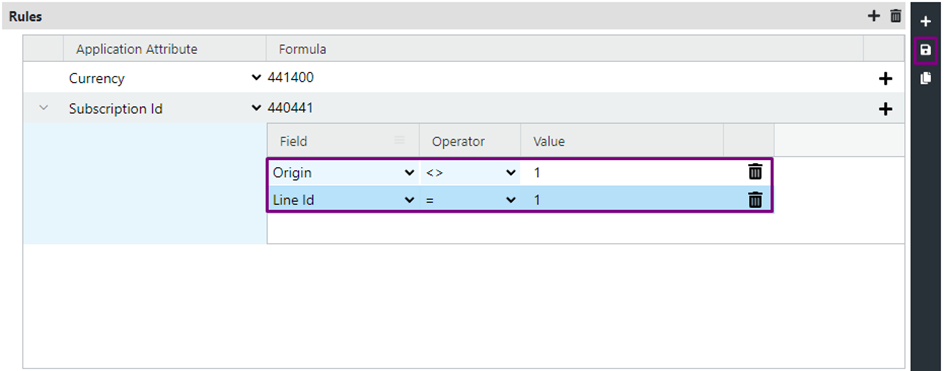
To add a Sub Criteria for any of your rules, click on the Add icon. Select the field, operator, and enter the desired value under the Sub Criteria section.
-
Click on the Save icon to save the configuration.
-
Multiple rules and sub-criteria can be added as needed.
-
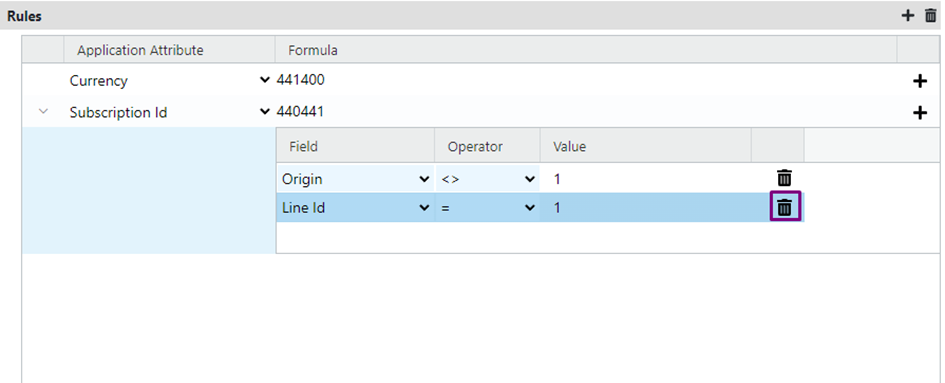
To delete a configuration, select the line and click on the Delete icon in the Rules tab. To delete only the Sub Criteria, select the specific line and click on the Delete icon next to it.
-
Make any necessary changes to the Rules or Sub Criteria, and then save the changes using the Save icon.
-
Remember to review and validate your Data Rules configurations to ensure they align with your business requirements.
How to configure the Criteria under the Data Rules
-
Click on the Add icon to add a new row in the Criteria section.

-
Select the field from the dropdown menu based on your object selection.
-
Choose the appropriate operator from the dropdown list under the Operator field.
-
Enter the value corresponding to the data mentioned under the Field column.
-
Multiple criteria can be added by repeating the above steps.

-
If any of the criteria need to be edited, make the necessary changes and click on the Save icon.
-
To delete a criteria, click on the Delete icon next to it.
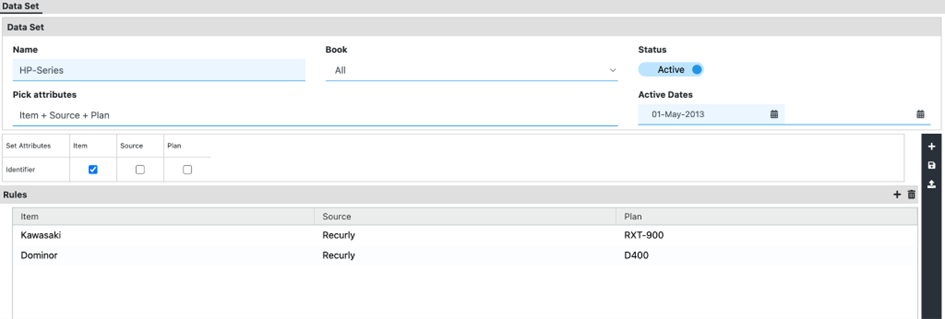
Datasets
Datasets are integral data tables crafted specifically for analysis within Recurly Revenue Recognition Advanced. They form the cornerstone of all data analysis processes. These datasets allow for the creation of detailed tables, encompassing a wide range of attributes, including item, liability account, revenue account, region, country, customer, and more.
A key feature of these datasets is their dynamic nature; once established, they are automatically updated on a daily basis. This ensures that the data remains current and relevant, providing users with the most recent information for their analytical needs.
It is essential to recognize that once a dataset is created, it cannot be entirely deleted. Instead, it can be inactivated if it is no longer required for ongoing analysis. This approach preserves the integrity of the data while offering flexibility in dataset management. The option to inactivate rather than delete ensures that historical data is maintained for reference, compliance, or auditing purposes, while preventing its use in future analyses.
How to create a dataset
-
Navigate to the Transformation section and select Dataset.
-
Enter a name for the dataset in the provided field.
-
Select the appropriate books for which you want to apply this dataset.
-
Choose the desired attributes from the available options and mark the primary attribute(s) for the dataset.
-
Click on Save to save the dataset configuration.
Once you have configured the datasets and uploaded the sales order file with the appropriate identifiers, Recurly Revenue Recognition Advanced will display the details in the Revenue Workbench according to the dataset configurations. This means that the data from the sales order file will be analyzed and processed based on the rules and attributes defined in the datasets, providing you with accurate and meaningful insights.

Furthermore, the datasets will be reflected in all reports generated in Recurly Revenue Recognition Advanced. This ensures that the data analysis and reporting are consistent across different functionalities and allows you to leverage the dataset configurations for comprehensive and consistent reporting throughout the system.
Updated 3 months ago